Picture this: I’m standing in a cramped kitchen, a bowl of over‑whipped butter on the counter, a handful of strawberries that look like tiny suns, and a frantic friend who just dared me to whip up a dessert that could outshine a bakery. The oven door was stuck, the timer was broken, and I had to improvise with what I had on hand. I grabbed a handful of chocolate chips, a splash of heavy cream, and a dash of cocoa, and I thought, “If I can make this work, I’ll have a new signature treat.” The result? A chocolate‑covered strawberry brownie that feels like a secret indulgence you’re allowed to keep to yourself.
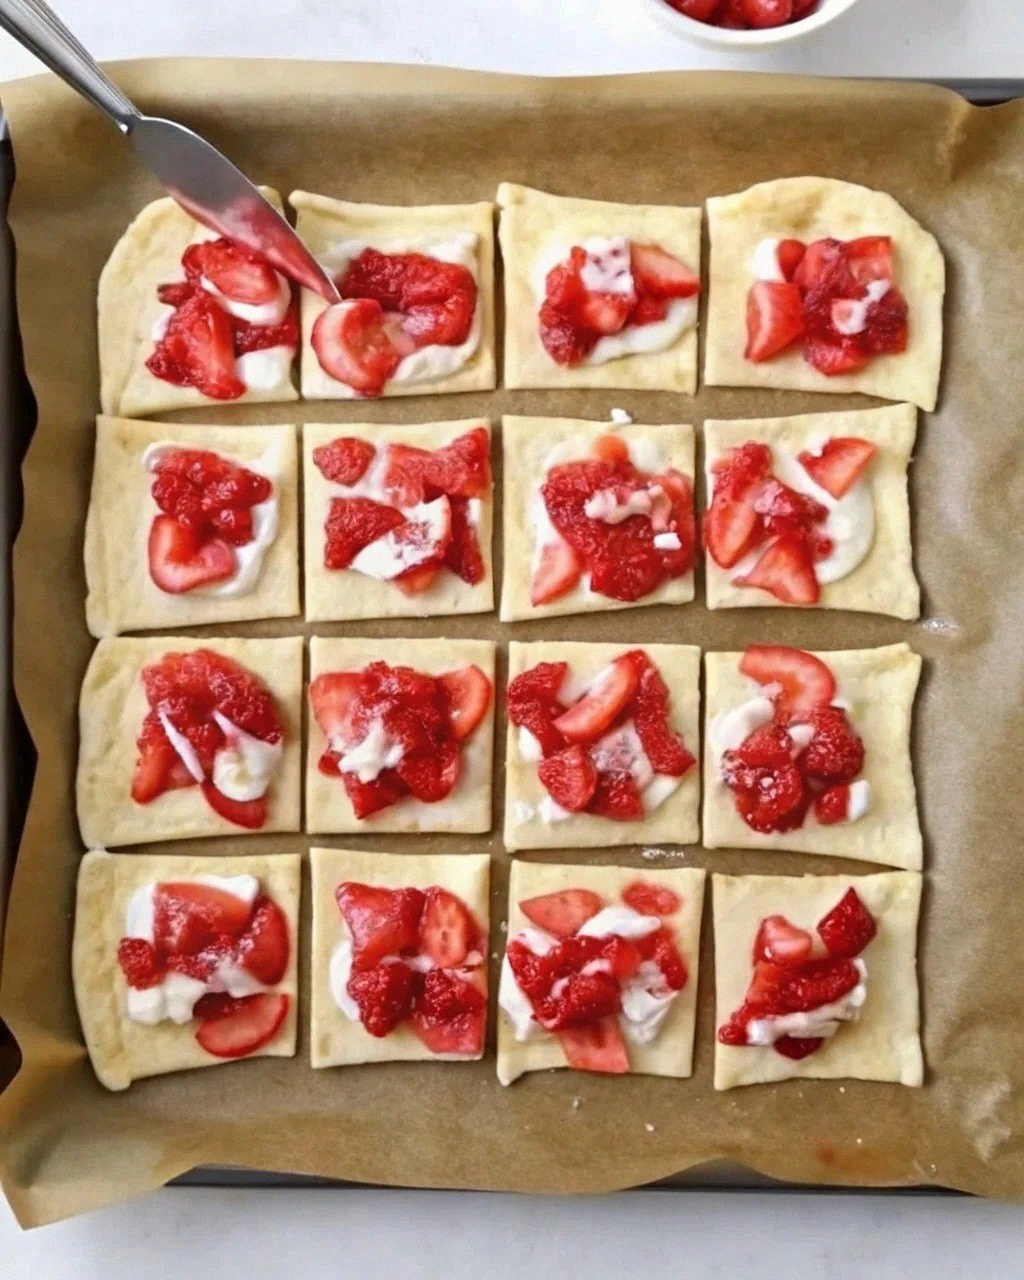
The moment the butter hit the heat, the kitchen filled with a buttery aroma that made my mouth water before I even tasted anything. The strawberries, bright and juicy, released a sweet perfume that mingled with the rich scent of melted chocolate. I could hear the faint hiss of the butter as it melted, a comforting soundtrack to my culinary experiment. The texture of the brownie batter was silky, almost like a thick sauce, while the strawberries added a pop of juiciness that cut through the sweetness. As I spooned the mixture into the pan, the sound of the spoon clinking against the parchment felt like a drumbeat for an impending feast. The anticipation was palpable, and I could almost taste the final product even before it baked.
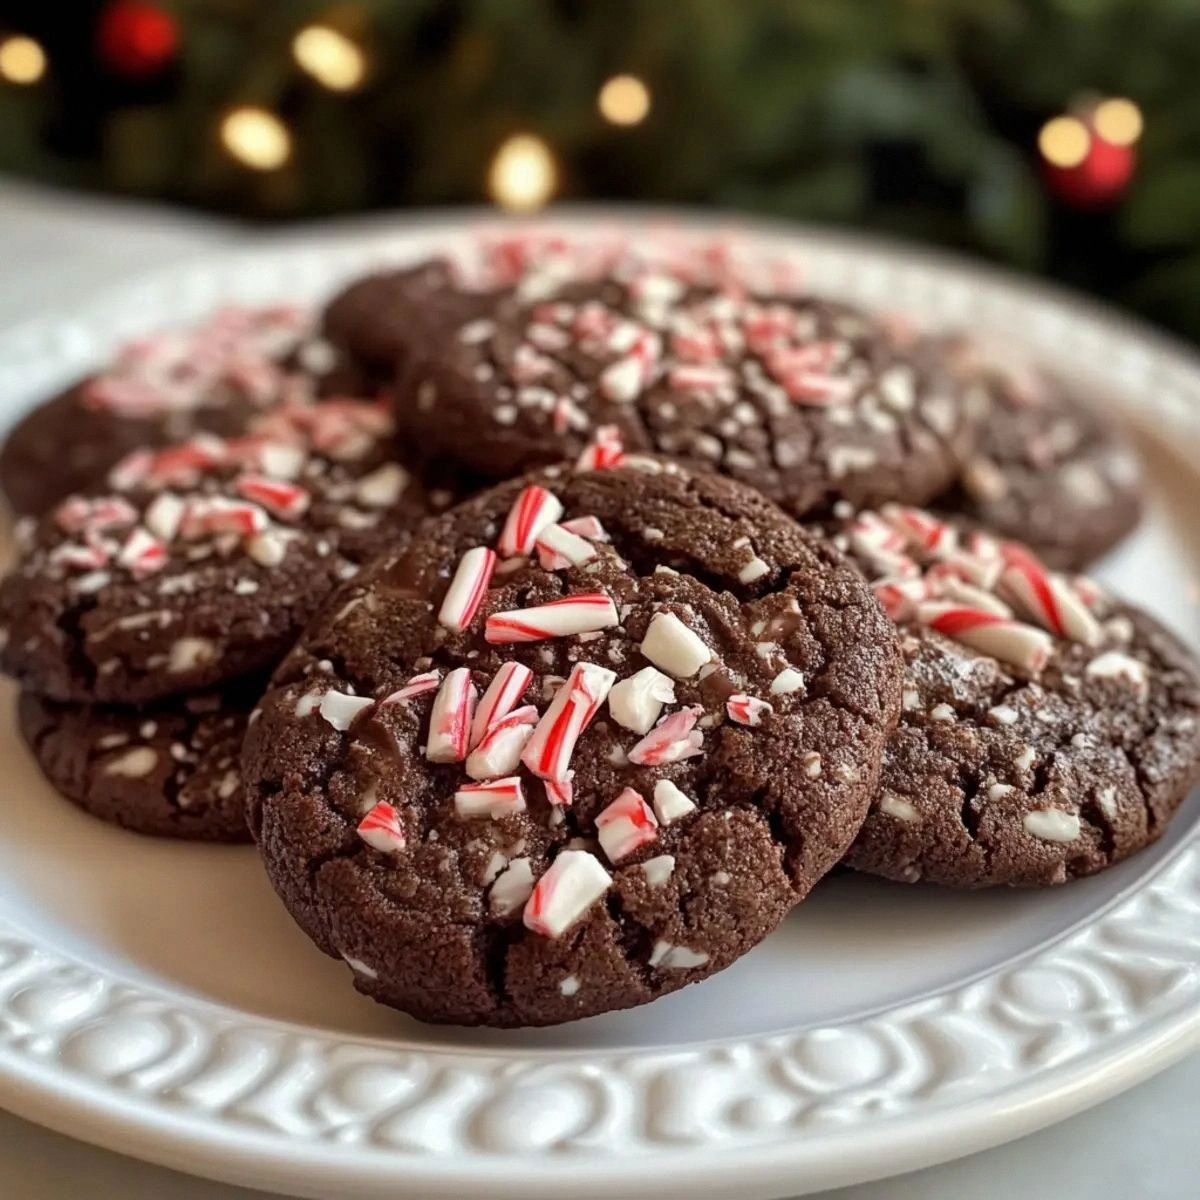
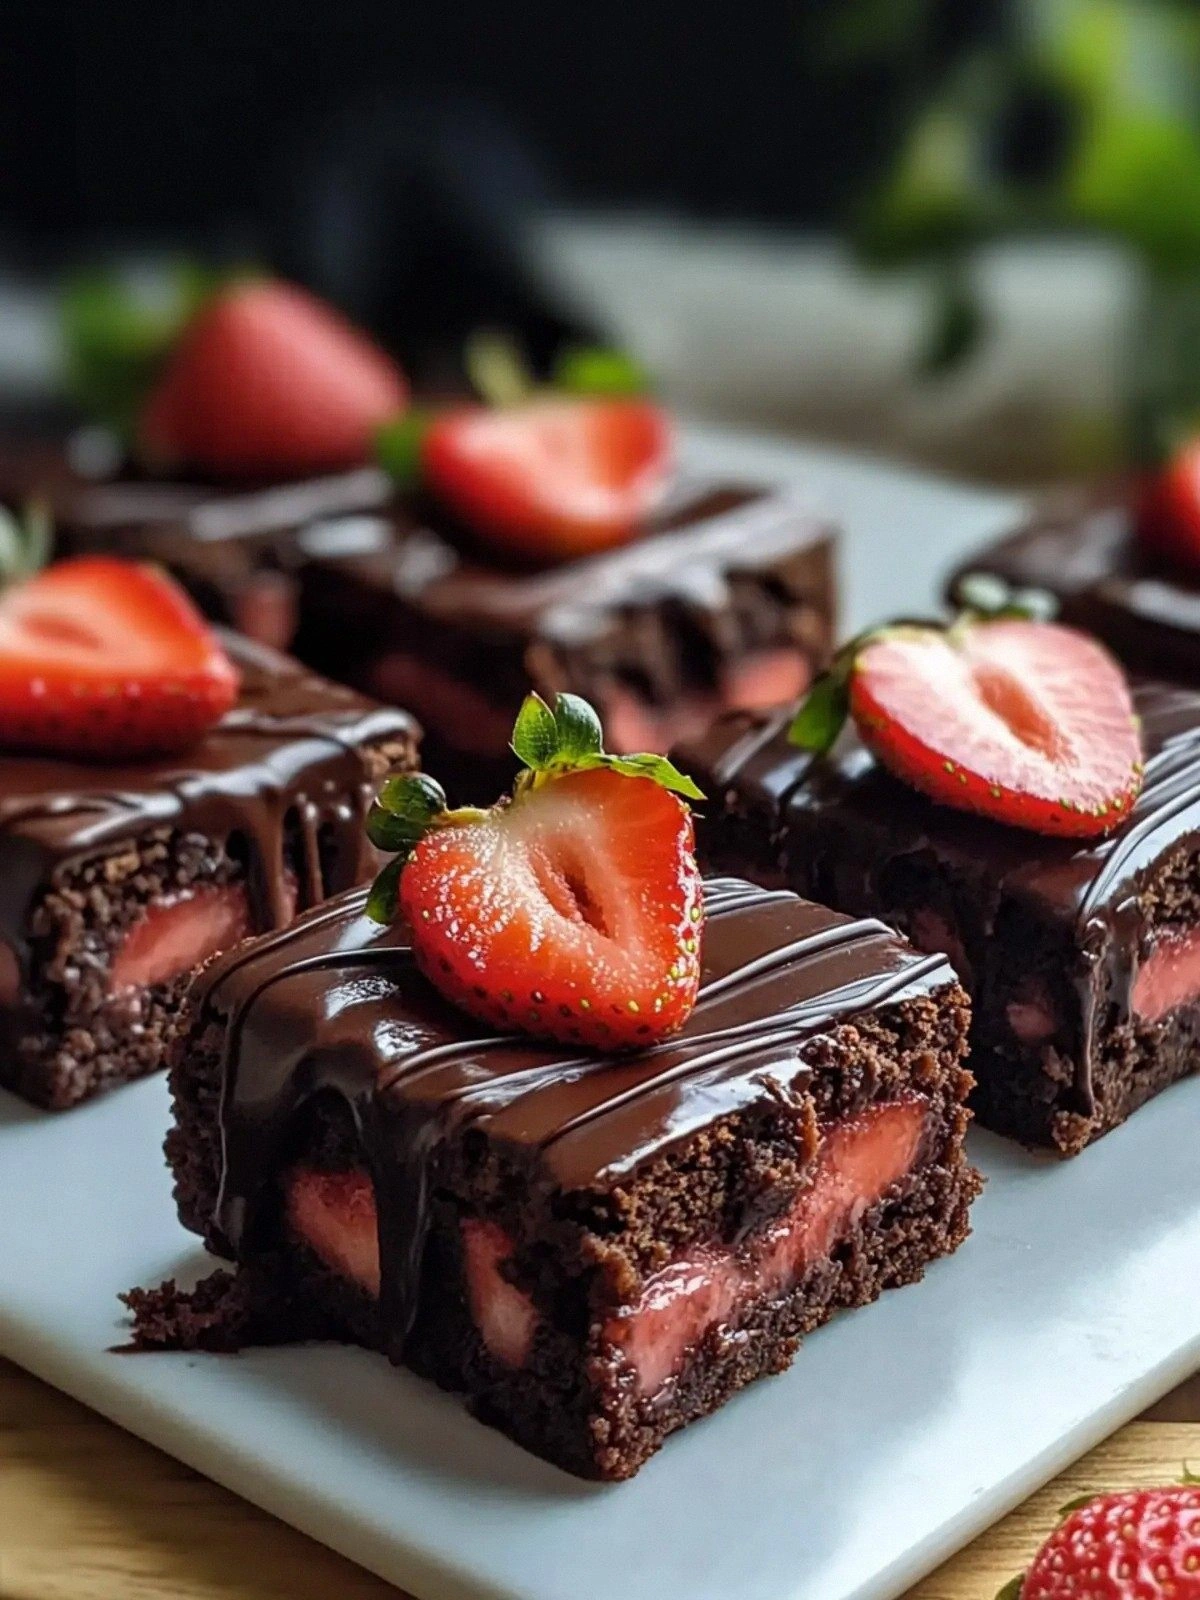
What sets this version apart is that it marries the indulgence of chocolate with the freshness of strawberries in a single bite, and it does so with a buttery, airy brownie base that’s both dense and melt‑away. I dared you to taste this and not go back for seconds, and I guarantee you will. Most recipes get this completely wrong, but here the chocolate isn’t cloying; it’s a silky coating that glistens like a satin ribbon around each strawberry. The brownie is perfectly fudgy yet airy, the kind of texture that shatters like thin ice when you bite. The finish is a glossy chocolate drizzle that adds a decadent shine and a subtle caramel note. If you’ve ever struggled with chocolate desserts, you’re not alone — and I’ve got the fix that turns any batch into a show‑stopping masterpiece.
Picture yourself pulling this out of the oven, the whole kitchen smelling incredible, and the first bite sending a wave of chocolate and berry bliss through your senses. The moment the tray cools, the chocolate sets into a glossy, crackly shell that’s begging to be broken. I’m telling you, this is hands down the best version you’ll ever make at home. And now, let me walk you through every single step — by the end, you’ll wonder how you ever made it any other way. Stay with me here — this is worth it.
What Makes This Version Stand Out
- Flavor Fusion: The combination of fresh strawberries and rich chocolate creates a flavor profile that feels both indulgent and refreshing. The berries’ natural acidity cuts through the sweetness, leaving a balanced finish.
- Texture Contrast: The brownie base is fudgy yet airy, while the strawberries add a burst of juiciness. The chocolate coating provides a glossy, slightly crisp exterior that breaks into silky chocolate.
- Ingredient Quality: Using unsalted butter and high‑quality chocolate chips elevates the dish. The butter’s richness enhances the chocolate’s depth, and the chips melt smoothly into a velvety glaze.
- Make‑Ahead Friendly: The dessert can be prepared a day ahead. The chocolate coating stays firm, and the brownies can be reheated to restore their gooey center.
- Visual Appeal: The glossy chocolate glaze gives the brownies a striking appearance, making them perfect for special occasions or Instagram moments.
- Simple Technique: No complex steps or exotic equipment are required. The method relies on basic kitchen tools, making it accessible to all.
Inside the Ingredient List
The Flavor Base
Unsalted butter is the cornerstone of this dessert, lending a deep, creamy richness that permeates every bite. Butter’s low water content allows it to melt smoothly, creating a silky batter that coats the strawberries perfectly. If you skip butter, the brownies become dry and lack that luxurious mouthfeel. For a vegan twist, swap for coconut oil, but keep the flavor profile intact by using a small amount of vanilla extract.
Granulated sugar is the sweetener that balances the tartness of the strawberries. It also helps the brownie batter set into a tender crumb while providing a subtle caramelization on the surface. Too much sugar can overpower the chocolate, so stick to the 2 cups measurement. If you prefer a healthier version, consider using a sugar substitute that measures equal volume, but be prepared for a slightly different texture.
Fresh strawberries bring a burst of bright, fruity flavor that contrasts the deep chocolate. They should be washed, hulled, and sliced into bite‑sized pieces to ensure even coating. If strawberries are out of season, frozen berries can be used, but thaw them first to avoid excess moisture. Remember, the berries’ natural juices help set the chocolate glaze into a glossy finish.
The Texture Crew
Cocoa powder is the unsung hero that gives the brownie its rich, chocolatey depth. It’s essential for achieving that deep brown color and a slightly bitter undertone that balances the sweetness. A fine‑ground cocoa powder ensures a smooth batter, whereas a coarse one can create a gritty texture. For a richer taste, use Dutch‑process cocoa, which is less acidic and blends seamlessly.
Flour is the structural backbone of the brownies, providing the necessary gluten to hold the batter together. Using all‑purpose flour gives a chewy crumb, while a blend of all‑purpose and cake flour can make the brownies lighter. If you prefer a gluten‑free version, replace with a 1:1 gluten‑free blend, but adjust the liquid slightly to maintain consistency.
Large eggs bind all the ingredients together, creating a cohesive batter that rises slightly during baking. They also add richness and a tender crumb. If you’re avoiding eggs, use a commercial egg replacer or a mixture of flaxseed meal and water, but note that the texture may differ slightly.
The Unexpected Star
Heavy cream is the secret that gives the chocolate coating a silky, glossy finish. It helps the chocolate chips melt into a smooth glaze that sets into a perfect sheen. The cream also adds moisture to the batter, ensuring the brownies stay fudgy. If you’re lactose intolerant, replace with full‑fat coconut milk for a similar mouthfeel.
Chocolate chips are the final layer that creates a decadent, glossy exterior. They should be high‑quality, preferably with a cocoa content of 60–70%. The chips melt into a smooth glaze that coats each strawberry and brownie piece. If you’re looking for a twist, try using dark chocolate chips for a more intense flavor profile.
The Final Flourish
This section of ingredients brings the dessert together, adding flavor depth and texture that elevate the entire experience. Each ingredient plays a vital role in achieving the perfect balance of sweet, tart, and chocolatey. When you combine them thoughtfully, the result is a dessert that feels luxurious yet approachable. This is where the magic happens, and where the final flavor profile is shaped.
Everything's prepped? Good. Let's get into the real action.
The Method — Step by Step
- Preheat the oven to 350°F (175°C) and line an 8‑inch square pan with parchment paper, leaving a small overhang on each side. This ensures the brownies lift out easily once baked. The parchment also prevents the chocolate glaze from sticking, making cleanup a breeze. As the oven heats, you’ll notice a faint buttery aroma that signals the butter is ready to melt. Keep the temperature steady to avoid uneven baking. Once the oven is ready, set a timer for 30 minutes.
- In a medium saucepan, melt 1 cup of unsalted butter over low heat until it’s fully liquid. Stir occasionally to prevent scorching. Once melted, remove from heat and let it cool slightly, about 2 minutes, so it doesn’t cook the eggs when added. The butter should still be warm but not hot enough to scramble the eggs. This step is crucial for achieving a silky batter. While the butter cools, you can start preparing the strawberries.
- Add 2 cups of granulated sugar to the melted butter and whisk until the mixture is smooth and glossy. The sugar dissolves, creating a uniform base that will carry the chocolate flavor. The mixture should look almost translucent, indicating the sugar has fully integrated. This is the moment where the batter starts to feel silky. If the sugar isn’t fully dissolved, the brownies may have a gritty texture. Keep whisking until the mixture looks smooth.
- In a separate bowl, combine 1 cup of all‑purpose flour, 0.75 cup of cocoa powder, and a pinch of salt. Sift the dry ingredients together to avoid lumps. This ensures an even distribution of cocoa throughout the batter. The flour will give structure while the cocoa adds depth. If you prefer a lighter texture, add a tablespoon of baking powder. Mix until just combined.
- Crack 2 large eggs into a small bowl, then whisk them lightly. Add the eggs to the butter‑sugar mixture, whisking vigorously to incorporate. The eggs bind the batter, giving it a rich, cohesive texture. Whisk until the mixture is smooth and the eggs are fully integrated. This step is vital for a tender crumb. Avoid over‑whisking to prevent the batter from becoming airy.
- Fold the dry flour mixture into the wet batter gently, using a spatula. The goal is to combine the ingredients without over‑mixing. Over‑mixing can develop gluten, resulting in a tough brownie. The batter should be thick yet pourable, similar to a thick pancake batter. Gently fold until no dry spots remain. This creates the foundation for the brownie.
- Fold in the sliced strawberries, ensuring they are evenly coated. The berries should be distributed evenly across the batter. This step allows the chocolate glaze to cling to each piece. If the berries are too wet, they might release moisture, causing the brownies to be soggy. Pat the batter gently to keep the berries from sinking to the bottom.
- Pour the batter into the prepared pan, smoothing the top with a spatula. The batter should fill the pan evenly. Gently tap the pan on the counter to release air bubbles. This ensures a uniform rise. The batter should be level, as uneven batter can lead to uneven baking.
- Bake in the preheated oven for 25 minutes, or until a toothpick inserted into the center comes out with a few moist crumbs. The brownies should have a slightly firm surface but remain soft in the middle. The edges will start pulling away from the parchment, indicating readiness. Avoid over‑baking; this will dry out the brownies. Keep an eye on the top for a golden brown color.
- Remove the pan from the oven and let it cool for 10 minutes. During this time, the chocolate glaze will set into a glossy finish. The brownies should feel firm to the touch but still slightly springy. This cooling period is essential for the glaze to harden properly. While cooling, you can prepare the chocolate drizzle.
- While the brownies cool, combine 1 cup of heavy cream with 2 cups of chocolate chips in a microwave‑safe bowl. Microwave on high for 30 seconds, then stir. Repeat the process until the mixture is smooth and glossy. The heavy cream helps the chocolate melt evenly, creating a silky glaze. Keep stirring to prevent hot spots. The result should be a thick, glossy sauce.
- Once the brownies have cooled, drizzle the chocolate glaze over the top, spreading it evenly with a spatula. The glaze should pool in the corners and create a shiny, glossy surface. Let it set for 5 minutes, then use a knife to cut the brownies into squares. The glaze will be slightly tacky, making it easy to cut cleanly. This step adds a decadent finish that elevates the dessert.
- If you prefer a thicker glaze, add a tablespoon of flour to the chocolate mixture before microwaving. This thickens the glaze without altering the flavor significantly. Stir well to incorporate the flour fully. The thicker glaze will create a more substantial coating, especially on the strawberries. This is ideal for a more decadent experience.
- Let the brownies sit at room temperature for 15 minutes to allow the glaze to set completely. The glaze should harden into a glossy, slightly brittle shell. This step ensures a crisp exterior while maintaining a soft interior. The brownies are now ready to be served. You can garnish with a few fresh mint leaves for a pop of color.
- Serve the brownies warm or at room temperature. The warm brownies will have a gooey center that oozes chocolate when cut. If you prefer a firmer bite, refrigerate the brownies for 30 minutes before serving. The chocolate glaze will remain glossy, but the texture will be slightly firmer. Either way, each bite delivers a burst of chocolate, strawberry, and buttery goodness.
- For an extra touch of elegance, dust the finished brownies with powdered sugar or drizzle with a thin layer of melted dark chocolate. This adds a subtle sweetness and an attractive finish. The powdered sugar should be lightly dusted to avoid overpowering the chocolate. The dark chocolate drizzle adds a hint of bitterness that balances the sweetness.
- If you’re planning ahead, store the brownies in an airtight container at room temperature for up to 3 days. The chocolate glaze will stay firm, and the brownies will remain moist. For longer storage, freeze the brownies for up to 2 weeks, then thaw at room temperature before serving. This method preserves the flavor and texture without compromising quality.
- When reheating frozen brownies, place them on a parchment‑lined tray and bake at 300°F (150°C) for 10 minutes. The brownies will warm evenly, and the chocolate glaze will soften slightly for a richer mouthfeel. Avoid overheating, as this can cause the chocolate to separate. The reheated brownies should feel warm and comforting, ready to be enjoyed like fresh ones.
That's it — you did it. But hold on, I've got a few more tricks that'll take this to another level. These insider tips will help you avoid common pitfalls and elevate the flavor profile even further.
Insider Tricks for Flawless Results
The Temperature Rule Nobody Follows
Maintaining the right oven temperature is key to a perfect rise. An oven that runs too hot can cause the chocolate glaze to burn while the brownies remain undercooked. Use an oven thermometer to verify the temperature, especially if your oven has a known heat discrepancy. This small step saves you from a burnt exterior and a soggy interior. A consistent 350°F (175°C) will give you a golden crust and a fudgy center.
Why Your Nose Knows Best
Your sense of smell is a reliable guide for judging doneness. When the chocolate glaze starts to set and the brownies emit a warm, buttery scent, it's a sign they’re ready. If the aroma leans too sweet or metallic, the brownies might be overbaked. Trust your nose, and you'll avoid the dreaded “burnt chocolate” mishap. The scent alone can tell you when to pull the brownies from the oven.
The 5-Minute Rest That Changes Everything
Letting the brownies rest for five minutes after baking allows the structure to set, making slicing easier and preventing them from sticking to the pan. This short pause also lets the chocolate glaze firm up slightly, giving that perfect glossy finish. Skipping this step often results in a mushy center and a messy mess on your cutting board. The rest is a small investment for a cleaner, more professional presentation.
The Secret Ingredient Swap
If you’re craving a richer flavor, swap the heavy cream for half-and-half or even a splash of vanilla extract. The vanilla adds a subtle sweetness that complements the chocolate. The half-and-half keeps the glaze silky while reducing dairy content. This tweak can transform a simple brownie into a gourmet delight.
The Perfect Cutting Technique
Use a hot knife to cut through the brownies. Heat the knife in hot water for 30 seconds, then wipe it dry before slicing. This prevents the glaze from sticking and ensures clean cuts. A dull or cold knife will tear the brownies, ruining the presentation. A hot knife gives you sharp, clean edges every time.
The Final Glaze Touch
After drizzling the chocolate glaze, lightly tap the pan on the counter. This helps the glaze spread evenly and reduces air bubbles. The result is a smooth, glossy finish that looks as good as it tastes. If you notice any unevenness, gently swirl the glaze with a spatula. This final touch elevates the dessert to a professional level.
Creative Twists and Variations
This recipe is a playground. Here are some of my favorite ways to switch things up:
Almond Crunch Variation
Add ½ cup of chopped toasted almonds to the batter before baking. The almonds add a nutty crunch that contrasts the smooth chocolate glaze. They also bring a subtle earthy flavor that complements the strawberries. Toast the almonds in a dry skillet until golden. Stir them into the batter just before pouring. This variation is a hit at parties.
Minty Fresh Twist
Incorporate 1 teaspoon of fresh mint extract into the batter for a refreshing burst. The mint pairs beautifully with strawberries, creating a flavor profile reminiscent of a summer garden. Use the mint extract sparingly; a little goes a long way. The mint will add a subtle cooling effect to each bite.
Dark Chocolate Intensifier
Replace the chocolate chips with 2 cups of dark chocolate chips with 80% cocoa. The darker chocolate provides a richer, more intense flavor that balances the sweetness of the strawberries. The glaze will be slightly darker, creating a striking visual contrast. This version is perfect for chocolate lovers who prefer less sugar.
Coconut Cream Variation
Swap the heavy cream for 1 cup of coconut cream for a tropical twist. The coconut cream adds a subtle coconut flavor that complements the strawberries. It also provides a silky texture similar to heavy cream. This variation is dairy‑free and still delivers a luscious glaze.
Spiced Surprise
Add ¼ teaspoon of ground cinnamon and a pinch of nutmeg to the dry ingredients. The spices bring warmth and depth, turning the dessert into a comforting autumn treat. The spices will mellow the chocolate, creating a balanced flavor profile. This variation is ideal for cooler evenings.
Caramel Drizzle Finish
Drizzle a homemade caramel sauce over the cooled brownies. The caramel adds a buttery sweetness that complements the chocolate glaze. Make the caramel by simmering 1 cup of sugar and ½ cup of butter until golden. Add ¼ cup of heavy cream slowly, whisking constantly. Drizzle over the brownies for an extra indulgent touch.
Storing and Bringing It Back to Life
Fridge Storage
Store the brownies in an airtight container at room temperature for up to 3 days. The chocolate glaze will remain firm, and the brownies will stay moist. Keep the container sealed to prevent moisture from seeping in. If you notice any condensation, let the brownies air out for a few minutes before sealing. This method preserves the freshness and flavor.
Freezer Friendly
Wrap each brownie individually in parchment paper and place them in a freezer bag. Freeze for up to 2 weeks for longer preservation. When ready to serve, let them thaw at room temperature for 30 minutes. The glaze will soften slightly, creating a gooey center. Avoid refreezing once thawed, as it can compromise texture.
Best Reheating Method
To reheat, place the frozen brownies on a parchment‑lined tray and bake at 300°F (150°C) for 10 minutes. The brownies will warm evenly, and the chocolate glaze will soften slightly for a richer mouthfeel. Let them cool for a minute before serving to allow the glaze to set again. This simple method restores the brownies to near‑freshness.