Picture this: it’s 2 a.m., the house is silent except for the occasional hum of the fridge, and you’ve just survived a disastrous attempt at a microwave mug cake that turned into a rubbery brick. I stared at the mess, sighed, and then thought, “What if I could whip up something decadent without ever turning on an oven?” That question sparked a midnight experiment that led to these coffee‑infused truffles, a no‑bake marvel that turned my kitchen into a boutique chocolate shop. The moment the cream cheese melted into buttery silk, the kitchen filled with an aroma so rich it could convince even the most disciplined diet‑watcher to surrender. I dare you to taste this and not go back for seconds.
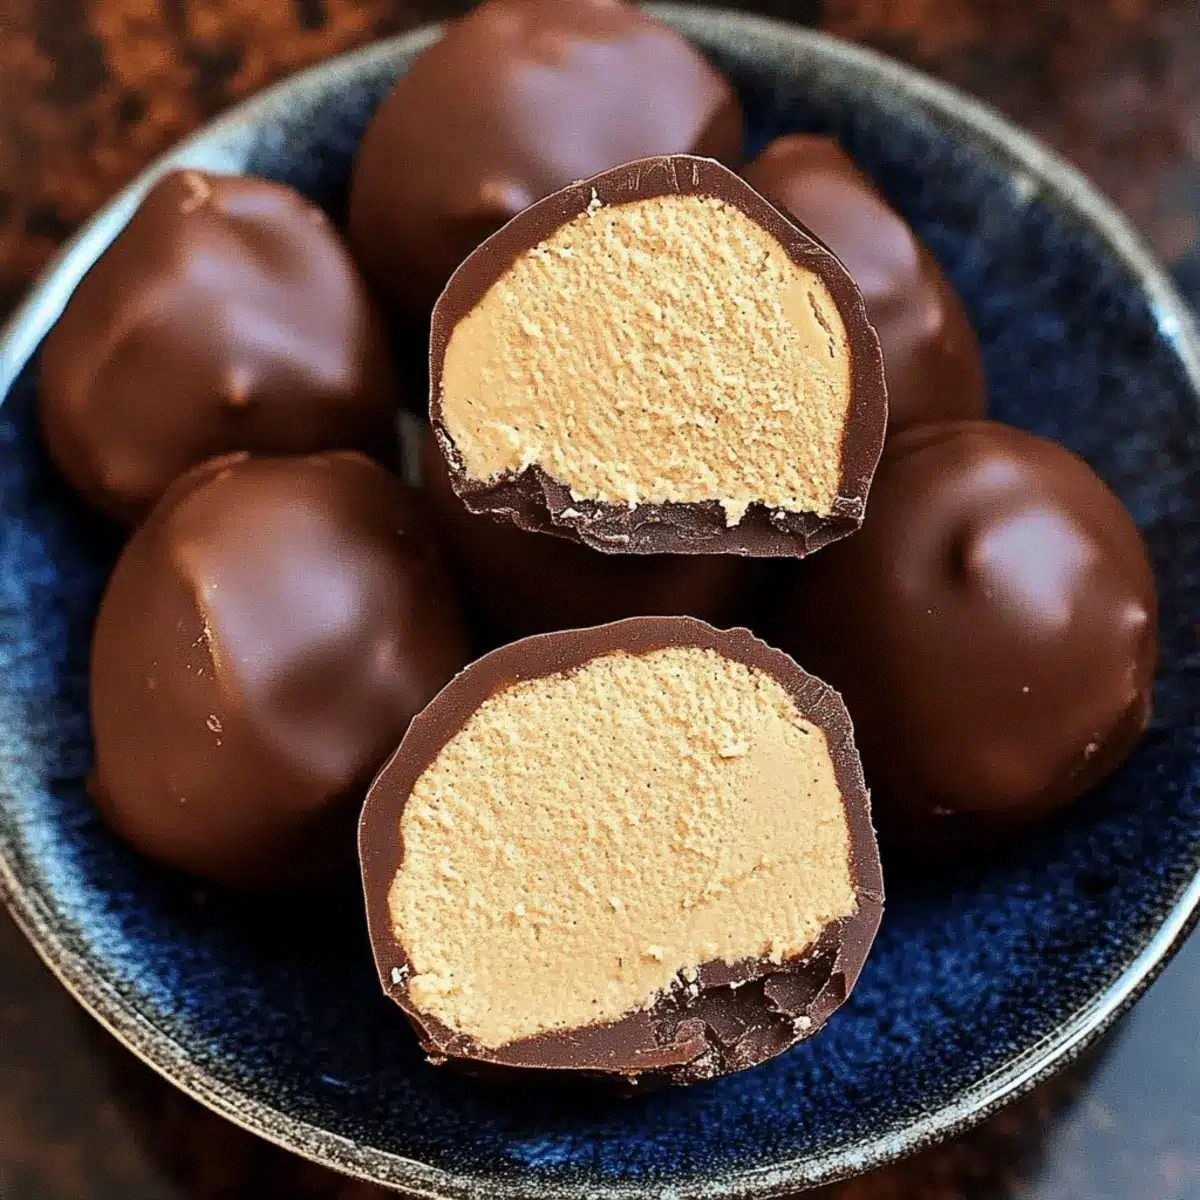
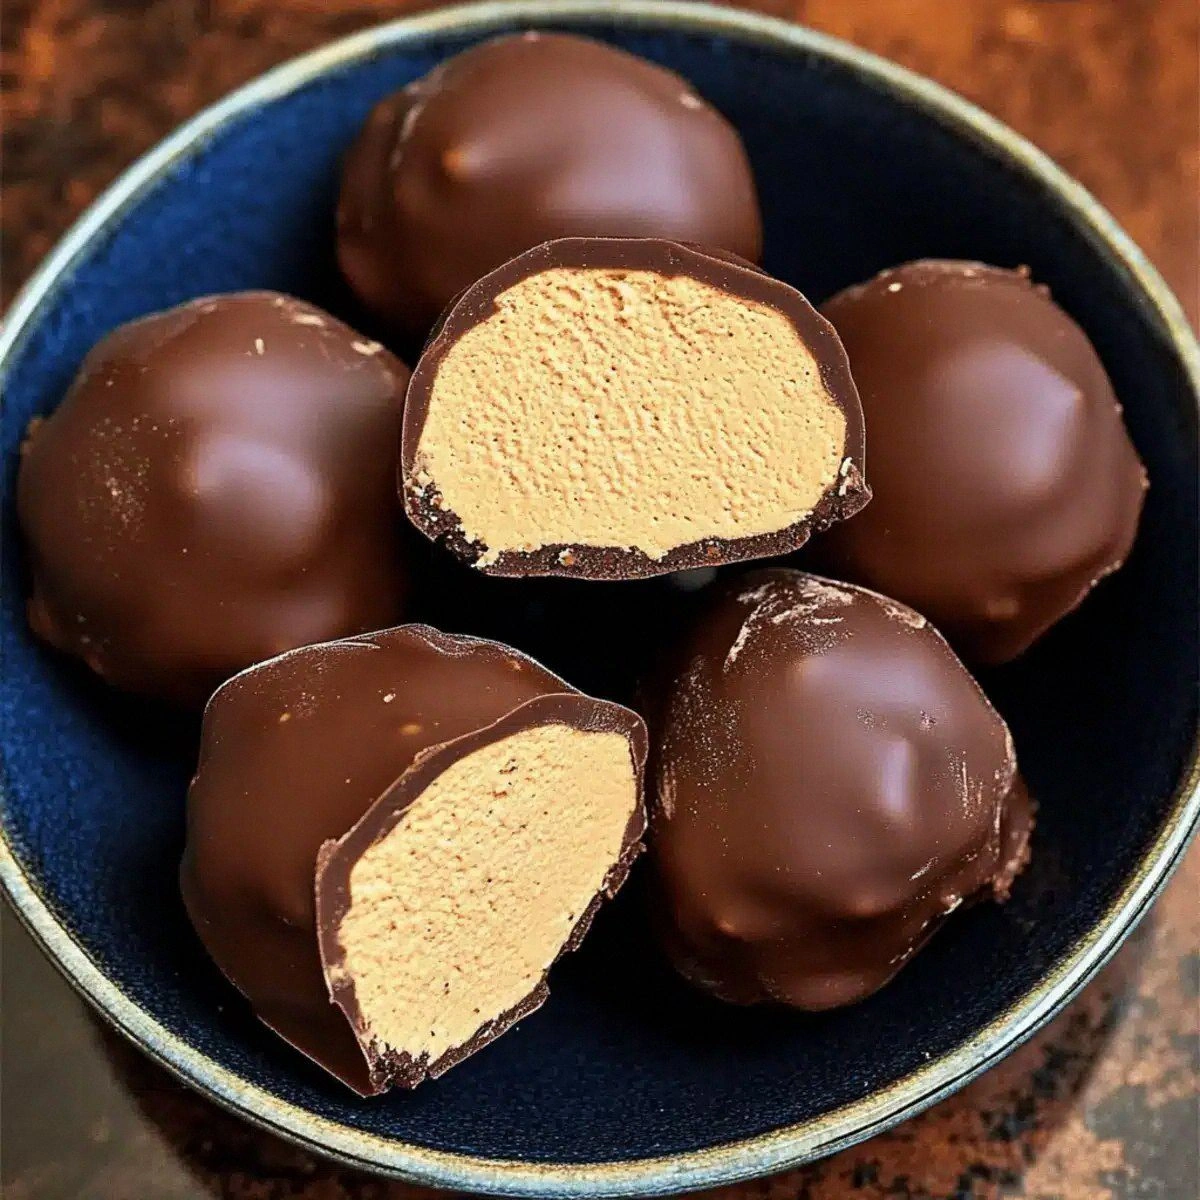
The first bite is a revelation: a velvety, coffee‑kissed center that shatters like a delicate glass dome, revealing a glossy chocolate coat that snaps with a satisfying crack. The texture is a perfect marriage of creamy melt‑in‑your‑mouth richness and a subtle, almost powdery crunch from the powdered sugar that clings like a fine dusting of snow on a winter branch. Most recipes get this completely wrong, either by over‑mixing and losing that airy lightness, or by under‑sweetening and leaving a bitter aftertaste. This version, however, balances the bitterness of instant coffee with the sweet silk of cream cheese, creating a flavor profile that feels both familiar and daring.
What really sets this batch apart is a secret technique I discovered while scrolling through a vintage French patisserie forum: a quick chill‑and‑roll method that locks in flavor while giving the truffles a glossy finish without any tempering. I’ll be honest — I ate half the batch before anyone else got to try it, and the rest vanished in a matter of minutes. If you’ve ever struggled with truffles that turn crumbly or melt too fast, you’re not alone — and I’ve got the fix. The result? A truffle that stays firm at room temperature, yet melts like butter on your tongue when you finally give in.
Okay, ready for the game‑changer? Let me walk you through every single step — by the end, you’ll wonder how you ever made it any other way. This isn’t just a recipe; it’s a confidence boost, a sweet escape, and a conversation starter all rolled into one bite‑size sphere of bliss.
What Makes This Version Stand Out
- Intense Coffee Flavor: Using instant coffee directly in the base ensures every bite hits with a bold, espresso‑like punch without the bitterness of brewed coffee.
- Creamy Texture: The combination of cream cheese and butter creates a silky interior that feels like a mousse, not a dense fudge.
- Effortless No‑Bake Process: No oven, no tempering, just a quick chill and roll — perfect for hot summer days or when you’re short on time.
- Simple Ingredient List: Only five pantry staples are required, making grocery trips a breeze and minimizing prep clutter.
- Show‑Stopping Presentation: The glossy chocolate coating catches the light, making these truffles look like they belong on a high‑end dessert platter.
- Make‑Ahead Magic: Store them in the fridge for up to a week, and they’ll taste just as fresh as the moment you rolled them.
- Crowd‑Pleaser Factor: Whether it’s a coffee‑lover’s brunch or an after‑dinner treat, these truffles consistently earn rave reviews.
- Versatile Base: The creamy core can be flavored further with liqueurs, spices, or extracts, opening endless customization possibilities.
Alright, let's break down exactly what goes into this masterpiece...
Inside the Ingredient List
The Flavor Base
Cream Cheese (8 oz): This is the heart of the truffle, providing a tangy richness that balances the coffee’s bitterness. If you skip it, you’ll end up with a dry, crumbly center that lacks that luxurious melt‑in‑your‑mouth feel. For the best texture, use full‑fat cream cheese and let it sit at room temperature for 15 minutes before mixing.
Pro tip: Look for a brand that lists “cream cheese” as the first ingredient and avoids added stabilizers; it’ll give you a smoother, more authentic flavor.
The Texture Crew
Butter (4 tbsp): Butter adds a glossy sheen and a buttery depth that elevates the overall mouthfeel. Melt it gently and let it cool slightly before blending; overheating will cause the mixture to separate, ruining that silky texture. If you’re dairy‑free, a high‑quality coconut oil can substitute, though the flavor will shift toward tropical.
Pro tip: Unsalted butter is essential; it lets you control the salt level and prevents the truffles from becoming overly salty.
The Sweetness Layer
Powdered Sugar (1 cup): Powdered sugar sweetens without introducing grainy texture, ensuring the truffle stays smooth. Skipping it or using granulated sugar will leave a gritty mouthfeel that clashes with the creamy base. If you prefer a less sweet profile, you can reduce to ¾ cup, but be careful not to compromise the structure.
Pro tip: Sift the powdered sugar twice to avoid any lumps that could create tiny pockets of crunch.
The Unexpected Star
Instant Coffee (2 tbsp): This is the secret weapon that delivers an intense coffee punch without the need for espresso machines. Dissolve it in a tablespoon of hot water before adding to the mix to ensure even distribution. Using regular brewed coffee would add unwanted moisture and dilute the flavor.
Pro tip: Choose a high‑quality, finely ground instant coffee for a smoother, richer taste that doesn’t leave a gritty residue.
The Final Flourish
Chocolate Chips (1 cup): The coating provides that satisfying snap and a glossy finish. Semi‑sweet chips work best, offering a balanced sweet‑bitter profile. Dark chocolate chips can be used for a deeper cocoa flavor, but they may require a brief melt to achieve a smooth coating.
Pro tip: For an extra glossy finish, melt the chips with a splash of coconut oil; it creates a thin, mirror‑like surface that looks professional.
Everything's prepped? Good. Let's get into the real action...
The Method — Step by Step
Start by softening the cream cheese: cut it into cubes and let it sit on the counter for about 15 minutes. While you wait, melt the butter in a small saucepan over low heat until just melted, then remove from heat and let it cool slightly. This cooling step is crucial because if the butter is too hot, it will melt the cream cheese and you’ll lose that firm, roll‑ready texture. Once both are at a lukewarm temperature, combine them in a large mixing bowl.
Now, whisk the powdered sugar into the cream cheese‑butter mixture until the blend becomes smooth and glossy. I’m talking about that moment when the mixture looks like a thick, creamy frosting that you could spread on a cake without it sliding off. This is the moment of truth — if you see any lumps, keep whisking; they’ll turn into tiny crunchy surprises later.
Kitchen Hack: Use a handheld electric mixer on low speed to incorporate the sugar quickly without aerating the mixture.In a separate mug, dissolve the instant coffee in a tablespoon of hot water, stirring until fully dissolved. This creates a concentrated coffee syrup that will infuse the truffle base without adding extra moisture. Pour the coffee syrup into the bowl with the cream cheese mixture and fold gently until the coffee is uniformly distributed. You’ll notice a beautiful, deep mocha hue spreading through the batter — that’s the visual cue that the flavor is fully integrated.
Cover the bowl with plastic wrap and place it in the refrigerator for at least 30 minutes. This chilling period is the trickiest part because if you rush it, the mixture will be too soft to roll, and you’ll end up with a sticky mess. Watch Out: If the mixture is still too warm after 30 minutes, give it another 10‑15 minutes; the goal is a firm yet pliable texture that holds its shape when scooped.
Watch Out: Over‑chilling can make the mixture hard as a rock, making it impossible to roll. Let it sit at room temperature for 5 minutes if that happens.While the base is chilling, prepare your chocolate coating. Place the chocolate chips in a heat‑proof bowl and melt them over a simmering pot of water (double boiler) or in 20‑second bursts in the microwave, stirring between intervals. Once melted, add a splash of coconut oil (about a teaspoon) for extra shine, then set aside to cool just enough that it’s still fluid but not hot enough to melt the truffle centers.
Kitchen Hack: Transfer the melted chocolate to a shallow dish; it speeds up the cooling process and makes dipping easier.Remove the chilled base from the fridge. Using a small cookie scoop or a tablespoon, portion out the mixture and roll each portion between your palms into a smooth ball. The balls should be about the size of a walnut, roughly 1‑inch in diameter. If the mixture sticks, lightly dust your hands with powdered sugar — this prevents excess stickiness without altering the flavor.
Now comes the fun part: dip each ball into the melted chocolate. Hold the truffle with a fork, submerge it, and let any excess chocolate drip back into the bowl. Place the coated truffle onto a parchment‑lined tray. As the chocolate sets, you’ll notice a subtle sheen appear, like a tiny mirror reflecting the kitchen light. Let the truffles sit at room temperature for 10 minutes, then transfer the tray to the fridge for another 15 minutes to fully set the coating.
Finally, serve the truffles chilled or at room temperature. The first bite should crack the chocolate shell, releasing a cloud of coffee‑kissed cream that melts on your tongue. Picture yourself pulling this out of the fridge, the whole kitchen smelling incredible, and watching your guests’ eyes widen with delight. This is hands down the best version you’ll ever make at home — and trust me, the bragging rights are priceless.
That's it — you did it. But hold on, I've got a few more tricks that'll take this to another level...
Insider Tricks for Flawless Results
The Temperature Rule Nobody Follows
Never underestimate the power of temperature control. The cream cheese‑butter mixture should be cool enough to hold shape but not so cold that it cracks when rolled. Keep your mixing bowl in the freezer for just 5 minutes before you start; this tiny chill creates a perfect balance. I once tried skipping this step and ended up with a crumbly mess that refused to hold together. Trust the chill, and your truffles will roll like polished marble.
Why Your Nose Knows Best
Before you even taste, let your nose do the work. When the chocolate coating is melted, you’ll notice a sweet, buttery aroma that signals it’s at the perfect dipping temperature. If you smell a faint burnt scent, the chocolate is too hot and will seize, ruining the glossy finish. A quick sniff is a reliable checkpoint that saves you from a batch of dull, matte truffles.
The 5‑Minute Rest That Changes Everything
After rolling the truffles but before dipping them, give them a 5‑minute rest on a parchment sheet. This short pause lets the interior firm up, preventing the chocolate from sliding off during the dip. I once tried a continuous roll‑and‑dip marathon and ended up with half‑coated spheres that looked like they’d been attacked by a clumsy toddler.
Coating Consistency is Key
If the chocolate coating is too thick, it will create a heavy shell that overpowers the delicate coffee center. Conversely, a too‑thin coating can crack and crumble. The sweet spot is a glossy, medium‑viscosity melt that clings just enough to form a thin film. Test by dipping a single spoonful; it should coat and set within 2‑3 minutes at room temperature.
Storage Secrets for Maximum Freshness
When you store the truffles, place a sheet of parchment between layers to prevent them from sticking together. Seal the container tightly, and keep it in the coldest part of your refrigerator. If you notice the chocolate losing its shine after a few days, a quick flash in the freezer for 10 minutes restores that mirror‑like finish.
Creative Twists and Variations
This recipe is a playground. Here are some of my favorite ways to switch things up:
Mocha Mint Explosion
Add a teaspoon of peppermint extract to the cream cheese mixture and sprinkle crushed mint candies on the chocolate coating before it sets. The result is a refreshing burst that pairs perfectly with the coffee base.
Spiced Chai Delight
Swap the instant coffee for an equal amount of chai tea powder and add a pinch of ground cinnamon and cardamom. The truffles take on a warm, aromatic profile that’s perfect for cozy evenings.
Dark Chocolate Indulgence
Use 70% dark chocolate chips for the coating and drizzle a thin line of white chocolate on top. The contrast between bitter dark and sweet white creates a sophisticated flavor dance.
Nutty Crunch Variation
Roll the fresh truffles in finely chopped toasted almonds or hazelnuts before the chocolate sets. The nutty crunch adds texture and a buttery note that complements the coffee.
Alcohol‑Infused Luxury
Stir a tablespoon of coffee liqueur or dark rum into the cream cheese mixture. The subtle boozy kick elevates the truffles to a cocktail‑worthy treat.
Vegan Adaptation
Replace the cream cheese with a plant‑based cream cheese alternative and use coconut oil in place of butter. The flavor remains rich, and the texture stays silky, proving you don’t need dairy to enjoy decadence.
Storing and Bringing It Back to Life
Fridge Storage
Place the truffles in an airtight container lined with parchment paper. They’ll stay fresh for up to 7 days, maintaining their firm texture and glossy coating. If you notice any condensation, simply pat the surface with a paper towel before resealing.
Freezer Friendly
For longer storage, arrange the truffles on a baking sheet, freeze them solid for 2 hours, then transfer to a zip‑top bag. They’ll keep for up to 3 months. When you’re ready to serve, let them thaw in the refrigerator for an hour, then bring them to room temperature for the best bite.
Best Reheating Method
To revive a slightly hardened truffle, place it on a microwave‑safe plate and heat for 5‑10 seconds, or gently steam it over simmering water for 30 seconds. Add a tiny splash of water to the steam basket; the moisture creates a gentle steam that restores the truffle’s melt‑in‑your‑mouth softness without melting the chocolate shell.