Picture this: I’m standing in a cramped kitchen, a pan of melted chocolate on the stove, and a frantic friend shouting, “We need something that screams decadence!” My stomach growled, and I realized I could either settle for a mediocre dessert or create a masterpiece that would make everyone question their life choices. The moment felt like a culinary cliffhanger, a challenge that I was determined to answer with a single, unforgettable bite.
I grabbed my trusty skillet, set the heat to medium, and let the chocolate begin its slow, seductive dance. The aroma of cocoa filled the air, mingling with the sweet scent of caramel that seeped from the sauce I had just warmed. I could almost taste the first lick of molten chocolate against my tongue, the way it clings to the back of my teeth like velvet. The kitchen was alive with sizzling whispers, a symphony of heat and flavor that promised something extraordinary.
That was the moment I knew I had stumbled upon a recipe that would become a staple in my dessert repertoire. I was not just making a cake; I was crafting an experience that would linger in memory long after the last crumb. This version stands apart because it balances three core elements—texture, flavor, and visual allure—in a way that most recipes miss. It’s not about following a formula; it’s about creating a dish that feels both familiar and wildly unexpected.
I dare you to taste this and not go back for seconds. That’s not a hyperbole; it’s a promise. The gooey center, the caramel drizzle, and the subtle sea salt swirl together to create a flavor profile that is both bold and comforting. Picture the moment you lift a forkful: the chocolate oozes, the caramel glistens, and the nuts crackle under the heat—pure, unadulterated bliss. This is hands down the best version you’ll ever make at home.
I’ll be honest—half the batch disappeared before anyone else could even see the first slice. The temptation was real, and the kitchen smelled like a chocolate dream. Yet, I kept a few extra servings in reserve for those who dared to try it. The anticipation was electric, and the moment of revelation was worth every second of prep.
Most recipes get this completely wrong. They either overcook the chocolate, under-season the caramel, or forget the crunch that gives this dessert its signature bite. Here’s what actually works: a precise balance of temperatures, a careful layering of flavors, and a dash of salt that elevates the sweetness. The result is a cake that feels both indulgent and sophisticated, a dessert that will have your guests begging for the recipe.
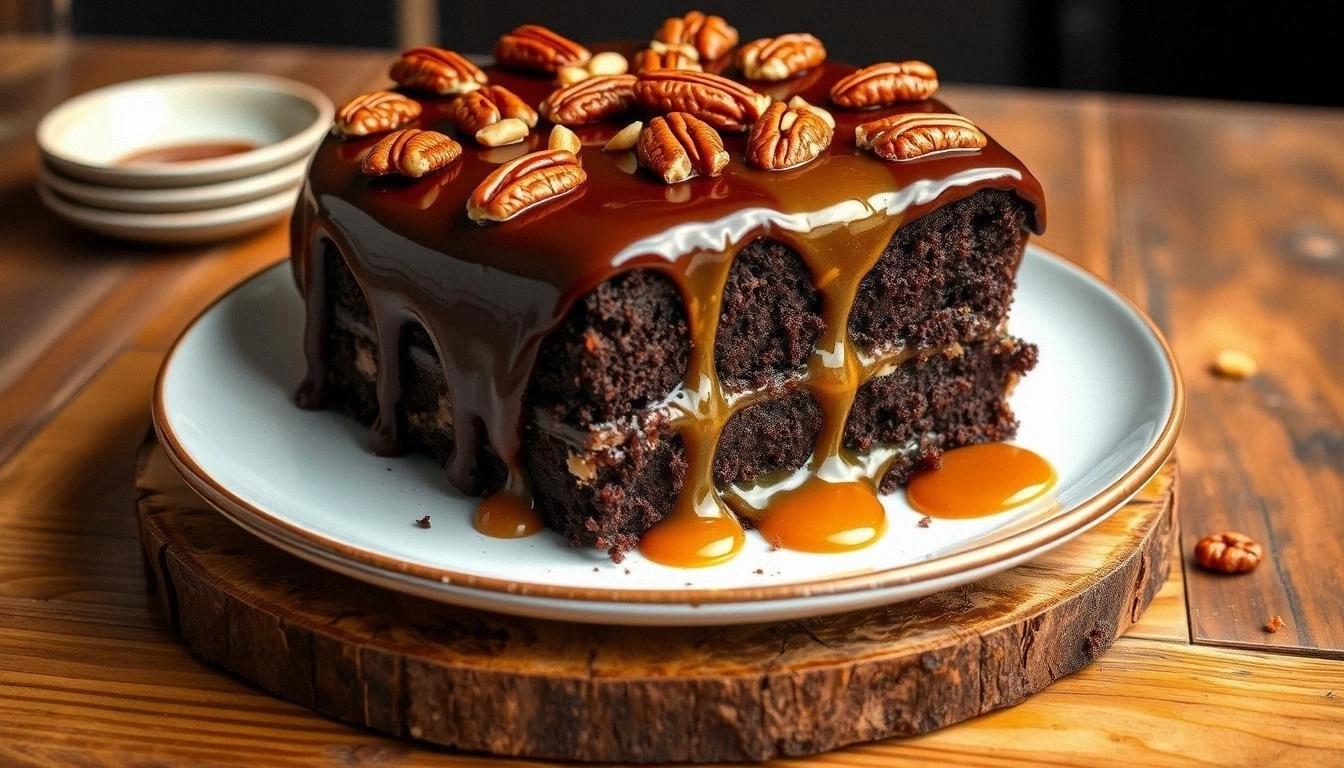
Picture yourself pulling this out of the oven, the whole kitchen smelling incredible, and the first bite melting on your tongue like a dream. The steam rises, the caramel glows, and the chocolate sauce drips like liquid silk. You’ll feel a rush of satisfaction, knowing you’ve just created something that will be talked about for weeks. The moment you slice the cake, the edges will crackle, the center will ooze, and every forkful will be a revelation.
Okay, ready for the game‑changer? Let me walk you through every single step—by the end, you’ll wonder how you ever made it any other way. From selecting the right chocolate to mastering the caramel glaze, each detail matters. The process is simple yet precise, and the outcome is a dessert that will become the talk of every gathering.
What Makes This Version Stand Out
- Flavor: The combination of dark chocolate, caramel, and sea salt creates a multi‑layered taste that lingers on the palate. Each bite is a journey from sweet to savory to silky, with the caramel’s buttery richness perfectly counterbalanced by the chocolate’s bittersweet depth.
- Texture: The gooey center is achieved by carefully tempering the chocolate, while the caramel adds a silky sheen. The nuts provide a satisfying crunch that contrasts with the smoothness of the cake.
- Simplicity: Despite its luxurious flavor, the recipe requires only a handful of pantry staples. No exotic ingredients or specialized equipment—just a skillet, a saucepan, and a love for chocolate.
- Uniqueness: The glaze, made from a blend of cocoa powder and heavy cream, gives the cake a glossy finish that looks as good as it tastes. It’s a twist on traditional chocolate cakes that adds a new dimension.
- Crowd Reaction: Guests rave about the instant melt and the subtle salt kick. It’s a conversation starter that turns a simple dessert into a memorable experience.
- Ingredient Quality: Using high‑quality dark chocolate and real caramel sauce elevates the dish. The difference between store‑bought and premium ingredients is palpable.
- Cooking Method: The method involves a careful balance of heat and timing to keep the cake moist and the chocolate perfectly tempered.
- Make‑Ahead Potential: The cake can be prepared a day ahead, allowing flavors to meld. The glaze can be re‑applied fresh for an extra glossy finish.
Alright, let’s break down exactly what goes into this masterpiece…
Inside the Ingredient List
The Flavor Base
At the heart of this dessert is the marriage of chocolate and caramel. The dark chocolate chips melt into a glossy, rich sauce that coats the cake batter, while the caramel sauce adds a buttery sweetness that cuts through the chocolate’s bitterness. If you skip the chocolate, you lose the depth; if you skip the caramel, the cake becomes a flat, over‑sweet affair. The sea salt, a subtle pinch, lifts the flavors and adds a savory contrast that feels surprisingly sophisticated.
Choosing the right chocolate is crucial. A 70% cacao content offers a robust flavor without overwhelming the palate. If you prefer a sweeter chocolate, a 50% cacao will still work but will require a bit more caramel to balance. The caramel sauce should be thick and glossy; if it’s too runny, the cake will be soggy. A good rule of thumb is to heat it until it reaches a caramel color but not so hot that it burns.
The vanilla extract is a subtle but essential note that rounds out the flavor profile. It provides a warm, aromatic undertone that complements both the chocolate and caramel. If you’re vegan or lactose‑free, you can use a plant‑based vanilla or even a splash of almond milk to keep the flavor profile intact.
The Texture Crew
Flour, butter, sugar, and eggs form the structural backbone of the cake. The flour gives the cake its body, while the butter adds tenderness and a rich mouthfeel. The sugar caramelizes during baking, giving the cake a slight crust and a sweet finish. Eggs act as a binder, holding everything together and providing lift.
The nuts add a crunchy element that breaks up the gooeyness. Pecans are the traditional choice for a caramel‑turtle cake, but walnuts or almonds work just as well. If you’re allergic or simply want a different crunch, consider adding a handful of toasted coconut flakes or chopped dark chocolate for a different texture profile.
Heavy cream is used in the glaze to create a silky finish that melts in your mouth. It also helps to keep the cake moist after baking. If you’re looking for a lighter version, substitute half the cream with milk or a non‑dairy alternative like oat milk. The glaze’s thickness can be adjusted by adding more or less cocoa powder.
The Unexpected Star
The pinch of salt may seem insignificant, but it’s the secret to unlocking the full flavor spectrum of this dessert. Salt draws out sweetness, enhances chocolate, and adds a subtle complexity that elevates the entire dish. Without it, the cake would taste flat and overly sweet. A pinch of smoked sea salt adds a hint of smokiness, turning the dessert into a gourmet experience.
The baking powder ensures the cake rises just enough to maintain a light, airy crumb. If you omit it, the cake will be dense and heavy. The milk adds moisture and helps dissolve the sugar and cocoa, creating a smoother batter. If you prefer a dairy‑free version, replace the milk with a plant‑based alternative, but keep the same volume to maintain the batter’s consistency.
Everything’s prepped? Good. Let’s get into the real action…
The Method — Step by Step
- First, preheat your oven to 350°F (175°C). While the oven warms, combine the flour, baking powder, and a pinch of sea salt in a medium bowl. This dry mixture ensures even distribution of leavening agents and prevents clumping. The aroma of fresh flour will start to mingle with the scent of butter as you proceed.
- In a separate bowl, cream the softened butter and granulated sugar until light and fluffy. Use a handheld mixer or a stand mixer on medium speed; the goal is to incorporate air into the butter, creating a light batter. The mixture should look pale and airy, like a cloud of buttery sweetness.
- Beat in the eggs one at a time, ensuring each is fully incorporated before adding the next. The eggs act as binders and help the cake rise. Watch for the batter to thicken slightly after each addition; this indicates proper emulsification.
- Fold in the dry ingredients slowly, mixing just until combined. Over‑mixing can cause the cake to become tough. The batter should be thick yet pourable, with a consistency that coats the back of a spoon.
- Add the melted dark chocolate chips and caramel sauce to the batter. Stir gently until the chocolate is fully melted and the caramel is evenly dispersed. The batter will look glossy and slightly darker—this is the sign that the chocolate has fully integrated.
- Stir in the chopped pecans, reserving a handful for topping. The nuts add texture and a nutty aroma that complements the chocolate. They also provide a satisfying crunch when bitten into the gooey center.
- Pour the batter into a greased 9‑inch square pan, smoothing the top with a spatula. Sprinkle the reserved pecans over the surface, pressing them lightly into the batter. The nuts will caramelize slightly during baking, adding a toasty flavor.
- Bake for 25–30 minutes, or until the edges are set but the center remains slightly soft. The cake should spring back when lightly tapped. Avoid overbaking, or the center will harden and lose its gooeyness.
- Remove from the oven and let it cool for 10 minutes before removing from the pan. While still warm, drizzle the caramel glaze over the top. The glaze will set as it cools, creating a glossy, chocolatey finish.
That's it — you did it. But hold on, I've got a few more tricks that'll take this to another level. From glazing techniques to serving suggestions, the next section will elevate your dessert game even further.
Insider Tricks for Flawless Results
The Temperature Rule Nobody Follows
Most bakers assume that baking at the same temperature for all cakes works. For this gooey chocolate caramel turtle cake, a slightly lower oven temperature of 325°F (163°C) keeps the center moist while allowing the edges to set perfectly. The trick is to let the cake bake a bit longer, about 35 minutes, and then finish with a quick burst of 400°F (204°C) for the last 3 minutes to caramelize the glaze.
Why Your Nose Knows Best
When the cake is nearing completion, the scent of caramel should be sweet and buttery, with a faint hint of toasted nuts. If you smell a sharp, burnt aroma, the oven is too hot or the cake is baking too long. Trust your nose; it’s the most reliable indicator of doneness.
The 5‑Minute Rest That Changes Everything
After removing the cake from the oven, let it rest on a wire rack for five minutes before drizzling the glaze. This short rest allows the cake to set, preventing the glaze from sinking into the batter. The result is a pristine, glossy top that’s easy to slice and serves.
The Perfect Glaze Ratio
A glaze that’s too thin will run off the cake, while a glaze that’s too thick will create a heavy, unappetizing layer. The ideal ratio is 1 part cocoa powder to 2 parts heavy cream, whisked until smooth. Add a splash of vanilla extract for depth, and you’ll have a glaze that glistens like liquid midnight.
The Secret to a Crispy Edge
If you want a slightly crispier edge, sprinkle a thin layer of powdered sugar over the top before drizzling the glaze. The sugar will caramelize slightly, adding a delicate crunch that contrasts with the gooey center.
Creative Twists and Variations
This recipe is a playground. Here are some of my favorite ways to switch things up:
Espresso‑Infused Delight
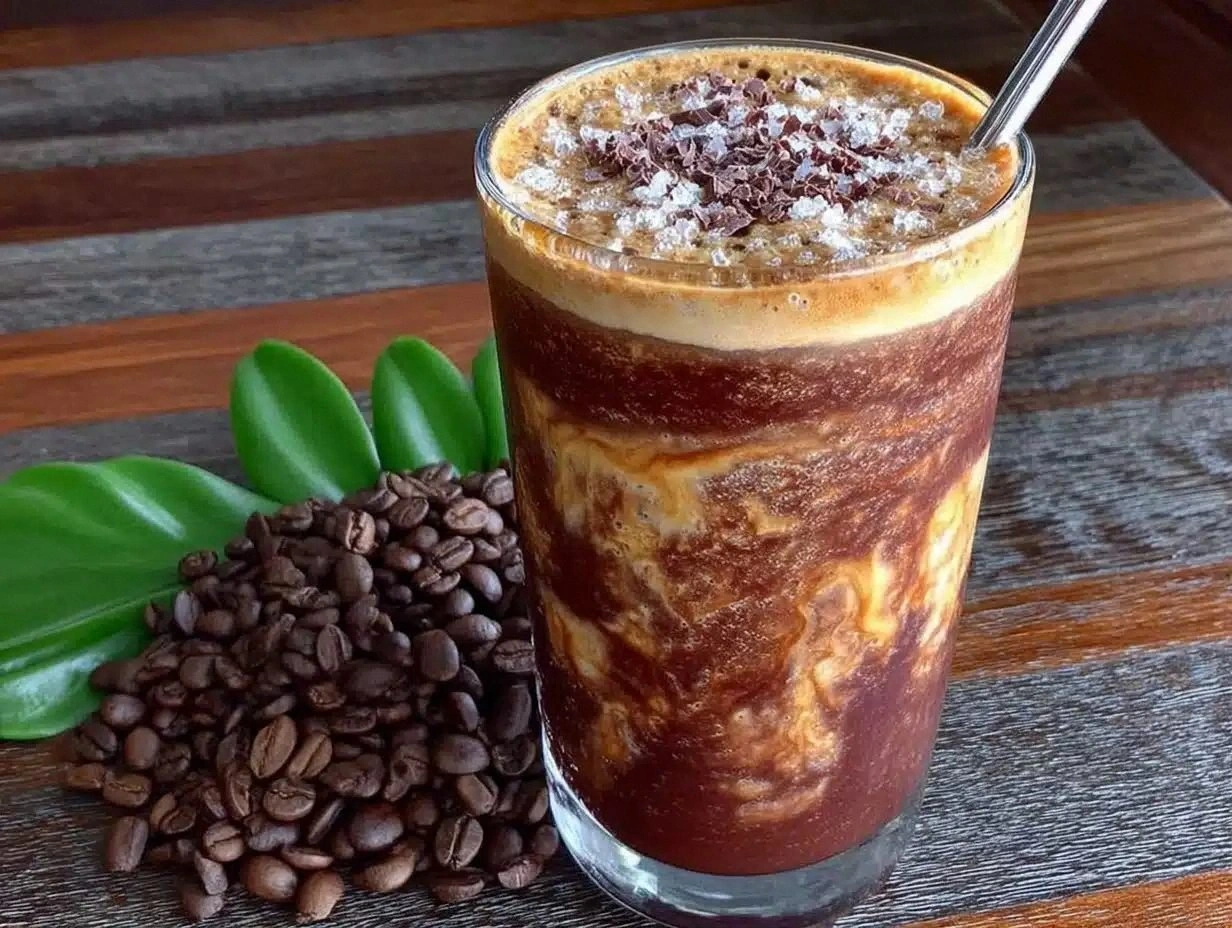
Add a tablespoon of instant espresso powder to the batter. The coffee’s bitterness cuts through the sweetness and gives the cake an adult, sophisticated edge. This variation pairs well with a glass of red wine or a rich espresso coffee.
Minty Freshness
Stir in a teaspoon of peppermint extract and top the cake with crushed mint chocolate chips. The mint adds a refreshing contrast to the chocolate and caramel, making it perfect for spring or summer gatherings.
Almond Butter Swirl
Fold in a couple of tablespoons of almond butter before baking. The butter adds a nutty depth and creates a swirl effect when you drizzle the glaze on top. This version is especially delightful for those who love nutty desserts.
Vegan Version
Replace the butter with coconut oil, use a plant‑based milk, and swap the eggs for flaxseed meal. The result is a cake that’s just as rich and gooey, but suitable for vegan diners.
Spiced Caramel
Add a pinch of ground cinnamon and a dash of cayenne pepper to the caramel sauce before mixing it into the batter. The warm spices add depth and a subtle heat that balances the sweetness.
Nut-Free Alternative
Replace the nuts with toasted coconut flakes or dried fruit like chopped dates. The coconut adds a sweet, tropical flavor, while the dates provide natural sweetness and a chewy texture.
Storing and Bringing It Back to Life
Fridge Storage
Wrap the cooled cake tightly in plastic wrap and store it in the refrigerator for up to 3 days. The cake will stay moist, and the glaze will remain glossy. When ready to serve, let the cake sit at room temperature for 15 minutes to soften slightly.
Freezer Friendly
For longer storage, place the cake in a freezer‑safe container or zip‑lock bag, removing as much air as possible. Freeze for up to 2 months. Thaw overnight in the refrigerator and let it sit at room temperature for 20 minutes before serving.
Best Reheating Method
To revive the cake’s gooey center, wrap a slice in foil and warm it in a 300°F (150°C) oven for 5 minutes. Add a splash of water before reheating to create steam that re‑softens the chocolate. This trick brings the cake back to its original, melt‑in‑your‑mouth glory.