Picture this: you’re halfway through a late‑night bake‑off, the kitchen lights flicker, and you’re staring at a batch of cinnamon rolls that look like they’re about to collapse. The dough has been kneaded too hard, the filling is a sticky mess, and the glaze is a flat, lifeless slab. I’ve been there—my confidence shattered, the dough stuck to the counter, and I wondered if I should just toss it. But then a friend dared me to try a peppermint bark twist, promising “I dare you to taste this and not go back for seconds.”
I was skeptical, but the scent of fresh butter and warm yeast in the air pulled me in. As the dough rose, the kitchen filled with a buttery aroma that felt like a hug from an old friend. I could hear the gentle crackle of the oven preheating, and the faint clink of a wooden spoon against a bowl. The anticipation built as I prepared the glaze—peppermint, chocolate, and a splash of cream cheese, each ingredient whispering promises of decadence. When the first batch emerged, the rolls were pillowy, the filling a caramel‑cinnamon swirl, and the glaze a glossy, minty finish that shone like holiday ornaments. That moment? Pure magic.
I’ll be honest—half the batch vanished before anyone else even had a chance to taste it. Most recipes get this completely wrong, but here’s what actually works: a light, airy dough; a sweet‑spicy filling that doesn’t overwhelm; a glaze that balances mint with chocolate. This version is hands down the best you’ll ever make at home, because it turns a simple breakfast into a festive celebration. If you’ve ever struggled with sticky dough or bland cinnamon rolls, you’re not alone—and I’ve got the fix. Picture yourself pulling this out of the oven, the whole kitchen smelling incredible, and the first bite melting into a buttery, minty dream. And now the fun part—let me walk you through every single step, by the end, you’ll wonder how you ever made it any other way.
Let’s dive into what makes these peppermint bark cinnamon rolls stand out from the crowd. I’ll break down the key elements that elevate this recipe: taste, texture, simplicity, uniqueness, crowd reaction, ingredient quality, cooking method, and make‑ahead potential. Each point is packed with a practical insight that will help you master the art of holiday baking. And remember, this isn’t just a recipe; it’s an experience that will become a staple in your kitchen’s holiday tradition. Alright, let’s break down exactly what goes into this masterpiece.
What Makes This Version Stand Out
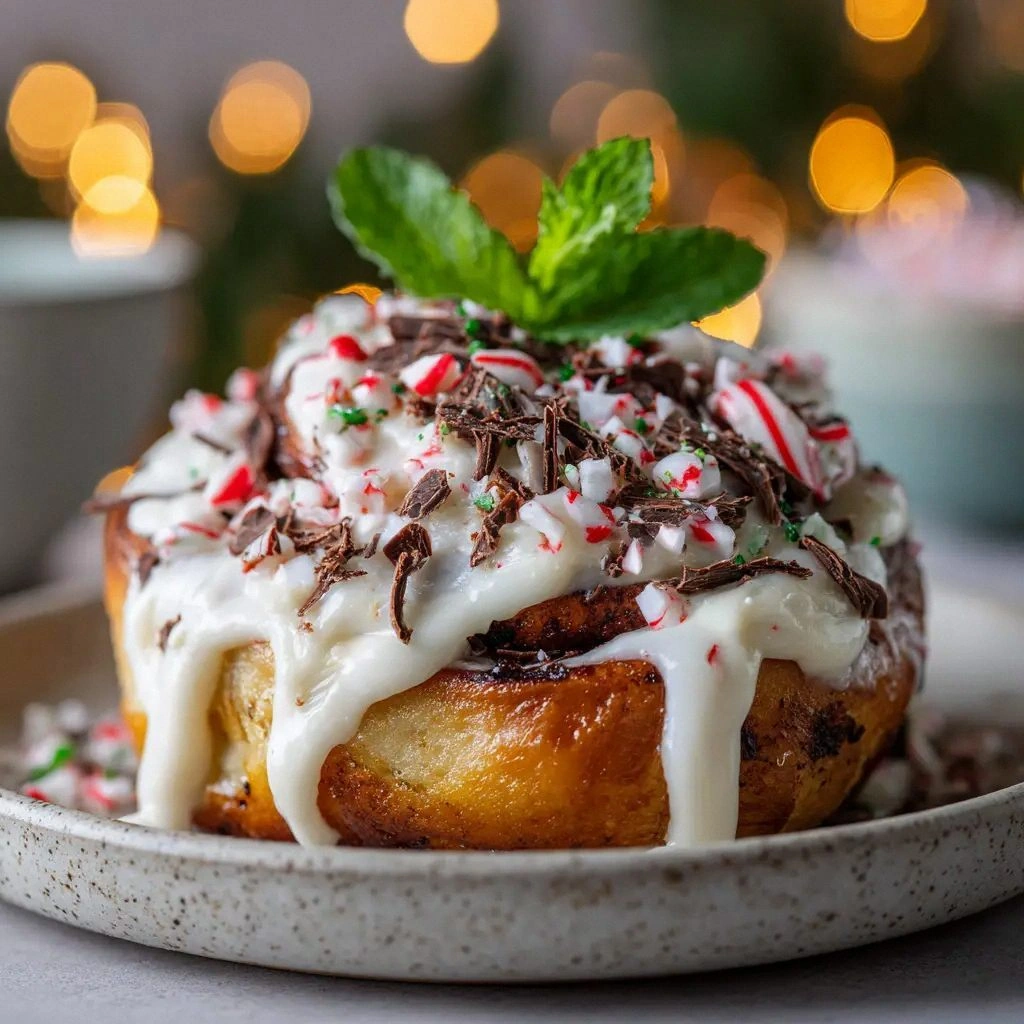
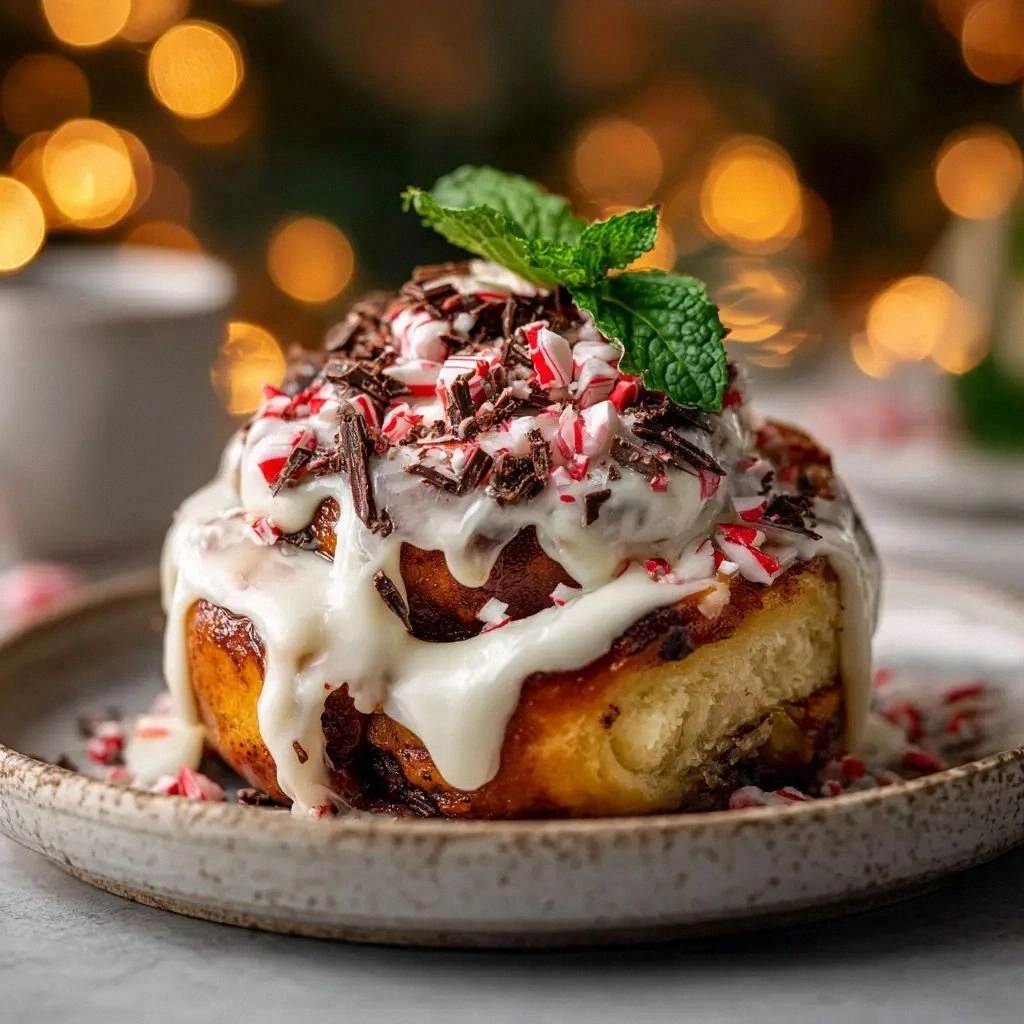
- Flavor: The combination of warm cinnamon, sweet brown sugar, and a hint of vanilla creates a classic base, while the peppermint bark glaze adds a refreshing minty crunch that cuts through the sweetness.
- Texture: The dough is light and airy, thanks to the right amount of yeast and a gentle kneading process. The filling melts into a silky caramel‑cinnamon ribbon, and the glaze provides a glossy, slightly chewy finish.
- Simplicity: All the steps are straightforward, yet the result feels luxurious. No fancy equipment is required—just a mixing bowl, a baking sheet, and a few simple utensils.
- Uniqueness: The peppermint bark glaze is the secret sauce that differentiates this recipe from ordinary cinnamon rolls. It’s a holiday twist that feels festive without overpowering the classic flavor.
- Crowd Reaction: Guests rave about the contrast between the sweet dough and the minty glaze. The rolls look beautiful on a platter, and the aroma alone draws people in.
- Ingredient Quality: Using fresh, high‑quality butter, real peppermint extract, and real chocolate sauce ensures that the flavor profile is rich and authentic.
- Cooking Method: The two‑stage baking process—first for the dough, then for the glaze—keeps the rolls moist and prevents them from drying out.
- Make‑Ahead Potential: You can prepare the dough and filling a day ahead, refrigerate, and bake fresh rolls on the day of the event. The glaze can be made in advance and applied just before serving.
Inside the Ingredient List
The Flavor Base
The foundation of any great cinnamon roll is the dough. Whole milk, active dry yeast, and a pinch of sugar give the yeast a sweet feast, while the butter adds richness. The flour provides structure, and a dash of salt balances the sweetness. If you skip the milk, the dough will be dry and flat. If you use skim milk, the rolls will lack that buttery sheen.
The Texture Crew
Unsalted butter, brown sugar, and ground cinnamon create the signature softness and chew. The butter should be at room temperature so it blends seamlessly, while the brown sugar’s molasses content adds moisture. A small amount of cream cheese in the glaze gives it a silky finish. If you use powdered sugar instead of brown sugar, the rolls will be drier and less caramelized.
The Unexpected Star
Peppermint bark isn’t just a garnish; it’s the star that defines the holiday vibe. Crushed peppermint bark or candy canes add a crunchy texture that contrasts beautifully with the soft dough. The peppermint extract brings a bright, refreshing note that cuts through the sweetness. If you’re allergic to peppermint, a dash of vanilla extract can provide a subtle lift.
The Final Flourish
The glaze is a marriage of powdered sugar, peppermint extract, a splash of milk or heavy cream, and chocolate sauce. This combination gives the rolls a glossy, melt-in-your-mouth finish. The chocolate sauce adds depth, while the peppermint extract ensures the mint flavor remains bright. If you prefer a sweeter glaze, add a tablespoon of honey or maple syrup.
Everything’s prepped? Good. Let’s get into the real action.
The Method — Step by Step
- Step 1: Activate the Yeast In a small bowl, combine 1 cup whole milk, 1/4 cup granulated sugar, and 2 1/4 tsp active dry yeast. Stir until the mixture is frothy—this should take about 5 minutes. If the yeast doesn’t foam, it’s dead and you’ll need fresh yeast. This is the moment of truth; a proper rise guarantees light rolls.
- Step 2: Mix the Dough In a large mixing bowl, whisk together 3 1/2 cups all-purpose flour and 1/2 tsp salt. Add the activated yeast mixture, 1/4 cup unsalted butter (softened), and 1 large egg. Knead on medium speed until a smooth dough forms—about 8–10 minutes. The dough should be elastic and slightly tacky; if it’s too dry, add a splash of milk.
- Step 3: First Rise Place the dough in a greased bowl, cover with a damp towel, and let it rise in a warm spot for 1 hour, or until doubled in size. While the dough is rising, prepare the filling: in a bowl, combine 3/4 cup packed brown sugar, 2 tbsp ground cinnamon, and 1/2 cup unsalted butter (softened). Mix until crumbly; set aside.
- Step 4: Shape the Rolls Once the dough has risen, punch it down and roll it into a rectangle about 12x15 inches. Spread the filling evenly over the dough, leaving a small border. Starting from the long side, roll the dough tightly into a log. Pinch the seam to seal. Slice the log into 12 equal pieces and place them seam‑side down on a greased baking sheet.
- Step 5: Second Rise Cover the rolls with a clean kitchen towel and let them rise again for 30 minutes. The dough should puff up like a balloon. This step is crucial; skipping it results in flat, dense rolls.
- Step 6: Bake Preheat the oven to 375°F (190°C). Bake the rolls for 20–25 minutes, or until golden brown and a toothpick comes out clean. The aroma will fill the kitchen like a holiday wreath.
- Step 7: Prepare the Glaze While the rolls are baking, whisk together 2 cups powdered sugar, 1 tsp peppermint extract, 1–2 tbsp milk or heavy cream, and 2 tbsp chocolate sauce. The glaze should be thick but pourable. If it’s too thick, add a little more milk; if too thin, add more powdered sugar.
- Step 8: Glaze the Rolls As soon as the rolls come out of the oven, drizzle the glaze over each one, letting it pool on the sides. Sprinkle 1/2 cup crushed peppermint bark or candy canes on top for crunch. Allow the glaze to set for 5 minutes before serving.
- Step 9: Final Touches If you like a glossy finish, lightly brush the tops with a little extra glaze. Serve warm, preferably with a cup of coffee or hot cocoa. The rolls should be soft, fragrant, and the glaze should have a slight sheen.
- Step 10: Enjoy Taste a roll and let the flavors dance on your tongue. The cinnamon, butter, and peppermint should harmonize like a choir of holiday carols. Remember, I dare you to taste this and not go back for seconds.
Insider Tricks for Flawless Results
The Temperature Rule Nobody Follows
The dough’s rise is all about temperature. Too hot, and the yeast kills itself; too cold, and the dough never rises. Aim for 110°F (43°C) when activating the yeast, and keep the dough in a draft‑free spot. If you’re in a cooler kitchen, wrap the bowl in a towel to retain warmth.
Why Your Nose Knows Best
Trust your nose to tell you when the dough is ready. A sweet, yeasty scent indicates a good rise. If the smell is sour or off, the yeast may have gone bad or the dough didn’t have enough time to ferment.
The 5-Minute Rest That Changes Everything
After glazing, let the rolls rest for exactly 5 minutes before serving. This short pause allows the glaze to set, preventing it from sliding off when you cut into the roll. The result is a perfect bite every time.
Use a Silicone Mat
A silicone baking mat prevents the rolls from sticking and makes cleanup a breeze. It also creates an even baking surface, ensuring each roll browns uniformly.
Keep the Oven Door Closed
Opening the oven door frequently during the bake causes temperature fluctuations that can lead to uneven cooking. Keep the door closed, and use the oven light to monitor progress.
Add a Splash of Water to Reheat
If you’re reheating leftover rolls, add a tiny splash of water to the baking sheet before placing them in the oven. The steam will keep the rolls moist and prevent them from drying out.
Creative Twists and Variations
This recipe is a playground. Here are some of my favorite ways to switch things up:
Cranberry Orange Twist
Swap the peppermint bark for dried cranberries and add a splash of orange zest to the glaze. The tartness balances the sweet dough, creating a holiday flavor that’s both bright and comforting.
Almond Joy Roll
Add shredded coconut and chopped almonds to the filling. Replace the peppermint glaze with a caramel‑coconut drizzle. The result is a roll that feels like a dessert bar.
Chocolate Chip Surprise
Fold in chocolate chips into the dough before rolling. Keep the peppermint glaze but add a drizzle of dark chocolate on top for an extra indulgent bite.
Spiced Carrot Roll
Add grated carrot and a pinch of nutmeg to the dough. The carrot adds moisture, while the nutmeg gives a warm, spicy note that complements the cinnamon.
Lemon Poppy Seed
Replace the brown sugar with lemon‑infused sugar and add poppy seeds to the dough. A light lemon glaze with a hint of vanilla creates a bright, citrusy finish.
Savory Herb Roll
For a savory take, omit the sugar in the filling and add chopped fresh herbs like rosemary or thyme. Finish with a sprinkle of sea salt and a drizzle of olive oil for a breakfast that’s both savory and sweet.
Storing and Bringing It Back to Life
Fridge Storage
Store leftover rolls in an airtight container at room temperature for up to 3 days. If you need them longer, refrigerate them in a sealed bag. The rolls will stay soft, and the glaze will remain intact.
Freezer Friendly
Wrap individual rolls tightly in plastic wrap and place them in a freezer bag. They’ll keep for up to 2 months. Thaw overnight in the refrigerator before reheating.
Best Reheating Method
Reheat in a preheated oven at 350°F (175°C) for 10 minutes, or until warmed through. Add a splash of water to the baking sheet to keep the rolls moist. The glaze will soften slightly, creating a fresh, melt‑in‑your‑mouth experience.