I still remember the year I swore off holiday baking forever. There I stood in my tiny kitchen, flour in my hair, three failed batches of sugar cookies cooling into hockey pucks on my counter, and a party starting in two hours. My neighbor Barb chose that exact moment to waltz in with a plate of these unassuming little cookies that looked like they'd been rolled in fresh snow. One bite and I was ruined for every other Christmas cookie I'd ever met. The edges had that delicate snap of a perfectly baked shortbread, but the centers? Pure molten magic that tasted like someone had condensed all the joy of December into one impossibly soft, tangy-sweet bite.
Here's where things get interesting — these aren't your grandmother's butter cookies (unless your grandmother was a genius who discovered that cream cheese and cake mix could create something bordering on illegal). The chemistry here is wild: the cream cheese keeps the centers almost custardy while the cake mix creates this crackly, sugary exterior that shatters like thin ice under your teeth. When you pull them from the oven, they'll look almost underbaked — that's your cue to channel every ounce of self-control you possess and wait exactly five minutes before transferring them to a rack. I dare you to taste one warm and not immediately question every life choice that led you to believe other cookies were worth your time.
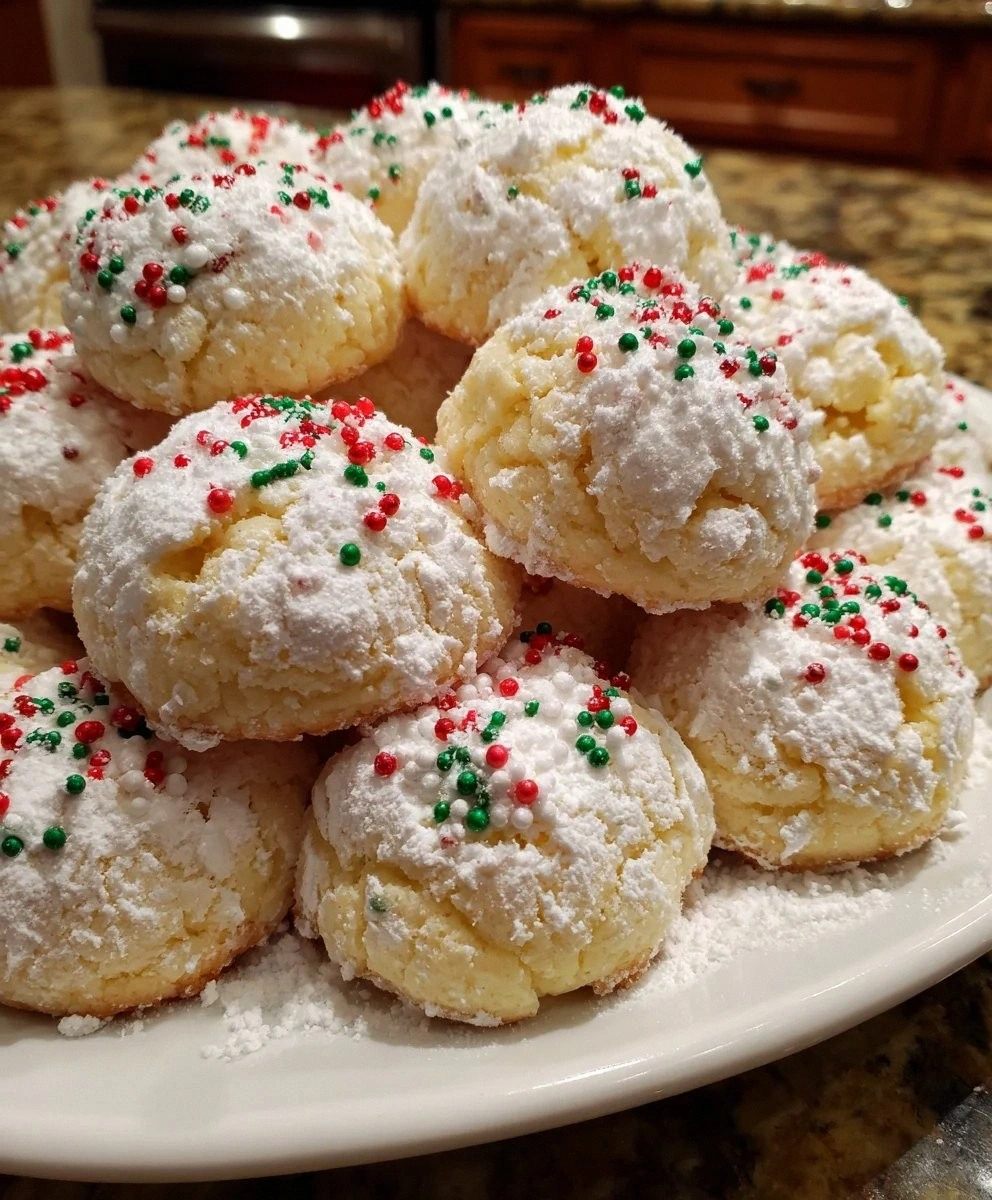
What makes these particularly dangerous is how deceptively simple they seem. Six ingredients, one bowl, twenty minutes of active work — that's it. But the result tastes like you spent hours in a French pastry lab. The red and green sprinkles melt into tiny jeweled pockets on the surface, making each cookie look like a miniature Christmas ornament you can eat. The powdered sugar coating creates this dreamy, snow-dusted effect that practically begs for a mug of hot cocoa and a crackling fire. I'll be honest — I ate half the batch before anyone else got to try them, and I'm not even sorry because I know you'll do the exact same thing once you taste these.
Picture yourself pulling these out of the oven, the whole kitchen smelling like vanilla and butter and everything right with the world. The cookies will still be puffed and pale, looking nothing like the golden beauties they'll become. That's when you'll understand why I've made these every single Christmas since Barb saved my sanity. Let me walk you through every single step — by the end, you'll wonder how you ever made it any other way.
What Makes This Version Stand Out
Texture Perfection: Most butter cookies are either crisp throughout or soft and cakey. These deliver both worlds — crispy, sugar-crackled edges give way to centers so gooey they practically melt on your tongue like cotton candy. The secret lies in the cream cheese, which creates pockets of tangy richness that keep the middles soft even after cooling.
Foolproof Simplicity: Traditional butter cookies require chilling, rolling, cutting, and praying they hold their shape. This dough comes together in one bowl, requires zero chilling, and bakes into perfect rounds every single time. Even my friend who once burned water managed to nail these on her first try.
Make-Ahead Magic: Mix the dough on Sunday, roll into balls, freeze them raw, and you've got instant Christmas cookies ready to bake whenever surprise guests show up with wine and good intentions. They go from frozen to plate in under fifteen minutes, making you look like the most prepared host in history.
Crowd Psychology: I've watched grown adults fight over the last cookie like it was the last lifeboat on the Titanic. Something about that sweet-tangy flavor profile with the festive sprinkles triggers pure childhood joy in everyone who tries them. They're the first to disappear at every cookie swap, guaranteed.
Ingredient Integrity: Using real cream cheese (not the spreadable kind in tubs) and pure vanilla extract makes a difference you can taste. This isn't the place for shortcuts — quality ingredients shine through in such a simple recipe, creating depth that surprises people who expect "just another cake mix cookie."
Visual Impact: These look professional bakery expensive with practically zero effort. The powdered sugar creates a stunning contrast against the colorful sprinkles, making them photograph-worthy for your holiday Instagram without any fancy piping skills required.
Alright, let's break down exactly what goes into this masterpiece...
Inside the Ingredient List
The Flavor Foundation
Unsalted butter is the backbone here, providing rich dairy notes that support all the other flavors without competing with salt levels. When properly softened to room temperature, it creams into the sugar creating tiny air pockets that give these cookies their tender crumb. Skip the cheap stuff and spring for European-style butter with higher fat content — your taste buds will throw a party. If you absolutely must use salted butter, omit any additional salt from the recipe and know that you're missing out on the pure, sweet cream flavor that makes these special.
Cream cheese brings the signature tang that balances all that sweetness and creates the gooey texture that makes people close their eyes when they bite in. Full-fat is non-negotiable — reduced-fat versions contain stabilizers that affect both flavor and texture, leaving you with cookies that taste diet and bake up dense. The cheese should be soft enough to leave an imprint when you press it but not so warm it's melting. Pro tip: cut it into small cubes and let it sit out while you gather other ingredients for even softening.
The Sweetening Agents
Yellow cake mix isn't just convenience — it's scientifically engineered to create perfect texture every time. The emulsifiers in the mix help bind everything together while the added sugar and vanilla create depth you'd spend hours building from scratch. Don't get fancy with butter pecan or chocolate here — plain yellow is what creates that nostalgic flavor that tastes like Christmas morning. If you're feeling rebellious, white cake mix works but creates paler cookies that don't look as festive.
Powdered sugar serves double duty here — mixed into the dough it dissolves instantly for smooth sweetness, while the coating creates that signature snow-covered look and adds a delicate crunch. The cornstarch in powdered sugar also helps prevent spreading, keeping your cookies thick and chewy. Sift it if it's lumpy, because nobody wants to bite into a pocket of dry sugar that hasn't incorporated properly.
The Holiday Magic
Red and green sprinkles aren't just decorative — they add tiny bursts of sweetness and a slight crunch that contrasts beautifully with the soft cookie. Use old-fashioned jimmies rather than nonpareils, which bleed their colors and turn your dough into a muddy mess. The sprinkles you choose actually affect the final flavor, so skip the waxy dollar store versions that taste like crayons. If you want to get fancy, look for naturally colored sprinkles that use vegetable dyes for more subtle, sophisticated hues.
The Binding Elements
One large egg might seem insignificant, but it's doing serious structural work here. The proteins coagulate during baking, giving the cookies just enough structure to hold together while the centers stay molten. Room temperature eggs incorporate more evenly, preventing streaky batter and ensuring consistent texture throughout. If you forget to pull it out early, submerge the egg in warm water for five minutes to bring it up to temp quickly.
Vanilla extract is your flavor amplifier, rounding out all the other tastes and adding warmth that makes these taste homemade rather than straight from a mix. Use real extract, not artificial — the difference is immediately apparent in such a simple recipe where every ingredient shines through. Madagascar vanilla adds floral notes, while Mexican brings spicier tones that complement the cream cheese beautifully.
Everything's prepped? Good. Let's get into the real action...
The Method — Step by Step
- Preheat your oven to 350°F and position the rack in the center. Most recipes get this wrong — they blast cookies at higher temperatures, which sets the edges before the centers have a chance to get gooey. While it's heating, line two baking sheets with parchment paper, but don't get cocky and skip this step like my cousin Mike did. His cookies welded themselves to the pan so permanently he considered throwing the whole sheet away rather than scrubbing for three hours.
- In a large bowl, beat the softened butter and cream cheese together until completely smooth, about two full minutes. This is where patience pays off — you want no visible lumps of cream cheese remaining, just a pale, fluffy cloud that looks like it belongs in a dairy commercial. The mixture should lighten in color and increase slightly in volume as you incorporate air. If you're still seeing white flecks after two minutes, keep going — those won't disappear during baking and will create weird pockets in your finished cookies.
- Beat in the egg and vanilla extract until fully incorporated, scraping down the bowl at least once. The batter might look slightly curdled at first — that's just the egg proteins reacting with the fat, and it will smooth out as you continue mixing. Don't panic and start over like I did the first time. The mixture should be pale yellow and silky smooth when you're done, with no streaks of egg white visible.
- Add the entire box of yellow cake mix and beat on low speed just until combined. Overmixing develops the gluten in the flour, leading to tough cookies that could double as hockey pucks. The dough will be thick and slightly sticky, more like play-doh than traditional cookie dough. If you find yourself thinking "this can't be right, it's too thick," congratulations — you've got it perfect.
- Scoop tablespoon-sized portions of dough and roll them between your palms into perfect spheres. The dough should feel cool and pliable, not sticky. If it's sticking to your hands like crazy, dust your palms with a tiny bit of powdered sugar. Place the balls on your prepared sheets about two inches apart — they spread more than you'd expect, and cookie blobs touching each other are nobody's idea of festive.
- Pour the powdered sugar into a shallow bowl and roll each dough ball until completely coated, really packing it on. Don't be shy here — that thick sugar coating is what creates the signature crackly top as the cookies bake and expand. I like to roll them once, then re-roll for a double coat that looks like they've been dusted by a tiny snowstorm. The sugar will seem excessive, but trust the process.
- Gently press three to five red and green sprinkles onto the top of each cookie. Press them in slightly so they adhere during baking but don't flatten the dough. The heat will melt the sprinkles just enough to create jewel-toned pools that look like stained glass windows. Too many sprinkles and you'll overwhelm the delicate flavor — restraint here creates elegance.
- Bake for 10-12 minutes, rotating the pans halfway through. This is the moment of truth — you're looking for cookies that look slightly underbaked in the centers with just the faintest golden blush around the bottom edges. They should still be puffed and pale on top, with the powdered sugar forming delicate cracks across the surface. If you wait until they're golden brown, you've gone too far and will have crispy cookies instead of the gooey centers that make these legendary.
- Cool on the baking sheet for exactly five minutes — set a timer because this step is crucial. Too short and they'll fall apart when you move them; too long and they'll stick to the parchment. During this time they'll deflate slightly and develop that perfect chewy edge. Transfer to a wire rack to cool completely, though I'll be impressed if any make it that far before disappearing.
That's it — you did it. But hold on, I've got a few more tricks that'll take this to another level...
Insider Tricks for Flawless Results
The Temperature Rule Nobody Follows
Room temperature doesn't mean "I took it out of the fridge five minutes ago" — it means the cream cheese should feel like a baby's cheek when you press it gently. Too cold and you'll overmix trying to get rid of lumps, creating tough cookies. Too warm and the dough will be greasy and spread into sad little puddles. The butter should bend slightly when pressed but still hold its shape. If it's melting around the edges, it's too soft and your cookies will flatten out like pancakes. I've found 68-70°F is the sweet spot that creates the perfect texture every time.
Why Your Nose Knows Best
Forget timers — your nose is the most reliable tool in your kitchen arsenal. When these cookies are perfectly baked, your kitchen will smell like a vanilla cloud descended from heaven. If you start smelling butter browning, you've gone too far and need to pull them immediately. The first time I trusted my nose over the timer, I pulled cookies that looked too pale but had that perfect gooey center. My guests raved so much that now I bake by scent alone, and it's never failed me.
The 5-Minute Rest That Changes Everything
I know it's torture, but letting the cookies rest on the hot pan for exactly five minutes is what creates that perfect contrast between crispy edges and molten centers. During this time, the residual heat continues cooking the centers while the edges set up enough to hold together when moved. A friend tried skipping this step once — let's just say it didn't end well, and she ended up serving cookie soup with a spoon. The patience pays off in texture that's worth every second of waiting.
The Storage Secret
These cookies actually improve after sitting overnight — the flavors meld and deepen while the texture settles into perfect chewy-gooey harmony. Store them in an airtight container with a small piece of bread to maintain moisture. The bread trick works like magic, keeping your cookies soft for up to five days. Just don't use rye bread like I accidentally did once — your cookies will taste like a sandwich.
The Freezer Hack
Roll the dough balls, coat them in powdered sugar, then freeze them on a baking sheet. Once solid, throw them in a freezer bag and you've got instant Christmas cookies for the next three months. Bake them straight from frozen — just add 2-3 minutes to the baking time. I keep a bag hidden in my freezer for emergency gifts or those nights when only warm cookies will solve life's problems.
Creative Twists and Variations
This recipe is a playground. Here are some of my favorite ways to switch things up:
The Chocolate Lover's Dream
Swap the yellow cake mix for chocolate fudge and add mini chocolate chips to the dough. The cream cheese creates this amazing contrast against the rich chocolate, and the powdered sugar coating looks like snow on a chocolate mountain. Use white and red sprinkles for a peppermint vibe that tastes like the holidays exploded in your mouth. If you've ever struggled with chocolate cookies that taste flat, the cream cheese here adds depth that makes them taste bakery-professional.
The Lemon Snow Cloud
Use lemon cake mix and add a teaspoon of fresh lemon zest to the dough. The tartness cuts through all that sweetness and creates cookies that taste like sunshine in winter. Dust them with extra powdered sugar and use yellow and white sprinkles for a sophisticated look that belongs on a Martha Stewart cover. These are particularly dangerous because they don't taste as rich as they are, so you eat twice as many before realizing what you've done.
The Salted Caramel Dream
Use butter pecan cake mix and press a caramel candy into the center of each dough ball before baking. The caramel melts into a molten core that combines with the cream cheese for the most indulgent cookie experience of your life. Finish with a sprinkle of flaky sea salt on top right when they come out of the oven. If you thought the original version was addictive, these will ruin all other desserts for you permanently.
The Birthday Party Remix
Use funfetti cake mix and rainbow sprinkles for cookies that taste like childhood happiness. These are what you bring to office parties when you want to be everyone's favorite person. The colorful sprinkles melt into tiny puddles of color that look like confetti frozen mid-celebration. They're so cheerful that even grumpy Uncle Bob can't help but smile when he bites into one.
The Spice Market Special
Use spice cake mix and add a pinch of cardamom to the dough. The warm spices complement the cream cheese beautifully, creating cookies that taste like Christmas morning in a cozy cabin. Use gold and burgundy sprinkles for an elegant look that belongs on a holiday magazine cover. These are sophisticated enough for your foodie friends but familiar enough that kids devour them too.
The Peanut Butter Cup
Use yellow cake mix but swap half the cream cheese for peanut butter. The combination creates this amazing sweet-salty flavor that's completely irresistible. Press a mini peanut butter cup into the center of each cookie right when they come out of the oven. The chocolate melts slightly and creates this incredible contrast with the powdered sugar coating. Warning: these disappear faster than any other version I've made.
Storing and Bringing It Back to Life
Fridge Storage
Store cooled cookies in an airtight container in the refrigerator for up to one week. The cold actually intensifies the cream cheese flavor and creates an almost cheesecake-like experience. Let them come to room temperature for 15 minutes before serving, or embrace the cold and eat them straight from the fridge like my sister does. Layer them between sheets of parchment paper to prevent sticking, and add a small piece of bread to absorb excess moisture and keep them soft. The powdered sugar coating might absorb slightly, but a fresh dusting before serving brings back that beautiful snow-covered look.
Freezer Friendly
These freeze beautifully either baked or unbaked. For baked cookies, cool completely, then freeze in a single layer before transferring to a freezer bag. They'll keep for up to three months and thaw in about 30 minutes at room temperature. For unbaked dough, roll into balls, coat with powdered sugar, and freeze on a baking sheet before storing in bags. Bake from frozen, adding 2-3 minutes to the time. The texture is actually slightly better when baked from frozen — the centers stay even gooier while the edges get crisp. Pro tip: hide a bag in the back of your freezer for emergencies, because nothing solves a bad day like warm cookies in 12 minutes flat.
Best Reheating Method
Microwave one cookie for 8-10 seconds to recreate that fresh-from-the-oven experience. Don't overdo it or you'll have a molten mess that requires a spoon and a fire extinguisher. For multiple cookies, wrap them in foil and warm in a 300°F oven for 5-7 minutes. Add a tiny splash of water to the foil packet before sealing — it steams them back to perfection. Never reheat them naked in the oven or the powdered sugar will brown and taste burnt. These methods restore that perfect contrast between crisp edges and molten centers, making yesterday's cookies taste like you just baked them fresh.