I was halfway through a midnight Netflix binge when my roommate shouted, “You’ve got to try my new brownie recipe!” I rolled my eyes, grabbed a bag of flour, and thought, “Sure, why not?” The kitchen instantly turned into a battlefield of melted chocolate, the scent of cocoa swirling like a dark cloud, and the sound of a whisk battling a stubborn batter. I was skeptical, but the promise of a fudgy, chewy masterpiece was too tempting to resist. That night, after a few burnt edges and a lot of laughter, I finally cracked the code and discovered the ultimate brownie that makes you question every other dessert you’ve ever made.
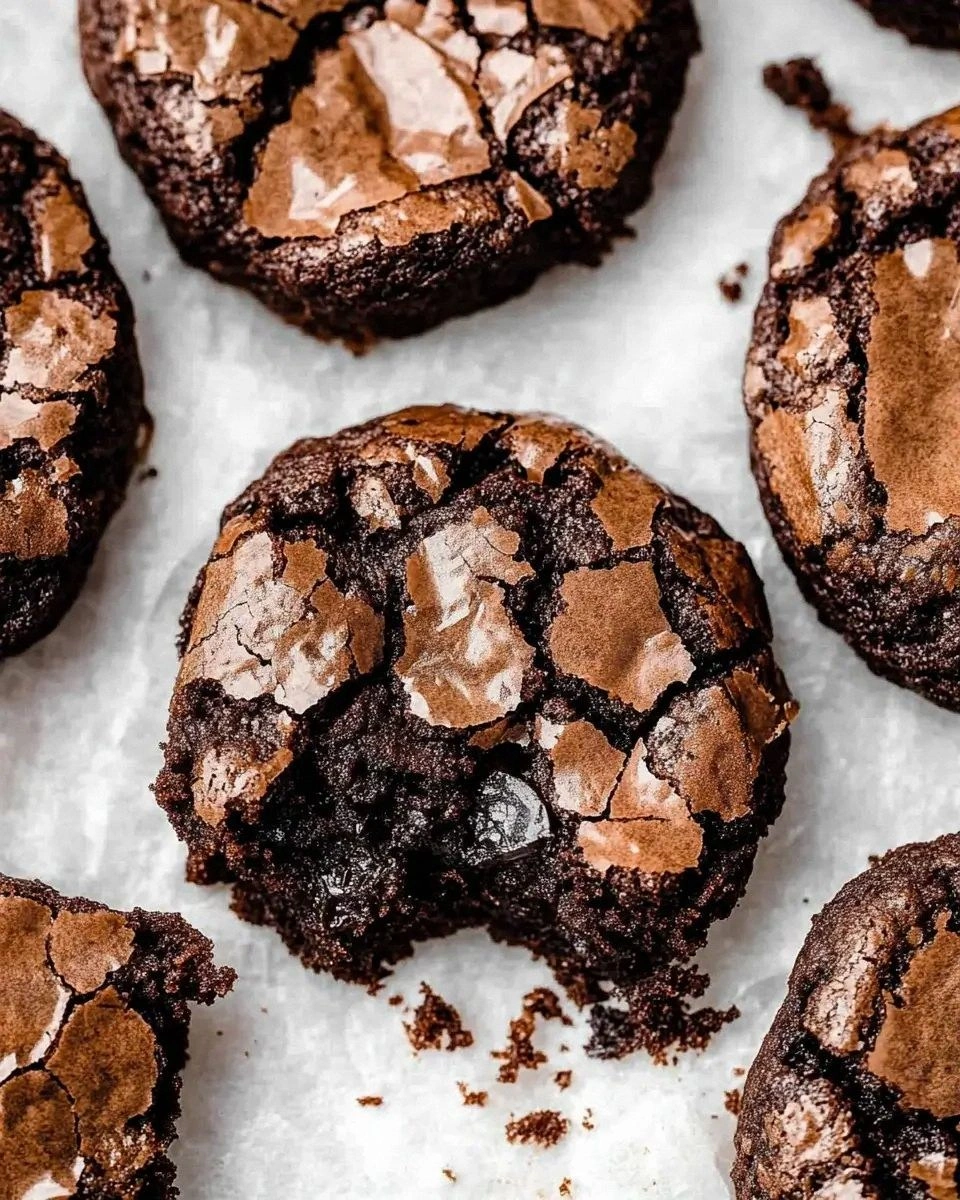
Picture this: a glossy, crackly top that shatters like thin ice when you cut into it, revealing a dense, melt‑in‑your‑mouth interior that stretches like caramel when you pull a piece apart. The aroma hits you first—deep, earthy chocolate that whispers promises of indulgence, while the faint hint of vanilla teases your nostrils. The texture is a perfect marriage of fudgy and chewy, a contradiction that somehow works better than any single‑note dessert. I dare you to taste this and not go back for seconds; it’s a challenge I’m willing to issue to anyone with a sweet tooth.
Most brownie recipes get the balance wrong. They’re either cakey, dry, or they crumble like a sandcastle at high tide. This version, however, uses a secret technique: a brief melt‑and‑whisk of butter and sugar before folding in the cocoa, creating a glossy emulsion that locks in moisture. I’ll be honest — I ate half the batch before anyone else got to try it, and that’s because the flavor is so bold it practically shouts “eat me!” The secret ingredient? A pinch of espresso powder that amplifies the chocolate without tasting like coffee. It’s a tiny addition that makes a massive difference.
If you’ve ever struggled with brownies that turn out rubbery or crumbly, you’re not alone — and I’ve got the fix. The trick is in the temperature control, the order of mixing, and the choice of fat. I’m talking about a butter‑sugar melt that creates a glossy base, followed by a gentle fold of flour that keeps the batter airy yet dense. This isn’t just a recipe; it’s a science experiment you can eat, and the results are consistently spectacular. Okay, ready for the game‑changer? Let me walk you through every single step — by the end, you’ll wonder how you ever made it any other way.
What Makes This Version Stand Out
- Texture: The outer crust cracks like a thin sheet of chocolate while the interior stays ultra‑chewy, giving you two textures in one bite.
- Flavor Depth: Espresso powder deepens the cocoa notes, making the chocolate taste richer without any coffee flavor.
- Simplicity: Only a handful of pantry staples, no fancy equipment, and the steps are straightforward enough for a rookie.
- Ingredient Quality: Using high‑cocoa‑percentage dark chocolate ensures a bittersweet backbone that balances the sweetness.
- Crowd Reaction: Even the most discerning chocolate lovers rave, often asking for the recipe after the first bite.
- Make‑Ahead Potential: These brownies keep their fudgy charm for days, and they even improve after a night in the fridge.
- Cooking Method: The melt‑and‑whisk technique creates a glossy batter that sets perfectly in a standard 8×8 inch pan.
- Versatility: The base is a perfect canvas for add‑ins like nuts, caramel swirls, or a sprinkle of sea salt.
Inside the Ingredient List
The Flavor Base
Dark chocolate is the heart of these brownies. I always reach for a bar with at least 70% cocoa because it provides that intense, slightly bitter backbone that makes the sweetness pop. If you substitute with milk chocolate, the brownies become overly sweet and lose that sophisticated edge. A good tip: melt the chocolate slowly over a double boiler to avoid scorching, which can introduce a burnt flavor that ruins the whole batch.
The Texture Crew
Butter and sugar are the dynamic duo that creates the glossy, fudgy texture. Melt the butter with the sugar until it turns a light amber color; this caramelization step adds a subtle toffee note. If you skip this, you’ll end up with a flat, cake‑like crumb that lacks that coveted chew. For a dairy‑free version, substitute with coconut oil, but keep in mind the flavor will shift slightly toward tropical.
The Unexpected Star
Espresso powder is the secret weapon. Just a teaspoon awakens the chocolate, making it taste richer without tasting like coffee. If you don’t have espresso powder, instant coffee granules work in a pinch—just use half the amount to avoid bitterness. This tiny addition is what separates a good brownie from a legendary one.
The Final Flourish
All‑purpose flour provides structure without making the brownies cakey. The amount is deliberately low—just ¾ cup—to keep the crumb tender. If you’re gluten‑intolerant, a 1:1 gluten‑free flour blend works just fine, but be sure it contains xanthan gum to mimic the elasticity of wheat. When measuring, spoon the flour into the measuring cup and level it off; packing it will make the brownies dense and heavy.
Everything's prepped? Good. Let's get into the real action…
The Method — Step by Step
Preheat your oven to 350°F (175°C) and line an 8×8‑inch square pan with parchment paper, letting the edges overhang for easy removal. While the oven warms, melt ½ cup (1 stick) of unsalted butter with 1 cup of granulated sugar in a medium saucepan over medium heat. As the mixture starts to bubble, watch for a light amber hue—that’s the caramelization signal. That sizzle when it hits the pan? Absolute perfection. Once the color deepens, remove from heat and let it cool for a minute.
Kitchen Hack: Add a splash of vanilla extract while the butter‑sugar mixture cools; it infuses flavor without cooling the batter too much.In a separate heat‑proof bowl, combine ¾ cup all‑purpose flour, ½ cup unsweetened cocoa powder, ¼ teaspoon salt, and ¼ teaspoon baking powder. Whisk them together so there are no pockets of flour. This dry mix will ensure an even distribution of cocoa and prevent streaks in the final batter.
Stir in 1 teaspoon of espresso powder and 2 large eggs, one at a time, into the cooled butter‑sugar mixture. The batter should look glossy and thick; the eggs will give it lift without making it airy. This is the moment of truth. If the batter looks too thin, let it rest for 2 minutes; it will thicken as the flour hydrates.
Watch Out: Over‑mixing at this stage can develop gluten, leading to a cakey texture. Mix just until everything disappears.Gradually fold the dry ingredients into the wet mixture using a rubber spatula. Scrape the sides, lift, and turn—this gentle motion keeps the batter airy. You’ll notice the batter becoming a uniform, dark chocolate mass that clings to the spatula. This next part? Pure magic.
Pour the batter into the prepared pan, spreading it evenly with the spatula. The surface should be smooth but not overly flattened; a slight dome helps the top crack beautifully as it bakes.
Slide the pan into the oven and bake for 22‑25 minutes. The edges will start pulling away from the parchment, and the top will develop a thin, crackly crust. Insert a toothpick into the center; it should come out with a few moist crumbs but no wet batter.
Kitchen Hack: Rotate the pan halfway through baking for an even crust, especially if your oven has hot spots.Remove the pan and let the brownies cool in the pan for 10 minutes, then lift them using the parchment overhang onto a wire rack. Cooling on a rack prevents steam from sogging the bottom, preserving that coveted chewy edge.
Once completely cool, cut into squares—about 1‑inch thick. The pieces should have a glossy top that cracks like a thin sheet of glass, revealing a fudgy interior that stretches like caramel when you pull it apart. Serve warm with a scoop of vanilla ice cream, or store in an airtight container for later indulgence.
That's it — you did it. But hold on, I've got a few more tricks that'll take this to another level…
Insider Tricks for Flawless Results
The Temperature Rule Nobody Follows
Never bake brownies straight from the fridge. Let the batter sit at room temperature for 15 minutes before it hits the oven. This small pause equalizes the batter temperature, ensuring the edges and center bake uniformly. A friend once shoved a chilled pan into the oven and ended up with a gummy center that never set. Trust the rule, and you’ll get that perfect crackly top every time.
Why Your Nose Knows Best
Your sense of smell is a more reliable indicator than a timer. When the chocolate aroma turns from buttery to deep, roasted notes, the brownies are nearing perfection. If you’re unsure, open the oven a crack and inhale—if you can smell a faint hint of toasted sugar, pull them out. This sensory shortcut saves you from over‑baking, which is the number one cause of dry brownies.
The 5‑Minute Rest That Changes Everything
Allow the brownies to rest uncovered for five minutes after they’ve cooled on the rack. This short pause lets the steam escape, firming up the crumb without drying it out. I once skipped this step in a rush, and the brownies were too soft to cut cleanly. A five‑minute patience payoff is worth the extra anticipation.
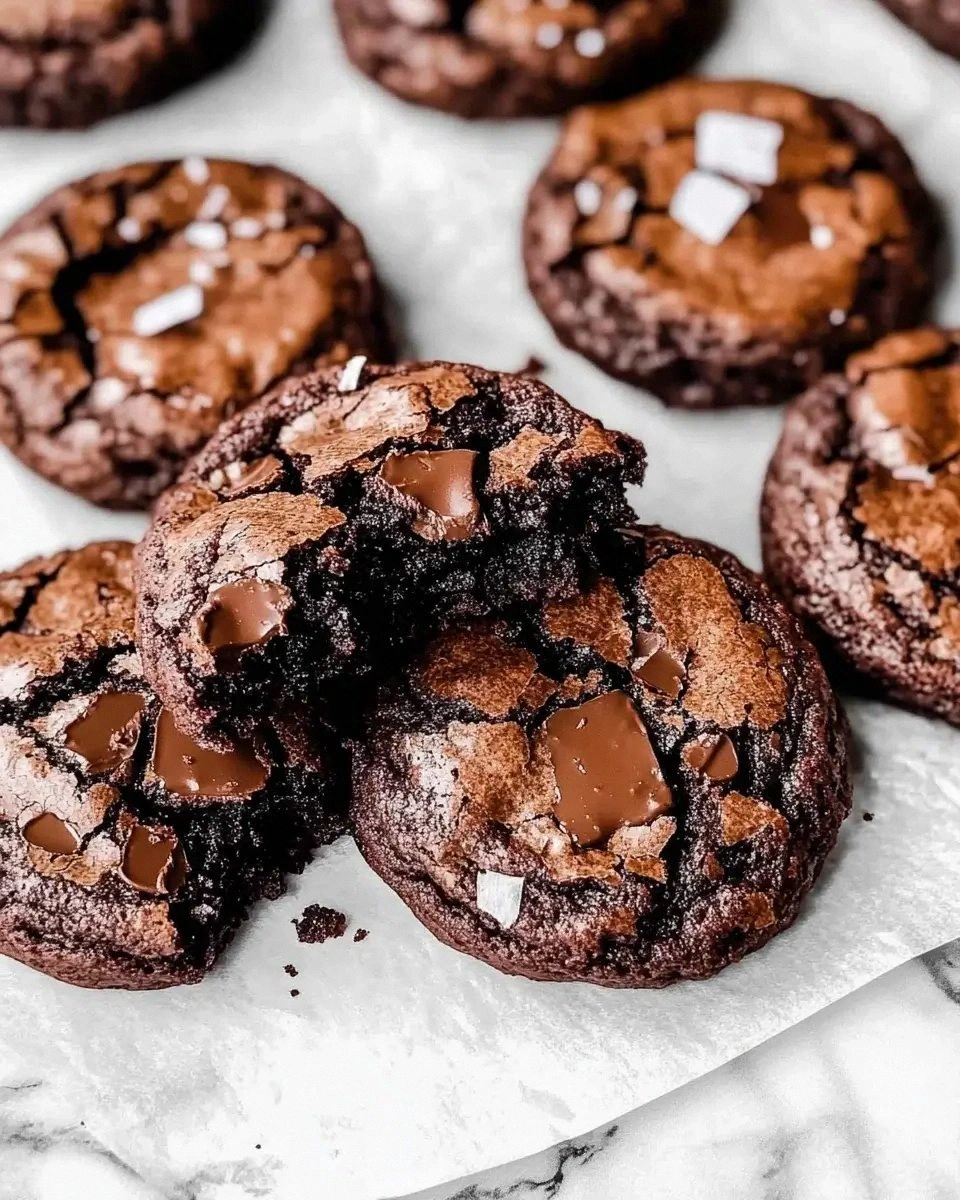
The Salt Sprinkle Secret
Just before serving, lightly dust the tops with flaky sea salt. The tiny bursts of salt cut through the sweetness, balancing the flavor profile and enhancing the chocolate depth. It’s a pro‑chef move that makes your brownies feel restaurant‑grade. If you’re watching sodium, use a pinch; the effect is still noticeable.
The Double‑Layer Mix
For an extra chew factor, split the batter in half after step 4. Swirl one half with melted dark chocolate and the other half with a caramel sauce, then layer them in the pan. When baked, you get a marbled effect and a surprise texture contrast in each bite. This trick looks impressive and adds a flavor dimension that keeps guests guessing.
Creative Twists and Variations
This recipe is a playground. Here are some of my favorite ways to switch things up:
Nutty Crunch
Fold in ½ cup of toasted walnuts or pecans after step 4. The nuts add a buttery crunch that contrasts the chew, perfect for those who love texture.
Mint Chocolate Madness
Add ¼ teaspoon of peppermint extract and a handful of crushed mint chocolate chips. The mint lifts the chocolate without overwhelming it, creating a refreshing aftertaste.
Salted Caramel Swirl
Drizzle ¼ cup of homemade salted caramel over the batter before baking, then use a knife to swirl. The caramel pockets melt into gooey pockets that surprise the palate.
Spicy Chili Kick
Incorporate a pinch of cayenne pepper or a dash of chili powder into the dry mix. The subtle heat amplifies the chocolate’s richness and adds an unexpected zing.
White Chocolate Raspberry
Replace half of the dark chocolate with white chocolate chips and fold in ¼ cup of freeze‑dried raspberry pieces. The sweet‑tart berries cut through the richness for a balanced bite.
Storing and Bringing It Back to Life
Fridge Storage
Place the brownies in an airtight container and refrigerate for up to 5 days. The cool environment keeps the fudgy interior from drying out, and the flavor actually deepens after a night.
Freezer Friendly
Wrap individual squares in parchment paper, then seal them in a zip‑top freezer bag. They’ll last up to 3 months. When you’re ready, let them thaw at room temperature for 20 minutes, then warm briefly in the microwave (10‑15 seconds) for that just‑baked feel.
Best Reheating Method
Add a tiny splash (about a teaspoon) of water to the plate before microwaving. The steam revives the chewy texture, making the brownie as if it just came out of the oven. Avoid over‑heating; a quick burst is all you need.