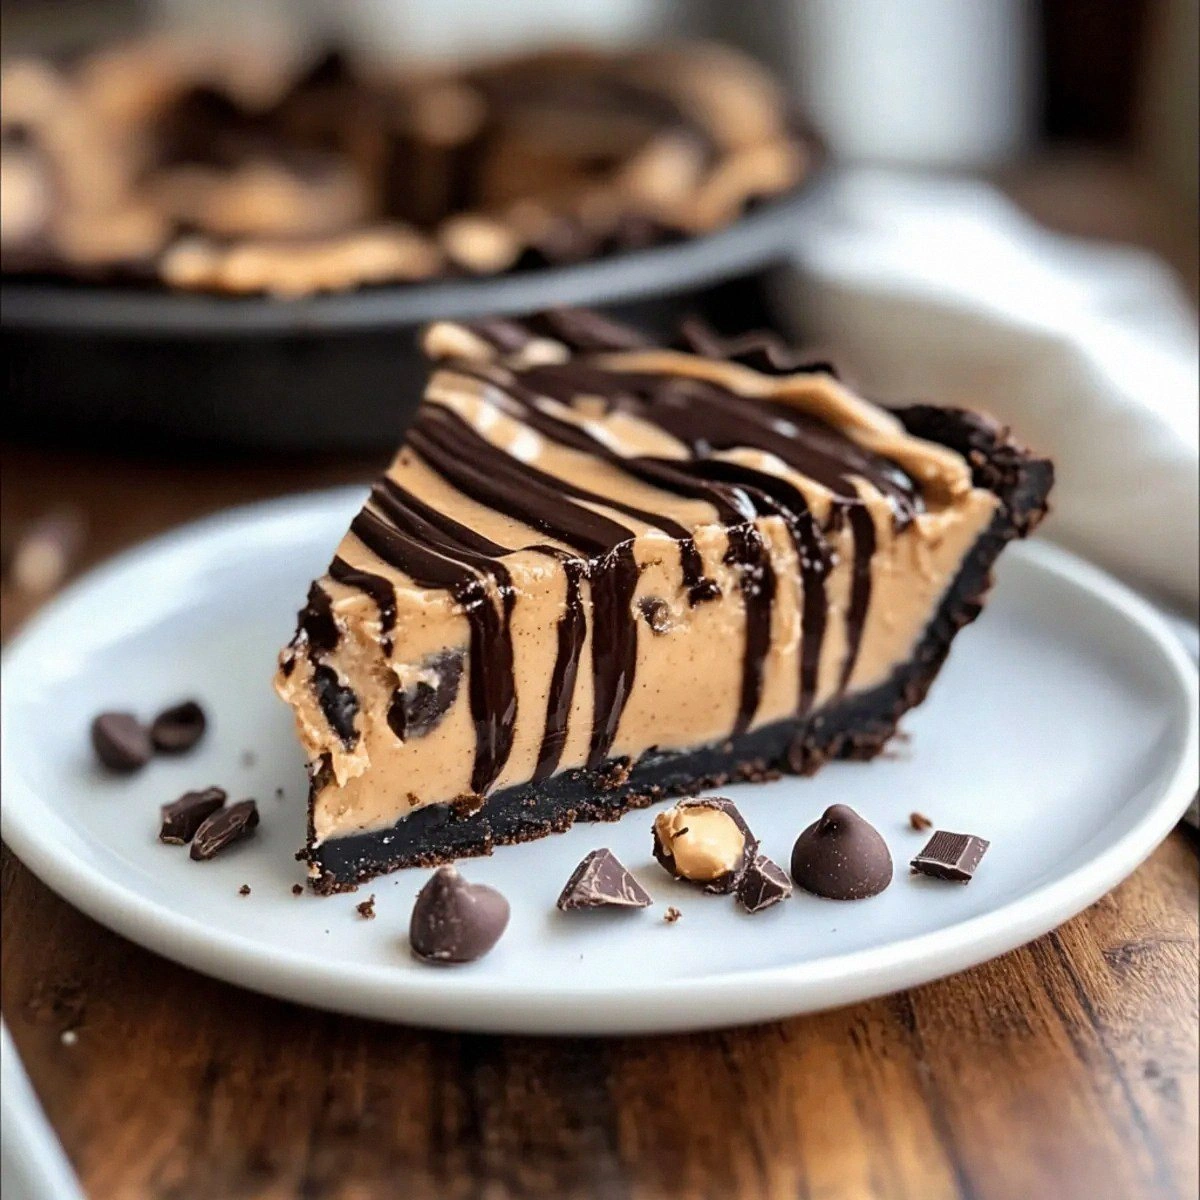
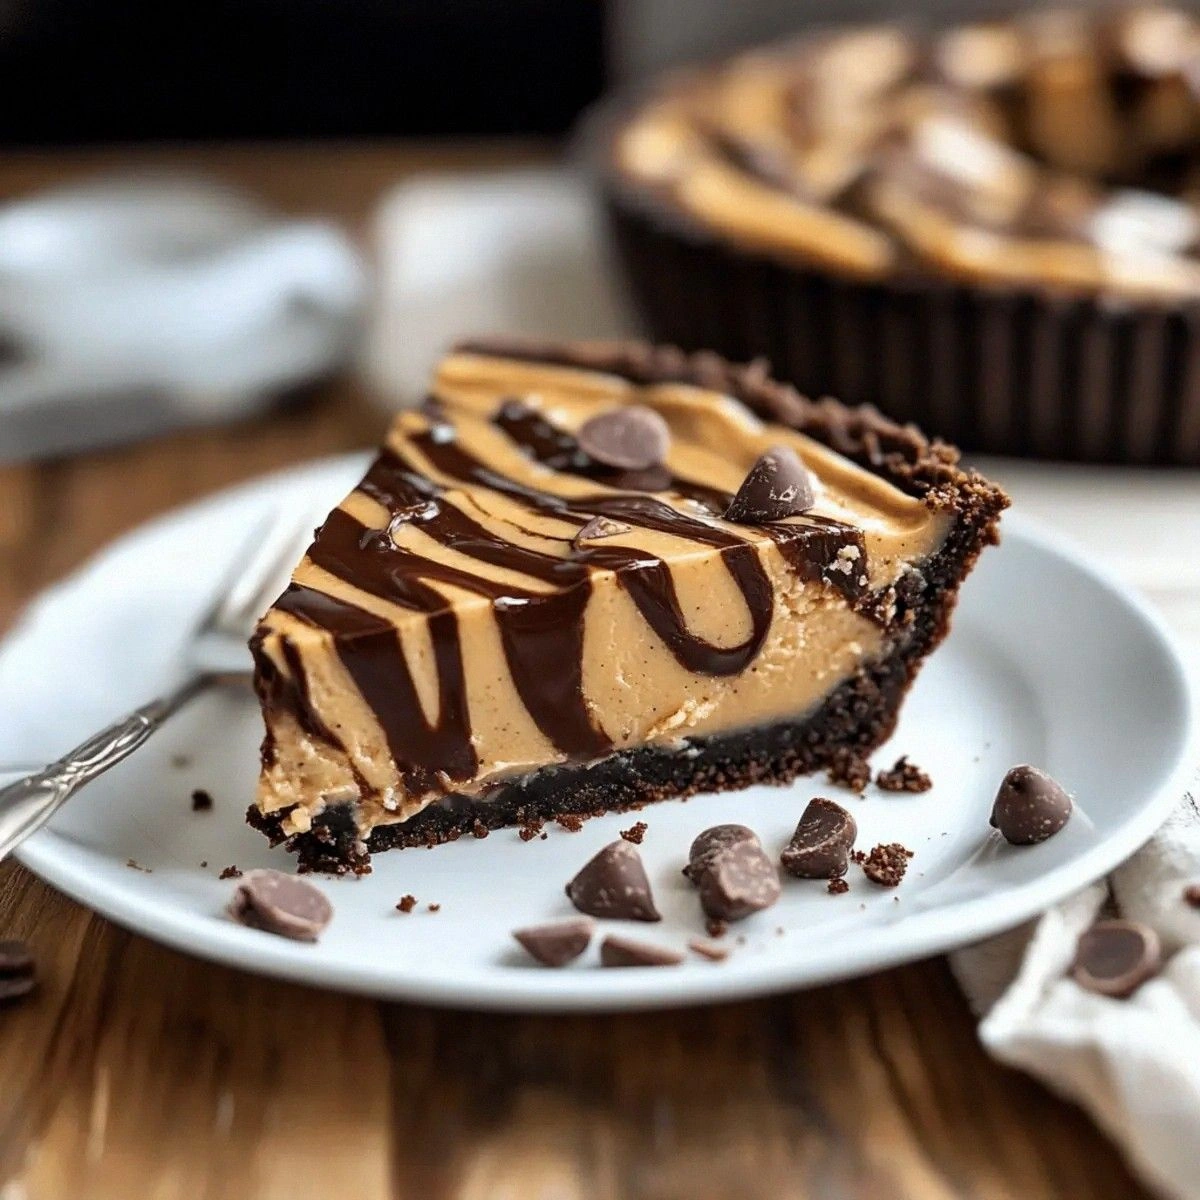
Picture this: a buttery chocolate cookie crust that crumbles like a fresh‑baked brownie, a silky peanut butter filling that spreads across the tongue like velvet, and a glossy chocolate ganache that shimmers like a midnight lake. The aroma alone is enough to make your mouth water—think roasted peanuts mingling with dark chocolate, with a whisper of vanilla that ties it all together. When you slice into it, the layers stay perfectly defined, and the contrast between the crunchy crust and the melt‑in‑your‑mouth filling is pure bliss. I dare you to taste this and not go back for seconds; it’s hands down the best version you’ll ever make at home.
Most recipes get this completely wrong. They either drown the peanut butter in too much chocolate, or they make a crust that falls apart the moment you lift the pie. Here’s what actually works: a precise ratio of cookie crumbs to butter for a sturdy base, a whipped‑cream‑lightened peanut butter layer that won’t become a gummy mess, and a ganache that sets just enough to hold its shape without turning into a hard slab. The secret ingredient? A splash of heavy cream that turns the ganache into a silk‑smooth veil that glistens like a runway. I’m about to spill the beans on that technique, and trust me, you’ll thank me later.
Now, let’s talk about the moment you pull this out of the fridge. The whole kitchen smells incredible, the chocolate shavings on top catch the light, and you can already hear the collective gasp of your guests. You’ll be the hero of the evening, the one who delivered a dessert that feels like a hug and a high‑five all at once. Okay, ready for the game‑changer? Let me walk you through every single step — by the end, you’ll wonder how you ever made it any other way.
What Makes This Version Stand Out
- Taste: The deep cocoa notes of the crust balance perfectly with the salty‑sweet peanut butter, creating a flavor duet that sings with every bite.
- Texture: A buttery, crunchy base meets a creamy, airy filling, topped with a glossy ganache that snaps lightly when you cut through.
- Simplicity: No oven, no complicated tempering—just a handful of steps and a fridge, making it accessible even for kitchen novices.
- Uniqueness: The addition of whipped cream into the peanut butter layer keeps it light, while chocolate shavings add a visual wow factor.
- Crowd Reaction: Guests consistently claim this is the most addictive pie they’ve ever tasted, often asking for the recipe before the first bite.
- Ingredient Quality: Using premium chocolate chips and a good‑quality peanut butter elevates the whole experience from good to unforgettable.
- Method: The no‑bake approach preserves the natural flavors and prevents the dreaded “cooked” peanut butter taste.
- Make‑Ahead Potential: This pie can be assembled a day ahead, letting the flavors meld while you focus on other dishes.
Inside the Ingredient List
The Flavor Base
The 2 cups of chocolate cookie crumbs are the backbone of this pie. They provide that rich cocoa flavor and a crumbly texture that mimics a shortbread crust. If you skip them, you’ll lose the deep chocolate undertone that makes the peanut butter feel like a supporting act rather than the star. For a gluten‑free version, swap with crushed gluten‑free chocolate wafers—just make sure they’re still sweet enough to carry the flavor.
The Texture Crew
The 1/2 cup of unsalted butter binds the crumbs together, creating a firm yet melt‑in‑your‑mouth base. Butter at room temperature works best; too cold and the crust will crumble, too warm and it will become greasy. The 1 cup of creamy peanut butter is the heart of the filling—choose a natural, unsweetened variety for a less sugary outcome, or go with a sweetened version if you love extra sweetness. Powdered sugar (1 cup) sweetens the filling without adding grainy texture, and the 1 cup of heavy cream lightens the mixture, turning it into a cloud‑like mousse.
The Unexpected Star
A single teaspoon of vanilla extract might seem tiny, but it adds a fragrant depth that ties the chocolate and peanut butter together. Vanilla is the silent conductor that makes the flavors harmonize rather than clash. If you’re out of vanilla, a splash of bourbon or a pinch of espresso powder can add a sophisticated twist without overwhelming the palate.
The Final Flourish
Chocolate chips (1 cup) melt into the ganache, providing a glossy finish, while the 1/4 cup of chocolate shavings add a textural contrast and a visual pop that makes the pie look restaurant‑ready. Finally, the 1 cup of whipped cream is folded in at the end to keep the filling airy; over‑whipping will cause it to deflate, so stop as soon as soft peaks form.
Everything's prepped? Good. Let's get into the real action...
The Method — Step by Step
Start by crushing the chocolate cookie crumbs into fine particles; you can do this with a food processor or by placing them in a zip‑top bag and smashing with a rolling pin. Once pulverized, melt the unsalted butter in a small saucepan over low heat—watch it closely, you don’t want it to brown. Pour the melted butter over the crumbs, stir until fully combined, and then press the mixture firmly into the bottom and up the sides of a 9‑inch springform pan. The crust should feel dense under your palm; if it feels loose, add a splash more butter.
While the crust sets in the fridge, whisk together the creamy peanut butter, powdered sugar, and vanilla extract in a large bowl. The mixture will look thick at first; keep whisking until it becomes smooth and glossy. Next, in a separate chilled bowl, whip the heavy cream until soft peaks form—this is where the magic happens. Fold the whipped cream into the peanut butter mixture gently, using a spatula and a folding motion that preserves the air bubbles. This step is pure magic; it turns a dense peanut butter filling into a cloud‑like mousse.
Kitchen Hack: Chill your mixing bowl and whisk before whipping the cream; the cold surface helps the cream reach peaks faster and stay stable.Spread the peanut butter mousse over the chilled crust, using an offset spatula to create an even layer. Smooth the top as best as you can—tiny imperfections will be hidden by the ganache later. Once spread, place the pie back in the refrigerator for at least 15 minutes; this firms up the filling and makes it easier to work with the chocolate layer.
Now for the ganache: combine the chocolate chips and heavy cream in a saucepan over low heat. Stir constantly; you’ll hear a gentle sizzle when the cream meets the chocolate, and that sizzle is absolute perfection. Remove the pan from heat once the mixture is smooth and glossy, then let it cool for about 5 minutes so it thickens slightly but remains pourable.
Watch Out: If the ganache gets too hot, it will become grainy; keep the heat low and remove from the stove as soon as the chocolate is fully melted.Pour the ganache over the set peanut butter layer, using a spatula to spread it to the edges. The ganache should coat the pie like a silky veil, and you’ll notice it starts to pull away from the sides as it sets—this is the perfect visual cue that it’s thick enough. Sprinkle the chocolate shavings over the top while the ganache is still soft; they’ll sink slightly, creating a marbled effect.
Kitchen Hack: Use a fine grater for the chocolate shavings; the finer the shave, the more evenly they distribute, giving a professional finish.Cover the pie loosely with plastic wrap and refrigerate for at least 2 hours, preferably overnight. This chilling period allows the crust to harden, the filling to set, and the ganache to achieve that perfect snap‑when‑cut texture. Patience is key—if you’re tempted to dig in early, remember that the best desserts are worth the wait.
When you’re ready to serve, run a thin knife around the edge of the springform pan to release the sides, then gently lift the base. Transfer the pie to a serving platter, and if you like, dollop a spoonful of fresh whipped cream on each slice for an extra cloud of indulgence.
Finally, slice with a warm knife (dip it in hot water and wipe dry) to get clean cuts without dragging the ganache. Each slice should reveal a glossy chocolate top, a creamy peanut butter middle, and a crunchy cookie base—an Instagram‑ready cross‑section that screams “dessert royalty.” That’s it — you did it. But hold on, I’ve got a few more tricks that’ll take this to another level…
Insider Tricks for Flawless Results
The Temperature Rule Nobody Follows
Never underestimate the power of a cold environment. The crust sets best when the butter is solidified, so after pressing it into the pan, give it a quick 10‑minute blast in the freezer before chilling in the fridge. This rapid chill creates a tighter crumb structure, preventing any sogginess later on. I once tried skipping this step and ended up with a crust that sagged under the weight of the filling—lesson learned.
Why Your Nose Knows Best
When you melt the chocolate for the ganache, rely on your sense of smell more than a timer. The moment you catch that sweet, buttery aroma, you know the chocolate has fully emulsified with the cream. If you keep heating past that point, the ganache will develop a burnt note that overpowers the delicate peanut butter.
The 5‑Minute Rest That Changes Everything
After spreading the peanut butter mousse, give it a brief 5‑minute rest at room temperature before refrigerating. This short pause lets the air bubbles settle, resulting in a smoother surface and a more stable layer that won’t crack when you pour the ganache.
The Whisk‑to‑Fold Transition
When folding the whipped cream into the peanut butter mixture, use a rubber spatula and a gentle “lift‑over‑top” motion. Over‑mixing will deflate the cream, and you’ll end up with a dense filling. Think of it as coaxing the two components to fall in love without breaking the romance.
Chocolate Shaving Secrets
For the shavings, chill the chocolate bar in the freezer for 15 minutes before grating. Cold chocolate shaves more cleanly and holds its shape longer, giving you those elegant, glossy ribbons on top of the pie. A friend tried shaving at room temperature and ended up with clumpy bits that melted into the ganache—don’t let that happen to you.
Creative Twists and Variations
This recipe is a playground. Here are some of my favorite ways to switch things up:
Salted Caramel Swirl
Drizzle a homemade salted caramel sauce over the peanut butter layer before adding the ganache. The caramel adds a buttery richness that pairs beautifully with the salty peanuts, creating a flavor explosion that caramel lovers will adore.
Nutty Crunch
Fold in a half‑cup of toasted chopped peanuts into the mousse for an extra crunch. The toasted nuts add a smoky note and a satisfying bite that contrasts the silky filling.
Spicy Kick
Add a pinch of cayenne pepper to the ganache for a subtle heat that awakens the palate. The spice doesn’t overwhelm; it just adds a whisper of warmth that makes each bite intriguing.
White Chocolate Dream
Swap the dark chocolate chips for white chocolate and use white chocolate shavings on top. The lighter flavor profile is perfect for those who prefer a sweeter, milder dessert.
Berry Burst
Layer a thin spread of raspberry jam between the crust and the peanut butter mousse. The tartness of the berries cuts through the richness, offering a refreshing balance.
Storing and Bringing It Back to Life
Fridge Storage
Cover the pie tightly with plastic wrap and store it in the refrigerator for up to 4 days. The flavors continue to meld, making each subsequent slice even more harmonious. If you notice the ganache thickening too much, let the pie sit at room temperature for 10 minutes before serving.
Freezer Friendly
For longer storage, wrap the entire pie (still in the springform pan) in a double layer of aluminum foil and freeze for up to 2 months. When you’re ready to enjoy it, transfer to the fridge to thaw overnight, then let it sit at room temperature for 15 minutes before slicing.
Best Reheating Method
If the ganache has become too firm after refrigeration, place a tiny splash of water (about a teaspoon) on the surface and microwave for 5‑10 seconds. The steam will gently melt the ganache back to its glossy sheen without compromising the texture of the filling.