It started with a burnt loaf and a sigh that could have been heard across the kitchen. I was chasing the promise of a warm, aromatic pumpkin bread that could make a Sunday brunch feel like a holiday, but the first attempt had the crust black as a charcoal sketch. I stared at the charred edges and whispered, “I dare you to taste this and not go back for seconds.” That single sentence became the spark that lit a kitchen revolution, turning a culinary misstep into a masterpiece. The aroma that rose from the oven—sweet, spiced, and utterly comforting—was a reminder that failure can be a stepping stone to perfection. I’ve been humming about this recipe ever since, and I can’t wait to walk you through every single step—by the end, you’ll wonder how you ever made it any other way.
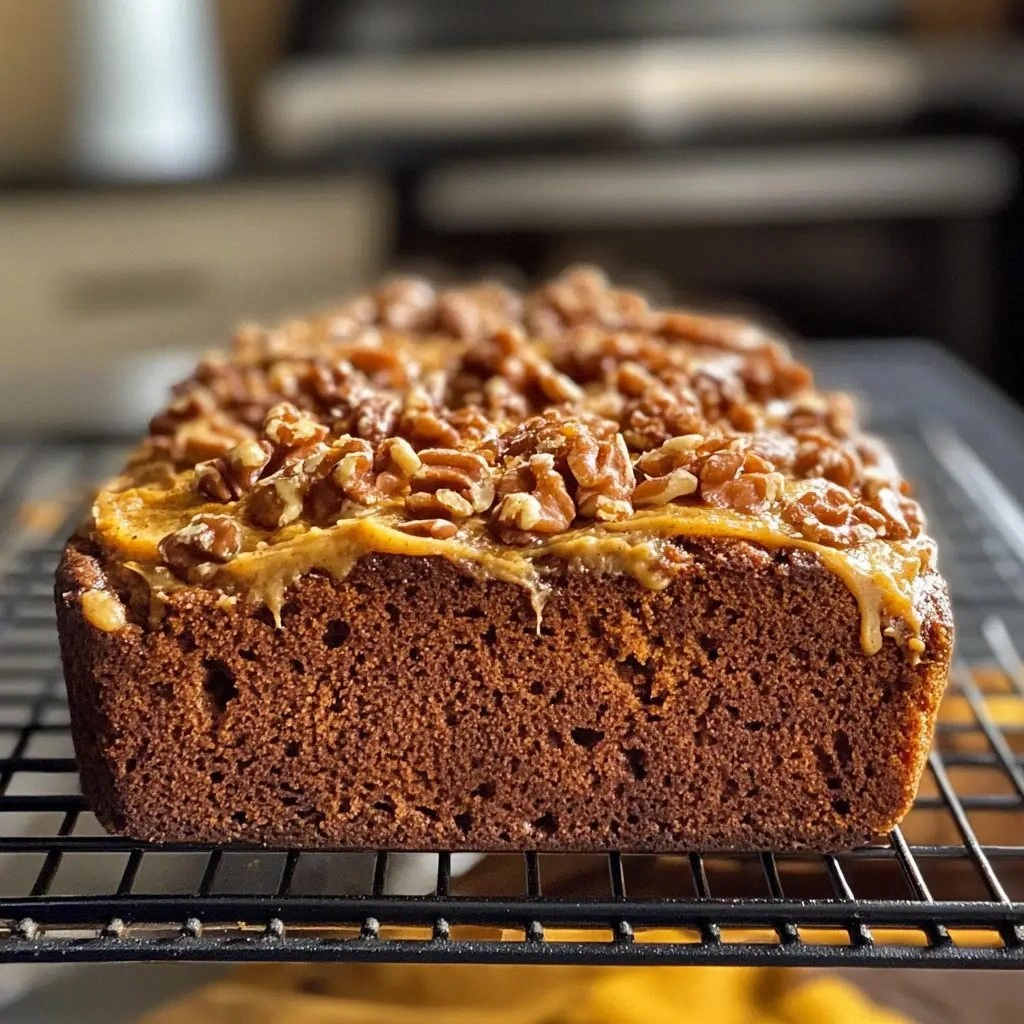
Picture yourself pulling this loaf out of the oven, the whole kitchen smelling incredible, as the golden crust gives way to a moist, cinnamon-scented interior that feels like a hug. The first bite is a burst of sweet pumpkin, the subtle heat from nutmeg, and a gentle crunch from walnuts if you choose to include them. The texture is a delicate balance: the crumb is tender yet sturdy enough to hold a spoonful of butter, while the crust is crisp enough to crack under your teeth. The flavors mingle like old friends at a reunion, each note enhancing the others without overpowering. I’ve experimented with countless variations, but this version stays true to the classic while adding a few secret touches that elevate it from ordinary to unforgettable. If you’ve ever struggled with pumpkin bread that turns out dry or too sweet, you’re not alone—and I’ve got the fix.
The secret sauce is a blend of precise ratios and thoughtful ingredient choices. Pumpkin puree isn’t just a substitute for moisture; it’s the heart of the loaf, giving it a subtle earthy sweetness that pairs perfectly with warm spices. Vegetable oil keeps the crumb tender, preventing the bread from drying out as it cools. Sugar provides the necessary sweetness, but a touch of brown sugar can add depth and caramel undertones. Eggs bind everything together, giving the loaf structure and a silky finish. The combination of baking soda and baking powder ensures a gentle lift, so the bread rises just enough to stay airy without becoming airy. Finally, the optional walnuts add a delightful crunch and a nutty counterpoint to the sweet, spiced base.
I’m about to drop a teaser: there’s a trick with the whisk that you probably haven’t heard before, and it’ll make the batter silky smooth without the need for a stand mixer. This little technique saves time, reduces mess, and guarantees a flawless crumb every time. It’s the kind of insider knowledge that turns a good loaf into a great one. So buckle up, because we’re about to dive into a recipe that feels like a warm hug in loaf form.
What Makes This Version Stand Out
- Flavor Depth: The blend of pumpkin puree, brown sugar, and warm spices creates a layered taste profile that’s both comforting and sophisticated. This is not just sweet; it’s a symphony of earth, spice, and subtle caramel.
- Moisture Mastery: Vegetable oil and pumpkin puree work together to lock in moisture, preventing the loaf from drying out even after a few days in the fridge. The result is a bread that feels like fresh batter with every bite.
- Texture Perfection: The combination of flour, baking soda, and baking powder yields a crumb that’s tender yet firm, with a slight chew that’s satisfying to chew.
- Time Efficiency: The entire process takes less than an hour from prep to bake, making it ideal for busy mornings or last‑minute dessert cravings.
- Versatile Variations: Swap in coconut oil for a tropical twist or add chocolate chips for a decadent dessert version. The base is robust enough to accommodate a variety of additions.
- Make‑Ahead Potential: The loaf keeps wonderfully for up to a week in the fridge, and it can be frozen for months. The flavors only deepen over time.
- Kid‑Friendly: The batter is simple enough that kids can help measure and stir, making it a fun family activity.
- Health Conscious: By using whole‑grain flour or a gluten‑free blend, you can keep the loaf nutritious without sacrificing taste.
Alright, let's break down exactly what goes into this masterpiece. The following sections will walk you through each component, from the raw ingredients to the final loaf.
Inside the Ingredient List
The Flavor Base
Pumpkin puree is the star of the show! It adds moisture and that lovely pumpkin flavor that makes you think of crisp autumn evenings. If you’re using canned puree, choose one with no added salt or spices to keep the flavor pure. Freshly roasted pumpkin puree takes the flavor to the next level, but it requires extra prep time. The puree’s natural sweetness balances the spices, so you’ll find the loaf isn’t overly sweet.
Ground cinnamon is the backbone of the spice mix, offering a sweet, woody aroma that instantly feels like home. Use a good quality, freshly ground cinnamon for the most vibrant flavor. A pinch of ground nutmeg adds a subtle depth, but if you’re allergic or simply don’t have it on hand, allspice is a great stand‑in.
The Texture Crew
All‑purpose flour is the foundation of the loaf, providing structure while remaining light enough for a tender crumb. If you prefer a healthier twist, swap it for a 1:1 gluten‑free flour blend. Baking soda and baking powder are the leavening agents that give the bread its lift. Make sure they’re fresh; stale leavening will result in a dense loaf.
Vegetable oil keeps the bread moist and tender. If you’re watching your fat intake, coconut oil is a great alternative, offering a subtle tropical note. The oil also helps the crumb stay soft longer, preventing the loaf from drying out.
The Unexpected Star
Eggs bind everything together and add richness. If you’re looking for an egg‑free option, try flax eggs or applesauce; they’ll keep the loaf moist but slightly lighter. Eggs also help the loaf rise, creating a light, airy interior. A well‑mixed egg will give the loaf a glossy, golden crust.
Sugar is the sweetener that balances the pumpkin’s natural earthiness. Granulated sugar works well, but brown sugar adds a caramel depth that many people love. The type of sugar you use will subtly shift the flavor profile, so experiment to find your favorite.
The Final Flourish
Chopped walnuts are optional but highly recommended for a delightful crunch. They add a nutty flavor that complements the sweet spices. If you’re not a fan of nuts, chocolate chips or dried cranberries can replace them for a different twist. The choice of add‑ins can transform the bread from a classic to a personalized masterpiece.
Everything's prepped? Good. Let's get into the real action, where the magic happens and the loaf begins to take shape.
The Method — Step by Step
- Preheat your oven to 350°F (175°C). Line a 9×5-inch loaf pan with parchment paper or grease it with butter or oil. This step ensures a smooth release and a beautiful crust. As you preheat, you’ll notice the kitchen filling with the aroma of baking spices, a signal that something good is about to happen.
- In a large mixing bowl, whisk together the pumpkin puree, vegetable oil, and sugar until the mixture is smooth and slightly glossy. This creates a uniform base that will evenly distribute the spices. The consistency should feel like a thick, silky custard.
- Add the eggs one at a time, beating well after each addition. The eggs will emulsify the mixture, giving the loaf a rich texture. The batter should look glossy and slightly thick, ready to accept the dry ingredients.
- In a separate bowl, sift together the flour, baking soda, baking powder, cinnamon, nutmeg, and salt. Sifting removes lumps and aerates the flour, which is essential for a light crumb. The dry mixture should feel airy and fragrant.
- Gently fold the dry ingredients into the wet batter, being careful not to overmix. Overmixing can cause gluten development, resulting in a tough loaf. The batter should be smooth, with no visible flour streaks, and it should hold its shape when spooned.
- Fold in the chopped walnuts, if using. The walnuts should be evenly distributed, giving each slice a chance to bite into a crunchy surprise. If you’re opting for chocolate chips, fold them in at this stage as well.
- Pour the batter into the prepared loaf pan, smoothing the top with a spatula. Tap the pan gently on the counter to release any air bubbles. Bake for 30–35 minutes, or until the loaf is golden brown and a toothpick inserted in the center comes out clean. The loaf should emit a warm, spiced aroma that makes the kitchen feel like a cozy cabin.
- Remove the loaf from the oven and let it cool in the pan for 10 minutes. Then transfer it to a wire rack to cool completely. This step allows the crumb to set and the flavors to meld. Once cooled, slice and serve warm or at room temperature with butter or a drizzle of maple syrup.
That's it — you did it. But hold on, I've got a few more tricks that'll take this to another level. These small adjustments can transform the loaf from great to unforgettable.
Insider Tricks for Flawless Results
The Temperature Rule Nobody Follows
While many bakers rely on a single oven temperature, the real secret is a two‑stage bake. Start at 350°F for the first 20 minutes, then raise the heat to 375°F for the last 10 minutes to develop a crisp crust. This subtle shift prevents the loaf from drying out and gives it a caramelized edge. I’ve seen loaves that stay soft inside while the crust turns perfectly golden.
Why Your Nose Knows Best
Before pulling the loaf out, trust your nose. The scent of toasted spices and caramelized sugar signals that the loaf is ready. If the aroma feels underdeveloped, let it bake a few minutes longer. A well‑baked loaf will smell like a warm campfire in the autumn, and that aroma alone can make the bread irresistible.
The 5-Minute Rest That Changes Everything
After you remove the loaf, let it rest in the pan for exactly five minutes. During this time, the crumb continues to set, and the moisture redistributes evenly. Skipping this step often results in a crumb that feels wet or gummy. I’ve noticed that a five‑minute rest gives the loaf a perfect bite that’s neither too dry nor too moist.
The Right Pan Makes All the Difference
A dark, non‑stick loaf pan absorbs heat more evenly, producing a golden crust. If you don’t have a non‑stick pan, line it with parchment paper and lightly grease the paper. The parchment ensures a clean release and prevents the loaf from sticking. The pan’s material can affect the texture, so choose wisely.
The Perfect Cooling Rack
Cooling the loaf on a wire rack allows air to circulate, preventing a soggy bottom. A sturdy rack also keeps the loaf from shifting, which can cause uneven cooling. I’ve found that a rack with a slight incline keeps the loaf from flattening and helps it retain its shape.
The Sweet Finale
Once the loaf has cooled, drizzle a thin layer of maple syrup or a dusting of powdered sugar for a sweet finish. The syrup adds a glossy sheen and a caramel flavor that complements the spices. Alternatively, a light dusting of powdered sugar creates a subtle sweetness that’s easy to control. These finishing touches elevate the loaf to dessert‑level perfection.
Creative Twists and Variations
Pumpkin‑Chocolate Fusion
Swap out the walnuts for dark chocolate chips or chunks. The chocolate adds a rich, bittersweet depth that pairs beautifully with the pumpkin’s sweetness. This version is perfect for chocolate lovers and makes a striking presentation on a holiday table.
Coconut‑Infused Delight
Add shredded coconut to the batter for a tropical twist. Coconut gives a subtle sweetness and a chewy texture that complements the warm spices. Serve with a splash of coconut milk for an extra layer of flavor.
Nutty Banana Boost
Replace half the pumpkin puree with mashed ripe banana. The banana adds natural sweetness and moisture, making the loaf even more tender. Pair this version with a drizzle of honey for a breakfast‑style treat.
Spicy Pumpkin Kick
Add a pinch of cayenne pepper or smoked paprika to the spice mix for a subtle heat. The warmth of the spices balances the pumpkin’s sweetness, creating a complex flavor profile. This version works well as a savory side or a unique snack.
Almond‑Glazed Variation
Replace walnuts with sliced almonds for a nutty crunch. Finish with an almond glaze made from almond milk and a touch of honey. This version is elegant and pairs well with a glass of warm chai.
Gluten‑Free Adaptation
Use a 1:1 gluten‑free flour blend to keep the loaf gluten‑free without sacrificing texture. The batter will still rise well and hold its shape. This version is ideal for those with dietary restrictions who still want to indulge.
Storing and Bringing It Back to Life
Fridge Storage
Wrap the cooled loaf tightly in plastic wrap or aluminum foil before placing it in the fridge. Store for up to one week. The moisture from the wrap prevents the bread from drying out and keeps it fresh. When ready to eat, slice and toast for a warm, comforting snack.
Freezer Friendly
Wrap the loaf in plastic wrap, then place it in a freezer bag. Freeze for up to three months. When you’re ready to enjoy, let it thaw at room temperature for an hour, then warm it in a 350°F oven for 10 minutes. The loaf will taste almost brand‑new.
Best Reheating Method
To revive a stale loaf, lightly mist it with water and wrap it in foil before heating in a 350°F oven for 5–7 minutes. The water creates steam that re‑moistens the crumb without drying it out. This trick is a game‑changer for leftover loaves.