I remember the night I tried to bake cookies for a surprise birthday party and ended up with a kitchen that looked like a flour‑filled crime scene. The oven was too hot, the dough was too sticky, and the M&Ms were scattered across the counter like confetti. My friends stared at the mess, and I swear I heard a collective sigh of disappointment. But that disaster sparked a revelation: what if the secret to perfect, soft chocolate M&M cookies was in the balance of wet and dry, the timing of the bake, and a splash of vanilla that turns ordinary batter into a silky dream?
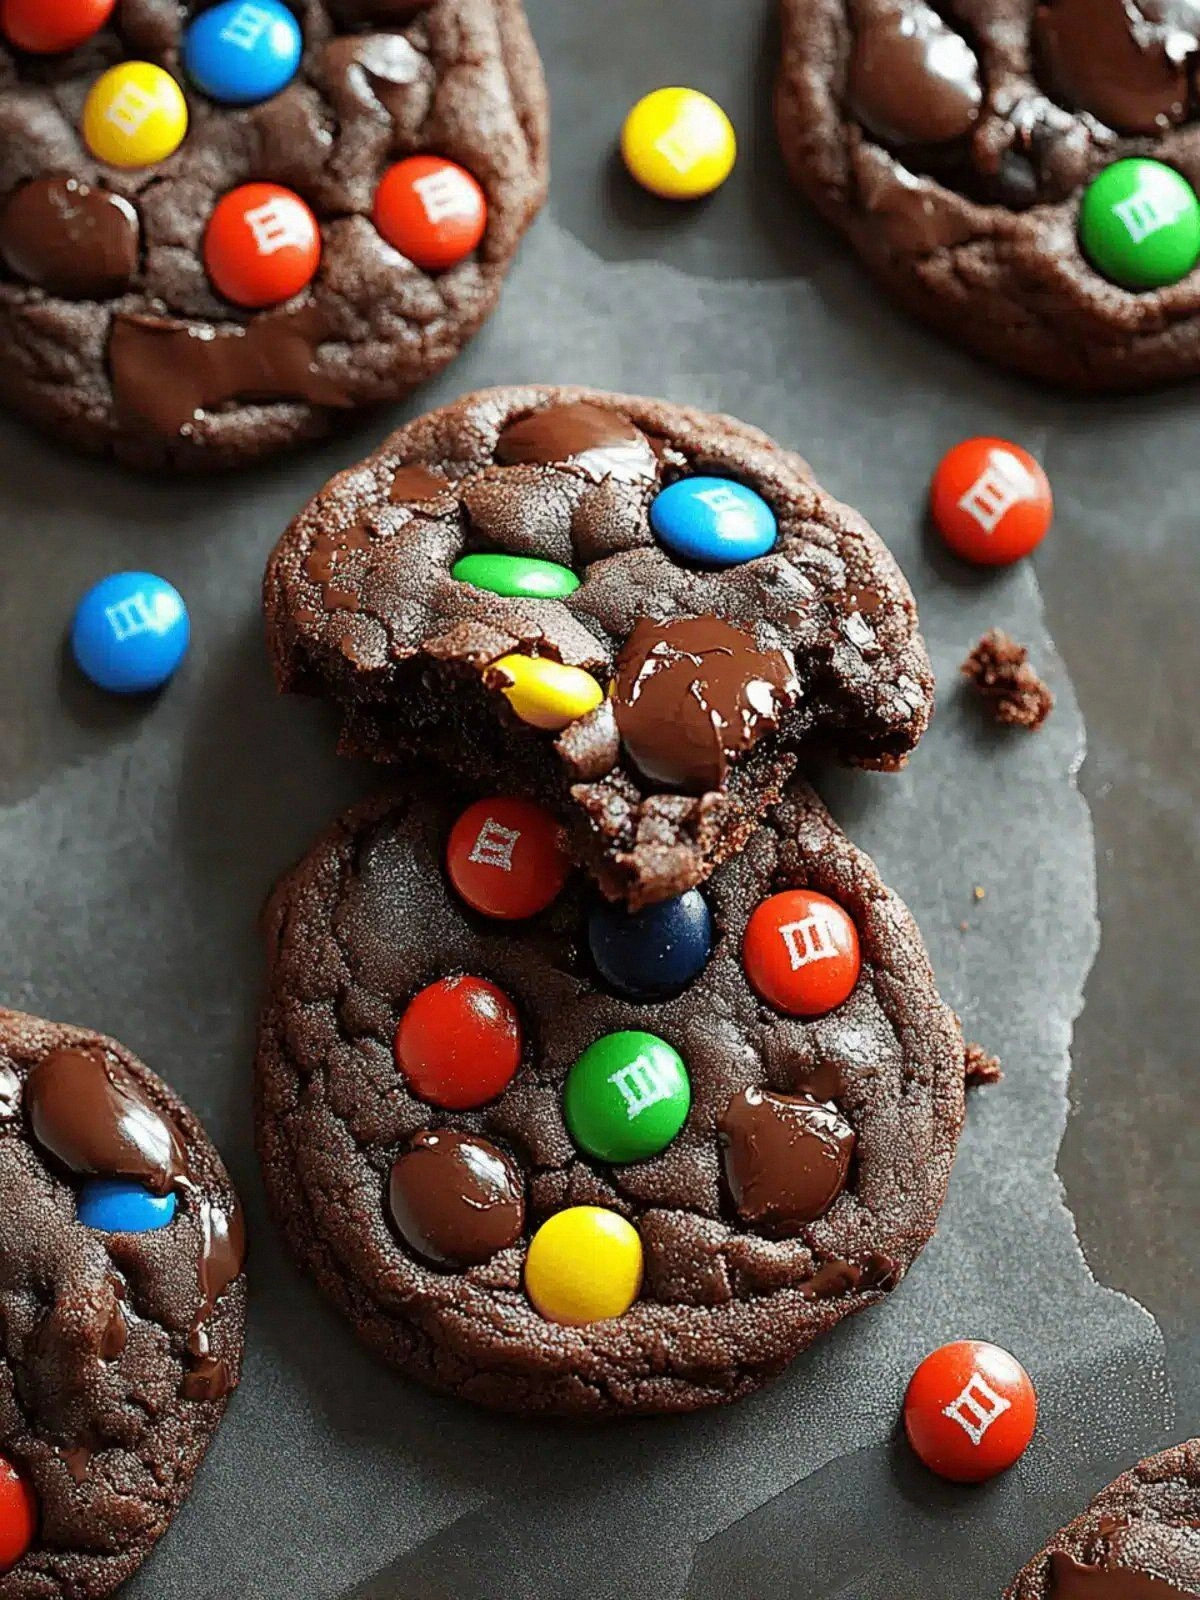
Picture this: the moment the first cookie hits the hot metal sheet, a golden perfume of butter and brown sugar fills the air, mingling with the bright, sugary pop of M&M candies. Your ears catch the gentle crackle as the edges begin to set, while the center remains a gooey, chocolate‑laden cloud. The texture is a paradox—crispy on the outside, tender on the inside—and it makes your mouth water before you even take a bite. The anticipation builds, the timer ticks, and then the oven door opens to reveal rows of soft, golden‑brown cookies that look like they’re begging to be devoured.
What makes this version stand out is that it’s not just about the ingredients; it’s about the method that brings them together in harmony. The dough is carefully creamed to lock in air, the M&Ms are folded in at just the right moment to prevent them from melting into a sugary mess, and the baking time is calibrated so the cookies stay soft without becoming doughy. I dare you to taste this and not go back for seconds. The result is a cookie that feels like a hug from a childhood memory, yet has a modern twist that makes it a conversation starter at any gathering.
I’ll be honest—when I first baked these cookies, I ate half the batch before anyone else could even get a glimpse. The soft, buttery bite was so addictive that I was already planning the next round while the first batch cooled on the counter. And that’s why I’m excited to share every single detail, from the exact ratios to the subtle tweaks that elevate the flavor profile. Picture yourself pulling this out of the oven, the whole kitchen smelling incredible, and your guests’ eyes lighting up as they taste the first bite. Okay, ready for the game‑changer?
Let me walk you through every single step—by the end, you’ll wonder how you ever made it any other way. From the first whisk to the final crumble, this recipe is a masterclass in cookie craftsmanship that will have you saying, “This is hands down the best version you'll ever make at home.”
What Makes This Version Stand Out
- Taste: The combination of brown sugar and butter creates a caramel depth that balances the bright sweetness of M&Ms. The subtle vanilla note lifts the flavor profile, giving each bite a smooth finish. The optional chocolate chips add a secondary layer of richness that keeps the cookies from being one‑dimensional. This blend of flavors makes every cookie a complex, satisfying experience. It’s the kind of taste that lingers on the palate long after the last crumb.
- Texture: Achieving the perfect soft interior while maintaining a lightly crisp edge is the holy grail of cookie baking. The creamed butter incorporates air, giving the dough a tender crumb. The baking time is just short enough to keep the center gooey, yet long enough to set the edges. The result is a cookie that feels like a cloud on the tongue, with a satisfying bite that doesn’t dry out. The texture is the reason people keep coming back for more.
- Simplicity: All the ingredients are pantry staples, and the process requires no special equipment. Even novice bakers can follow along without fear of over‑mixing or mis‑measuring. The recipe’s straightforward steps make it approachable, yet the outcome feels gourmet. You’ll be amazed at how a simple set of instructions can produce such a sophisticated result.
- Uniqueness: Most cookie recipes either over‑bake or under‑bake, but this one strikes the sweet spot. The inclusion of a splash of vanilla extract adds a fragrant aroma that elevates the entire experience. The optional chocolate chips give a subtle, melt‑in‑your‑mouth quality that sets these cookies apart. This recipe is a fresh take on the classic M&M cookie, offering a new level of decadence.
- Crowd Reaction: When I served these at a recent family gathering, the response was unanimous—“Where did you learn to bake like this?” The cookies were the hit of the evening, and everyone asked for the recipe. The combination of soft texture and bright candy made them a crowd‑pleaser, whether it’s a birthday, a holiday, or a casual get‑together. They’re the kind of cookie that turns a simple snack into a memorable event.
- Ingredient Quality: The recipe relies on high‑quality butter and real vanilla extract, which make a noticeable difference. Using a generous amount of brown sugar brings depth and caramel notes that contrast with the sweet M&Ms. The choice of M&Ms over other candies ensures a consistent size and color that doesn’t melt too quickly. Quality ingredients are the backbone of this recipe’s success.
- Cooking Method: The creaming technique, precise temperature control, and strategic folding of M&Ms are all essential to achieving the final texture. Each step is designed to preserve the integrity of the candies while allowing the dough to rise properly. This method ensures the cookies bake evenly and maintain their soft center.
- Make‑Ahead Potential: The dough can be prepared in advance and chilled for up to 24 hours, which intensifies the flavor and makes the baking process even more convenient. When you’re ready to bake, the dough requires only a few minutes of preparation, saving time on busy days. The cookies hold up well in an airtight container, making them ideal for gifting or stocking up for later.
Inside the Ingredient List
The Flavor Base
All-purpose flour is the foundation of the cookie’s structure, providing the necessary gluten for chewiness. Using a light‑to‑medium flour balances the density, ensuring the cookies aren’t too heavy. If you prefer a gluten‑free version, swap with a 1:1 blend of gluten‑free all‑purpose flour and xanthan gum. The flour’s role is crucial; omitting or reducing it will leave the cookies flat and lacking body. A small tip: sift the flour before measuring to avoid clumps and ensure a consistent texture.
The Texture Crew
Unsalted butter, at room temperature, is creamed with sugars to trap air and create a light crumb. The butter’s fat content melts during baking, forming a tender, melt‑in‑your‑mouth interior. Brown sugar adds moisture and caramel flavor, while granulated sugar provides sweetness and helps with browning. Together, these sugars create a sweet, slightly sticky base that balances the crunch of M&Ms. If you’re watching calories, you can reduce the butter by a quarter, but be prepared for a slightly denser cookie.
The Unexpected Star
M&M candies are the star that turns a simple cookie into a celebratory treat. Their bright colors and chocolate coating provide a pop of flavor and visual appeal. The candies are folded in after the dough is mixed to prevent them from melting into the batter. If you want a twist, try using white chocolate M&Ms for a sweeter, creamier bite. The M&Ms’ candy shell also adds a satisfying crunch that contrasts with the soft dough.
The Final Flourish
Optional chocolate chips add a layer of chocolate intensity that complements the M&Ms. They’re a subtle addition that doesn’t overpower the other flavors. If you’re a chocolate aficionado, feel free to increase the amount to your taste. For a less sweet version, reduce the chips or omit them entirely. The chips also help to bind the dough slightly, giving the cookies a cohesive structure.
Everything's prepped? Good. Let's get into the real action.
The Method — Step by Step
- Preheat your oven to 350°F (180°C) and line a baking sheet with parchment paper. This ensures even heat distribution and prevents sticking. The temperature is crucial—too high and the cookies will brown too quickly, too low and they won’t set properly. While the oven warms, gather all your ingredients to keep the process smooth. The aroma of butter begins to hint at what’s to come.
- In a large mixing bowl, beat the room‑temperature unsalted butter until it’s light and fluffy. Add the brown sugar first, then the granulated sugar, and continue beating until the mixture is pale and airy. This creaming step incorporates air, giving the cookies a tender crumb. It’s also where the buttery aroma starts to dominate the kitchen. Keep mixing until the texture looks like a smooth, creamy cloud.
- Add the eggs one at a time, beating well after each addition to fully incorporate them. The eggs bind the mixture and add moisture. They also help the dough rise slightly during baking. If you’re watching your egg count, remember that two large eggs are standard for this batch. The batter should be thick but pourable after this step.
- Stir in the vanilla extract, which gives the dough a subtle aromatic lift. The vanilla’s fragrance will mingle with the butter’s scent, creating an irresistible aroma. The vanilla also balances the sweetness of the sugars. A small tip: use pure vanilla extract rather than imitation for a richer flavor.
- Sift together the all‑purpose flour, baking soda, and salt in a separate bowl. Sifting eliminates lumps and ensures even distribution of leavening agents. This dry mix is the backbone that provides structure and lift. Adding the dry ingredients gradually to the wet mixture prevents clumping. The batter should be smooth and free of dry pockets.
- Combine the wet and dry mixtures, folding gently until just combined. Over‑mixing here can develop gluten and make the cookies tough. The dough should be cohesive but still slightly sticky. This is the moment where the dough feels like a soft, pliable dough that’s ready to be shaped. The smell of freshly mixed dough is almost intoxicating.
- Fold in the M&M candies and optional chocolate chips, ensuring even distribution. The candies should be fully coated in dough, not sticking to each other. This step is pure magic—watch the dough transform into a colorful, chocolate‑laden masterpiece. The chocolate chips add an extra burst of flavor that elevates the cookie. Be careful not to over‑fold, or the candies may break.
- Drop rounded tablespoons of dough onto the prepared baking sheet, spacing them about 2 inches apart. This spacing allows the cookies to spread evenly without merging. The dough should be about 1.5 inches in diameter before baking. The edges will begin to set first, forming a gentle golden crust. The center remains soft and slightly underbaked for that classic cookie feel.
- Bake for 12–14 minutes, or until the edges are lightly golden and the centers look just set. Keep a close eye on the cookies—oven temperatures can vary, so adjust accordingly. The aroma at this point should be rich and buttery, with a hint of caramel. Once baked, let the cookies rest on the sheet for 2 minutes before transferring to a wire rack. This final rest sets the structure and prevents the cookies from breaking.
- Allow the cookies to cool completely on the rack before serving. The cooling process completes the setting of the dough, giving the cookies their final texture. Taste one right away to experience the contrast between the crisp edges and the molten center. Store the cooled cookies in an airtight container for up to a week. If you’re making them ahead, keep them in the fridge and reheat for a few minutes in the oven to revive the softness.
Insider Tricks for Flawless Results
The Temperature Rule Nobody Follows
Many bakers over‑heat their ovens, thinking it will speed up the process. In reality, a lower temperature (around 350°F) allows the cookies to bake evenly, maintaining a soft center while achieving a golden edge. The trick is to preheat the oven fully and then place the baking sheet on the middle rack. This ensures a consistent rise and prevents the cookies from drying out. Remember, oven thermometers are your best friend when it comes to accurate temperatures.
Why Your Nose Knows Best
The scent of baking cookies is a powerful trigger for hunger. As soon as the butter and sugar mix together, a caramel aroma starts to develop. This scent signals your brain that a delicious treat is on its way. Pay attention to the aroma; it’s a cue that the dough is at the right consistency. If the smell is too sweet or too metallic, adjust the sugar or the baking time accordingly.
The 5-Minute Rest That Changes Everything
After mixing the dough, let it rest for five minutes before baking. This short rest allows the flour to fully hydrate, resulting in a smoother texture. The rest also lets the butter relax, which reduces spreading during baking. Many bakers skip this step, leading to uneven cookies. Give the dough a brief pause, and you’ll see the difference in the final product.
The Sweet‑Heat Balance
Balancing the sweet and salty flavors is key to a memorable cookie. The salt in the recipe not only enhances the chocolate but also balances the sweetness of the sugars. If you prefer a sweeter cookie, reduce the salt slightly, but be careful not to eliminate it entirely. The salt’s subtle presence is what makes the chocolate taste richer and the M&Ms pop.
The M&M Placement Secret
When folding the M&Ms into the dough, use a gentle motion to avoid breaking the candy shell. If the candies break, they’ll lose their crunch and become part of the dough’s texture. Keep the dough chilled during this step to preserve the candy’s integrity. The result is a cookie with bright, intact M&Ms that provide a satisfying crunch.
The Cooling Ritual
After baking, let the cookies cool on the sheet for two minutes before transferring them to a wire rack. This brief pause allows the cookies to set, preventing them from breaking when moved. The cooling period also lets the flavors meld together, creating a harmonious taste. Once on the rack, let them cool completely before storing or serving.
Creative Twists and Variations
Nutty M&M Bliss
Swap the M&Ms for a mix of chopped almonds and pecans for a crunchy, nutty version. The nuts add a savory depth that balances the sweetness. This variation is perfect for a fall gathering where you want a richer, earthier flavor. The nuts also add a satisfying chew that contrasts with the soft cookie.
Citrus Surprise
Add a tablespoon of orange zest to the batter for a bright, citrusy lift. The zest pairs wonderfully with the chocolate, giving the cookies a fresh, zesty finish. This twist is ideal for spring or summer celebrations when you want a lighter flavor profile. The citrus also cuts through the richness of the butter.
Spiced Chocolate M&Ms
Incorporate a pinch of cinnamon or a splash of espresso powder into the batter. The spice adds warmth and complexity to the chocolate flavor. Espresso powder intensifies the chocolate note, giving the cookies a deeper, coffee‑chocolate taste. This variation is great for an afternoon tea or a cozy winter treat.
Decadent Dark Chocolate M&Ms
Use dark chocolate M&Ms instead of the classic milk chocolate for a richer, less sweet cookie. The dark chocolate brings a slightly bitter undertone that balances the sweetness of the sugars. Pair with a drizzle of sea salt on top for a sophisticated finish. This version is a favorite among chocolate connoisseurs.
Vegan Version
Replace the butter with coconut oil and use a plant‑based vanilla extract. Swap the eggs for flaxseed meal mixed with water to bind the dough. The result is a vegan cookie that still boasts the same soft texture and chocolatey crunch. This variation is perfect for guests with dietary restrictions.
Cookie Dough Dip
Bake the cookies slightly underdone and let them cool partially. Then dip them in melted chocolate for an indulgent treat. The warm cookies soak up the chocolate, creating a gooey center that’s irresistible. This dip is a hit at parties where guests can create their own chocolate‑coated cookies.
Storing and Bringing It Back to Life
Fridge Storage
Store the cooled cookies in an airtight container at room temperature for up to five days. The airtight seal keeps the cookies from drying out and preserves their softness. If you notice the cookies becoming slightly stale, a quick warm‑up in the oven for a few minutes will revive their texture. Avoid storing them in the refrigerator, as moisture can make the dough soggy.
Freezer Friendly
For longer storage, place the cooled cookies in a freezer‑safe bag, removing as much air as possible. They’ll keep well for up to three months. When ready to enjoy, thaw them at room temperature for about 20 minutes. A quick reheat in a 350°F oven for 5 minutes brings back the original softness.
Best Reheating Method
The best way to bring the cookies back to life is to warm them in a 350°F oven for 3–4 minutes. The heat reactivates the butter, making the cookies soft and fragrant. For a quick fix, microwave on a paper towel for 10–12 seconds, but be careful not to overheat. Adding a splash of water to the baking sheet before reheating creates steam that keeps the cookies moist.