Picture this: you’re in the middle of a late‑night kitchen raid, the fridge is a barren wasteland, and your stomach is growling louder than a toddler’s tantrum. You stumble over a bag of taco seasoning, a sack of ground beef, and a half‑filled container of salsa. Suddenly, the idea hits you like a lightning bolt—why not turn that chaotic pantry into a walking taco casserole that practically walks itself to the table? I dared myself to create a version so simple, so flavorful, so downright irresistible that you’ll be tempted to taste it and not go back for seconds. And trust me, you’re going to want to do that.
I’ve been a self‑proclaimed taco aficionado for years, but the idea of a casserole that lets the taco flavors “walk” across the plate has been my culinary secret weapon. The first time I tried it, the aroma of browned beef and toasted chips filled the kitchen, turning the room into a Mexican fiesta. The sizzling sound on the skillet was music to my ears, the sight of golden, bubbling cheese was a visual treat, and the smell of cumin and garlic made my nose do a happy dance. When the first bite hit my tongue, the flavors exploded—crunchy chips, savory meat, tangy salsa, and creamy cheese all mingling in perfect harmony.
What sets this version apart is the secret “walking” technique: layering the ingredients so that the flavors literally move as they bake, creating a depth that you’ll taste in every bite. I’m talking about a gentle simmer that allows the salsa to seep into the meat, a strategic placement of tortilla chips that crisp up into golden rings, and a finishing layer of cheese that melts into a silky, velvety coating. The result is a casserole that feels like a taco on a platter, but with the comfort and convenience of a one‑pot meal. I’ll also reveal a surprising twist that most recipes forget—a splash of lime that brightens the dish without overpowering it.
So if you’ve ever felt the urge to make taco night a bit more special, or you’re simply craving a dish that’s both hearty and playful, let me walk you through every single step. By the end, you’ll wonder how you ever made it any other way.
What Makes This Version Stand Out
Bold Flavor: The combination of seasoned ground beef, salsa, and a melty cheese blend creates a punchy, savory profile that satisfies every taco craving. The layers of flavor develop as the casserole bakes, so each bite delivers a new burst of taste.
Texture Contrast: Crisp tortilla chips interspersed with gooey cheese and tender meat create a delightful crunch that’s impossible to resist. The chips caramelize slightly, adding a subtle nutty undertone.
Easy Assembly: All you need is a skillet, a baking dish, and a few minutes of prep. No fancy equipment or complicated steps—just cook, layer, bake, and serve.
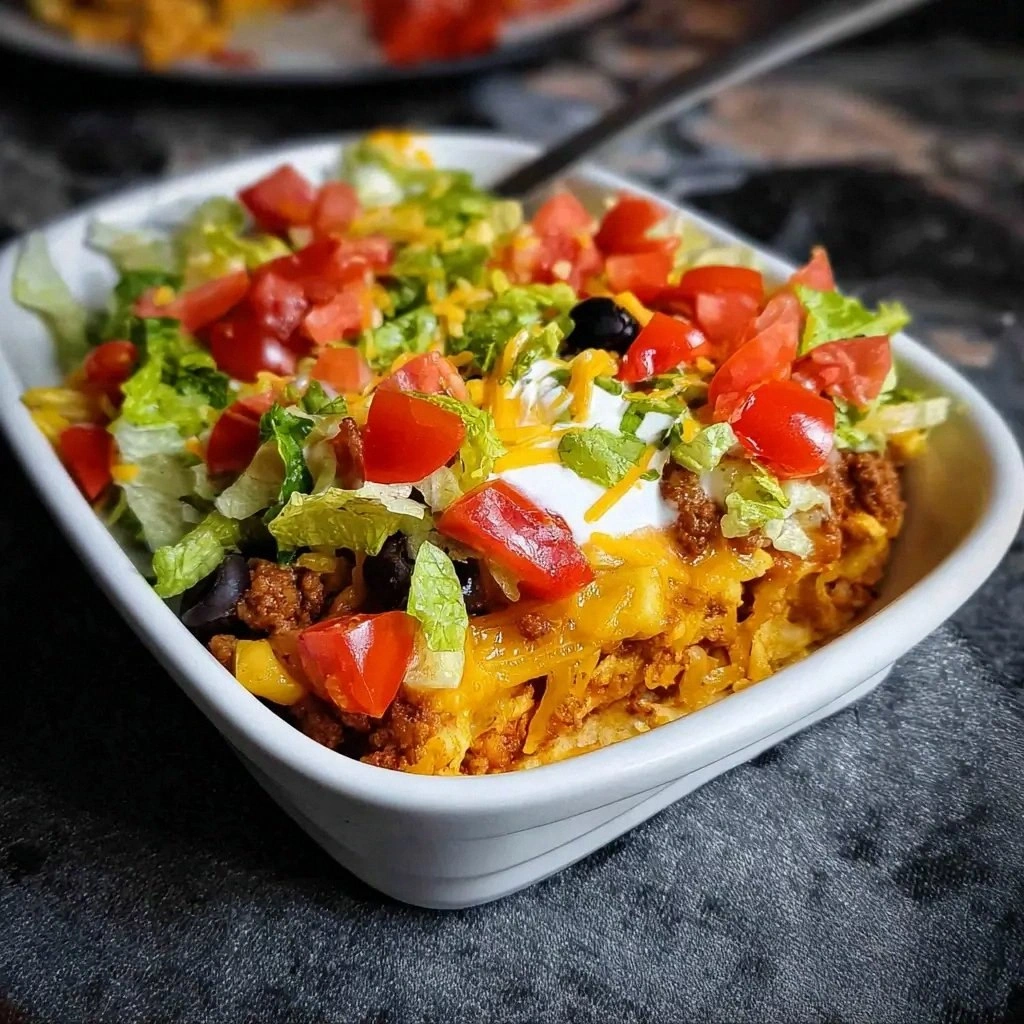
Visual Appeal: The golden cheese crust, bright salsa streaks, and the pop of green cilantro make this dish look as good as it tastes. It’s a crowd‑pleaser that looks impressive on any dinner table.
Make‑Ahead Friendly: This casserole can be assembled ahead of time and frozen, then baked straight from the freezer for a quick weeknight dinner. It’s the ultimate comfort food for busy families.
Kid‑Friendly: The familiar taco flavors make it a hit with kids, while the added crunch and cheese satisfy even the pickiest eaters.
Health‑Conscious Options: Swap ground beef for ground turkey or a plant‑based alternative, use low‑fat cheese, or add extra veggies to keep the dish lighter without sacrificing flavor.
Versatile Base: This casserole can be customized with different cheeses, sauces, or add‑ins—making it a versatile foundation for countless variations.
Alright, let's break down exactly what goes into this masterpiece…
Inside the Ingredient List
The Flavor Base
Ground Beef: The star of the show, it provides a hearty, meaty foundation. The fat content gives the casserole a juicy texture, but if you prefer leaner, swap for ground turkey or a plant‑based protein. Skipping beef will turn this into a completely different dish, so don’t be tempted to omit it.
Taco Seasoning: This is the secret sauce that brings cumin, paprika, and garlic together. A pinch of chili powder can add a subtle heat that keeps the dish interesting. If you’re a spice lover, feel free to double the amount.
Salsa: Freshness is key—use a chunky, tomato‑based salsa for a bright, tangy kick. The salsa also keeps the meat moist during baking. If you prefer a milder taste, opt for a mild salsa or even a salsa verde.
The Texture Crew
Cheddar Cheese: A sharp cheddar gives a classic taco flavor and melts into a silky coating. For a milder cheese, try Monterey Jack or a blend of both.
Monterey Jack: This cheese adds a subtle sweetness and a smooth melt. It balances the sharpness of cheddar, creating a harmonious cheese blend.
Crushed Tortilla Chips: These provide the essential crunch and a subtle corn flavor. Toast them lightly before adding to give them an extra toasty edge.
The Unexpected Star
Sour Cream: A dollop of sour cream adds a creamy, cool contrast to the warm, spicy layers. It also helps to mellow out the heat from the salsa and seasoning. If you’re dairy‑free, Greek yogurt or coconut cream works well.
Guacamole: A spoonful of guacamole adds a buttery texture and fresh avocado flavor that pairs beautifully with the salsa. It also adds a healthy dose of monounsaturated fats.
The Final Flourish
Cilantro: Fresh cilantro brightens the dish with a citrusy aroma that cuts through the richness. If you’re not a fan, you can omit it or replace it with parsley.
Lime Juice: A squeeze of lime adds a bright, acidic note that lifts the flavors. The acidity also helps to balance the richness of the cheese and meat.
Onion & Garlic: Diced onion and minced garlic add depth and aroma. They caramelize slightly during cooking, bringing a subtle sweetness that complements the savory elements.
Everything's prepped? Good. Let's get into the real action…
The Method — Step by Step
- Heat a large skillet over medium‑high heat. Add the ground beef, breaking it apart with a wooden spoon. Cook until browned, about 5–7 minutes. Drain excess grease, then set aside. This step is the foundation—if the meat isn’t fully browned, the casserole won’t have that deep, savory base.
- In the same skillet, toss in the diced onion and minced garlic. Sauté until translucent and fragrant, about 2 minutes. The aromatics will lift the flavor profile and create a subtle sweetness that balances the spices.
- Stir in the taco seasoning and salsa, cooking for an additional 3 minutes until the mixture thickens slightly. The sauce should coat the meat and aromatics, forming a cohesive base for the casserole.
- Transfer half of the meat mixture into a greased 9×13 inch baking dish. Sprinkle half of the shredded cheddar and Monterey Jack over the top. Layer the crushed tortilla chips evenly across the cheese. This layering technique ensures that each bite has a crunch and a cheesy bite.
- Repeat the layering with the remaining meat, cheeses, and chips. The top layer should be chips, which will crisp up into golden rings as it bakes.
- Cover the dish with foil and bake at 375°F (190°C) for 20 minutes. This step allows the flavors to meld and the cheese to melt into a smooth, cohesive layer.
- Remove the foil and bake for an additional 10 minutes, or until the top is golden brown and bubbly. The cheese should be fully melted, and the chips should be crisp. This is the moment of truth.
- Let the casserole rest for 5 minutes before serving. This resting period allows the flavors to settle and the cheese to set slightly, making it easier to cut into neat squares.
- Finish by dolloping sour cream and guacamole on top, then drizzle lime juice over the entire casserole. Garnish with chopped cilantro. The lime and cilantro add a fresh, citrusy brightness that cuts through the richness.
That's it — you did it. But hold on, I've got a few more tricks that'll take this to another level…
Insider Tricks for Flawless Results
The Temperature Rule Nobody Follows
Why it matters: Baking at the right temperature ensures the cheese melts evenly and the chips crisp without burning. I’ve learned that 375°F is the sweet spot for most ovens. If you go too hot, the top will brown too quickly, leaving the interior undercooked.
Why Your Nose Knows Best
Smell the difference: When the casserole starts to bake, you’ll notice a rich, buttery aroma from the melted cheese and a subtle hint of cumin from the seasoning. If the smell is too mild, it’s a sign that the sauce hasn’t fully developed.
The 5-Minute Rest That Changes Everything
Why it matters: Letting the casserole rest allows the cheese to set and the flavors to meld. The result is a cleaner bite, and the casserole won’t slide off the cutting board.
Add a Splash of Water Before Reheating
Why it works: Adding a tablespoon of water before microwaving or reheating in the oven helps steam the casserole, preventing the cheese from drying out. It’s a quick trick that keeps the dish moist.
The Secret of Layering Chips
Why it matters: Placing the chips on top ensures they crisp up into golden rings. If you scatter them throughout, they’ll get soggy from the sauce.
Creative Twists and Variations
This recipe is a playground. Here are some of my favorite ways to switch things up:
Mexican Street Taco Casserole
Swap the salsa for a smoky chipotle sauce and add a handful of corn kernels. Top with fresh avocado slices and a sprinkle of queso fresco for a street‑food vibe.
Tex‑Mex Breakfast Casserole
Use breakfast sausage instead of beef, and fold in scrambled eggs before baking. Finish with a drizzle of salsa verde and a sprinkle of cheddar.
Veggie‑Rich Powerhouse
Replace the meat with a mix of sautéed bell peppers, zucchini, and black beans. Add a splash of salsa and a handful of shredded pepper jack for a spicy kick.
Cheesecake‑in‑a‑Bowl
Use a blend of cream cheese, cheddar, and Monterey Jack for a richer, tangier cheese layer. The result is a casserole that feels like a dessert.
Low‑Calorie Make‑over
Use lean ground turkey, low‑fat cheese, and a sugar‑free salsa. Add extra veggies for volume without the extra calories.
Gluten‑Free Edition
Use gluten‑free tortilla chips and a gluten‑free taco seasoning blend. The dish remains hearty and flavorful, just without the gluten.
Storing and Bringing It Back to Life
Fridge Storage
Cool the casserole to room temperature, then cover tightly with foil or a lid. Store in the fridge for up to 3 days. The flavors deepen, and the cheese stays firm.
Freezer Friendly
Wrap the casserole tightly in plastic wrap, then place in a freezer bag. Freeze for up to 2 months. When ready to eat, thaw overnight in the fridge, then bake at 375°F for 25 minutes.
Best Reheating Method
Reheat in a preheated oven at 350°F for 15 minutes, or in the microwave on medium power for 4–5 minutes. Add a splash of water before reheating to keep the cheese moist and prevent drying.