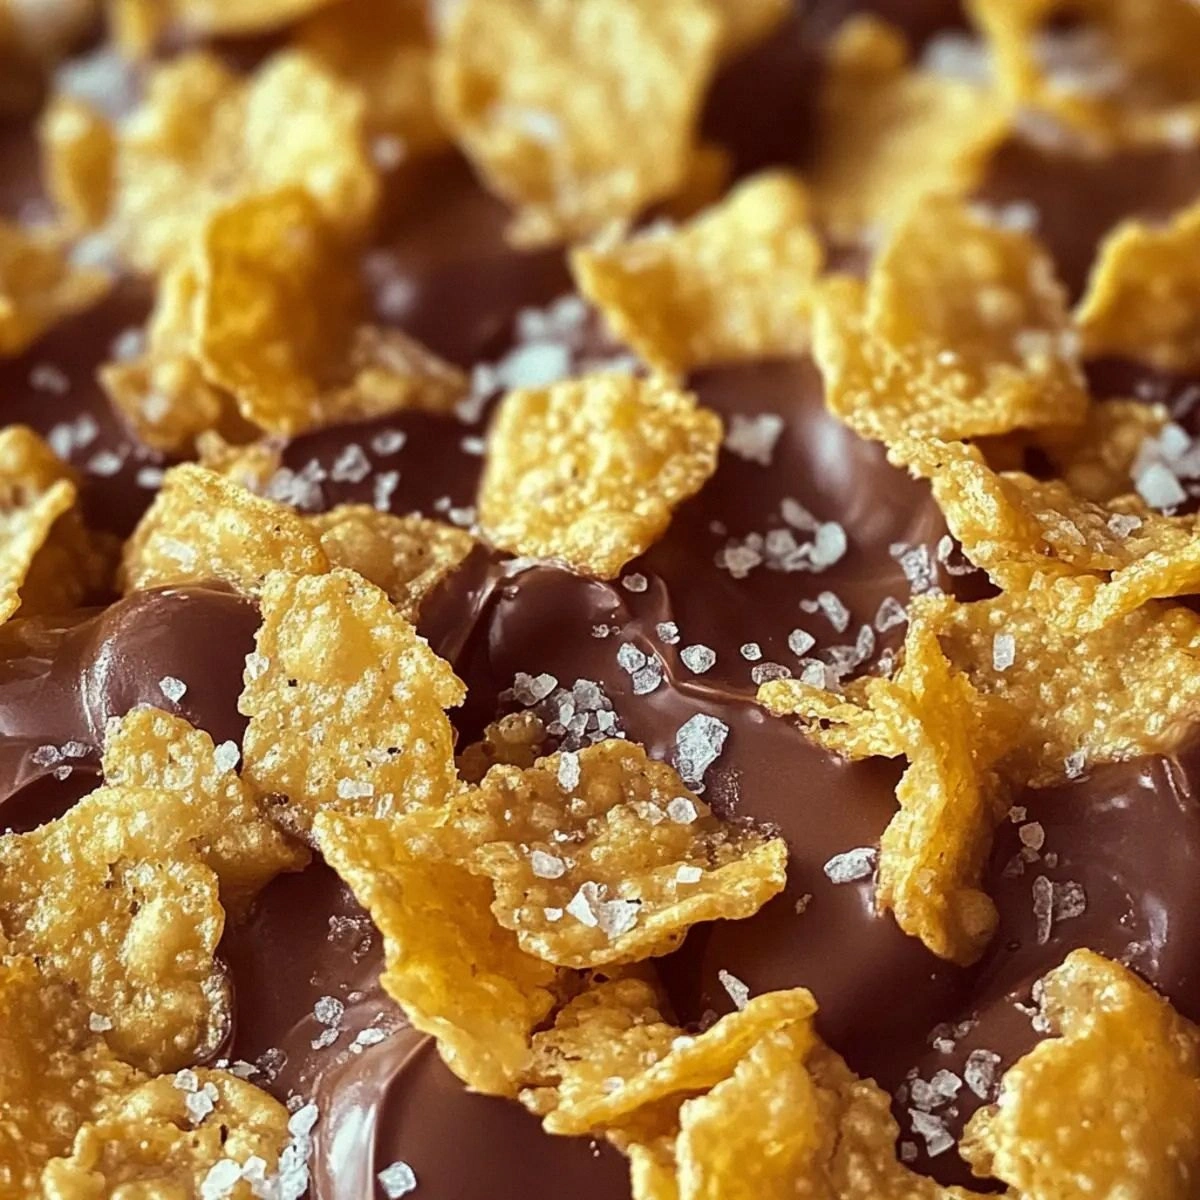
I was standing in my kitchen, half‑asleep, staring at a bowl of plain cornflakes that had somehow become the centerpiece of a midnight snack war. My roommate dared me to make something “sweet, salty, and addictive” and I laughed, because honestly, who could resist that crunchy, buttery promise? The next thing I knew, a pot of melted butter was bubbling on the stove, the smell of caramelized brown sugar curling around the room like a warm hug, and I was already picturing a glossy chocolate glaze that would coat each flake like a glossy lacquer. The moment I tasted the first bite, I felt a tiny fireworks show in my mouth – a perfect collision of sweet melt, salty snap, and that unmistakable cornflake crunch that shatters like thin ice under a spoon.
What makes this snack truly stand out is the balance of flavors that most other recipes completely miss. Most people either drown the cornflakes in sugar, turning them into a cloying mess, or they forget the buttery base that gives that luxurious mouthfeel. I discovered that a simple 1‑to‑1 ratio of butter to brown sugar, combined with a generous pinch of flaky sea salt, creates a caramel that’s buttery without being greasy, and the salt cuts the sweetness just enough to keep you reaching for more. The secret weapon? A quick flash‑melt of high‑quality chocolate that locks the whole thing together, forming a glossy, crack‑like crust that you can’t help but snap apart with your fingers.
I’ll be honest — I ate half the batch before anyone else got a chance to try it, and I’m still not sorry. The aroma that fills the kitchen as the butter and sugar melt together is nothing short of intoxicating, a scent that screams “dessert” but also whispers “snack”. Most recipes get this completely wrong by over‑baking, which turns the cornflakes into a sad, soggy mess. Here’s what actually works: keep the heat moderate, watch the caramel turn a deep amber, and pull the pan off the stove the instant you smell that toasty, nutty note. That’s the moment of truth, and it’s pure magic.
Picture yourself pulling this out of the oven, the whole kitchen smelling incredible, the glossy chocolate surface catching the light like a midnight lake. The edges start to pull away from the pan, revealing that perfect crackly top you’ve been dreaming about. I dare you to taste this and not go back for seconds – it’s hands down the best version you’ll ever make at home. Let me walk you through every single step — by the end, you’ll wonder how you ever made it any other way.
What Makes This Version Stand Out
- Flavor Harmony: The buttery caramel base, sweet chocolate glaze, and flaky sea salt create a sweet‑salty duet that dances on the palate without overwhelming any single note.
- Texture Symphony: Each cornflake stays crisp inside the glossy coating, giving you that satisfying snap that feels like biting into a fresh snowflake.
- Simplicity: Only five core ingredients are needed, yet the technique elevates them to a level you’d expect from a bakery.
- Uniqueness: The use of flaky sea salt on top adds a delicate crunch that most recipes skip, turning an ordinary snack into a gourmet treat.
- Crowd Reaction: People who try it for the first time usually declare it “addictive” and ask for the recipe within minutes – it’s a guaranteed party‑pleaser.
- Ingredient Quality: High‑fat butter and real dark chocolate give depth, while the cornflakes provide a neutral canvas that absorbs the flavors perfectly.
- Cooking Method: A gentle stovetop caramel followed by a quick bake locks in moisture without sogginess, ensuring a long‑lasting crunch.
- Make‑Ahead Potential: Store it in an airtight container and it stays crispy for days, making it a perfect grab‑and‑go snack.
Inside the Ingredient List
The Flavor Base
Butter is the backbone of this recipe. Using a full‑fat, unsalted butter gives you a rich, creamy mouthfeel that plain oil can’t match. If you skimp on butter, the caramel will taste thin and the final product will lack that luxurious melt‑in‑your‑mouth quality. For the best results, cut the butter into small cubes so it melts uniformly, and choose a butter that’s fresh – the flavor of butter can degrade quickly once it’s past its prime.
The Sweet Anchor
Brown sugar brings deep molasses notes that white sugar simply can’t provide. Its moisture content helps keep the caramel from becoming grainy. If you substitute with raw sugar, expect a slightly grittier texture; if you go for coconut sugar, the flavor will shift toward a subtle caramel‑like earthiness. When measuring, pack the sugar lightly into the cup; over‑packing can make the caramel too thick.
The Texture Crew
Cornflakes are the star of the show. Their airy structure absorbs the buttery caramel without losing their signature crunch. Opt for regular, not honey‑glazed, cornflakes – the added sugars will interfere with the caramel’s balance. If you’re gluten‑free, you can swap in puffed rice or gluten‑free cornflakes, though the texture will be a shade softer.
The Unexpected Star
Chocolate isn’t just a topping; it acts as a sealant that locks in the buttery caramel and prevents the cornflakes from getting soggy. Use a high‑quality dark chocolate (70% cacao or higher) for a bittersweet contrast that cuts through the sweetness. If you prefer milk chocolate, the snack will be sweeter, but you might lose some of that sophisticated edge. Melt the chocolate slowly over a bain‑marie to avoid scorching – a burnt chocolate flavor is a deal‑breaker.
The Final Flourish
Flaky sea salt is the final touch that turns this from “good” to “addictive”. Its irregular crystals create tiny bursts of salty crunch that balance the sweet caramel and chocolate. If you can’t find flaky sea salt, a pinch of finishing kosher salt works, but the texture won’t be quite as dramatic. Sprinkle the salt while the chocolate is still glossy, so it adheres perfectly.
Everything's prepped? Good. Let's get into the real action…
The Method — Step by Step
Start by melting the butter in a heavy‑bottomed saucepan over medium‑low heat. As the butter foams, add the brown sugar and stir constantly. You’ll hear a gentle sizzle – that’s the caramel forming. Keep the mixture moving until it turns a deep amber color and gives off a nutty aroma. Watch the color, not the clock.
Watch Out: If the heat spikes, the sugar can burn instantly, leaving a bitter taste that ruins the whole batch.Once the caramel reaches that perfect amber hue, remove the pan from the heat. Quickly stir in the flaky sea salt – it will dissolve slightly, creating tiny crystal pockets that will later sit on the surface. Let the mixture sit for 30 seconds; this pause allows the butter and sugar to meld, preventing the chocolate from seizing later.
Kitchen Hack: If you’re in a hurry, use a small whisk to incorporate the salt faster, but be gentle to avoid splattering.While the caramel rests, preheat your oven to 350°F (175°C). Line a large baking sheet with parchment paper – this prevents sticking and makes cleanup a breeze. Meanwhile, pour the cornflakes into a massive mixing bowl. The bowl should be big enough to allow the cornflakes to move freely without crushing them.
Pour the warm caramel over the cornflakes. Using a large silicone spatula, fold the mixture gently but thoroughly. You’ll hear a faint crackle as the hot caramel kisses each flake, coating them in a glossy sheen. The goal is to achieve an even coating; if you see dry patches, drizzle a little extra melted butter (just a tablespoon) and continue folding.
Spread the caramel‑coated cornflakes onto the prepared baking sheet in an even layer, about ½‑inch thick. This thickness ensures that the chocolate will later form a solid crust without sinking into the center. Place the sheet in the oven for 10‑12 minutes, watching closely. The edges should start to turn a light golden brown, and the whole mixture should emit a toasty scent.
While the cornflakes bake, melt the chocolate. Set up a bain‑marie: fill a saucepan with a couple of inches of water, bring it to a gentle simmer, and place a heat‑proof bowl on top, ensuring the bowl doesn’t touch the water. Add the chocolate pieces, stirring slowly until smooth and glossy. This gentle melt prevents scorching and keeps the chocolate’s flavor bright.
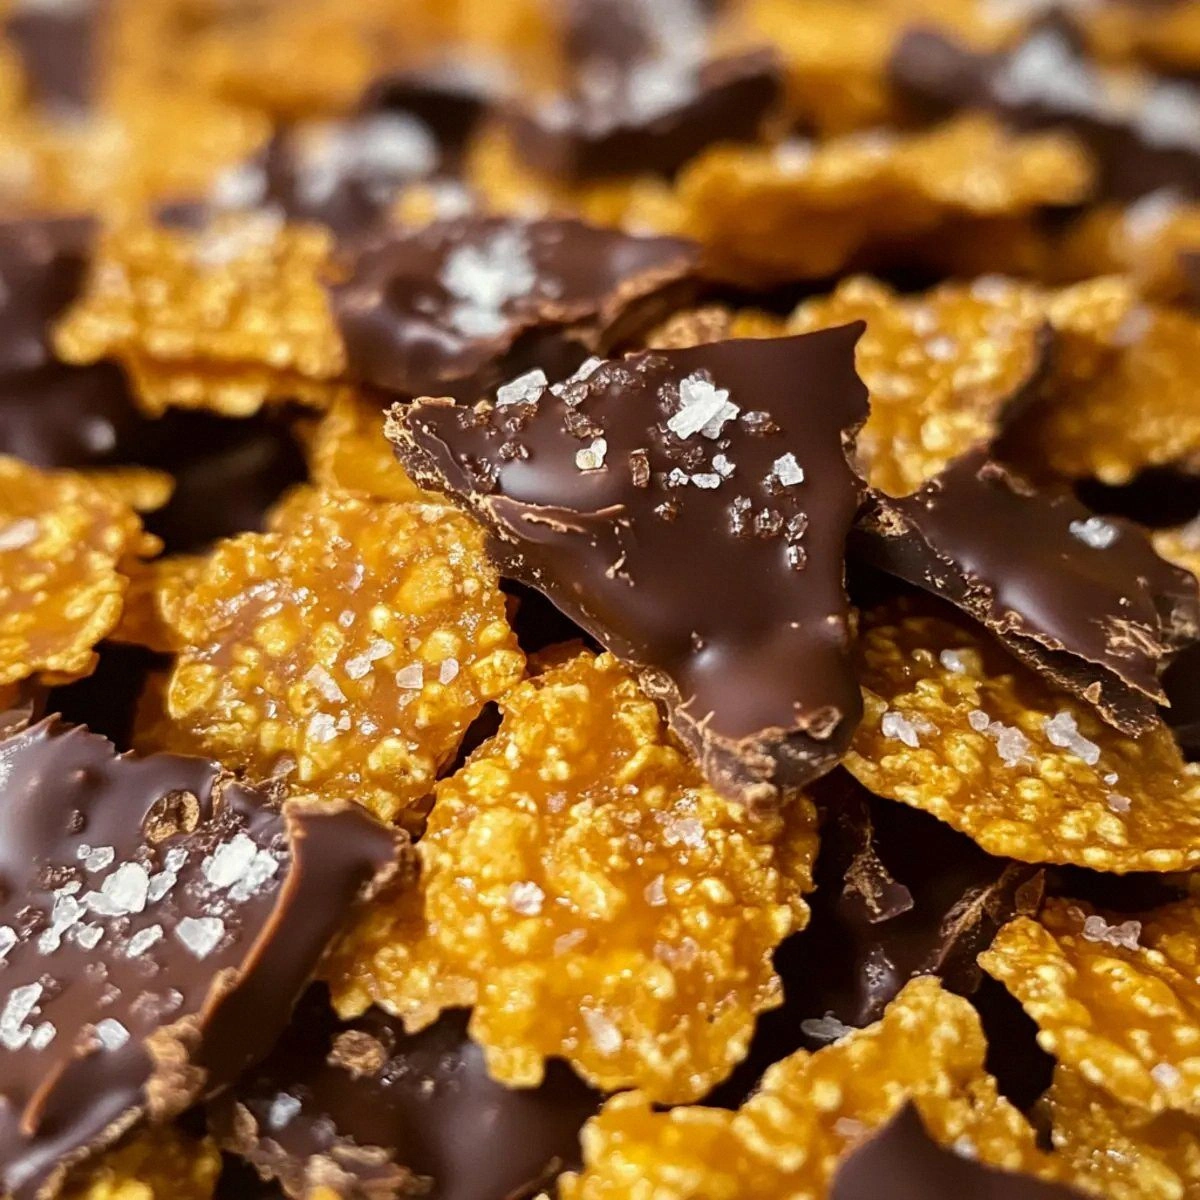
When the cornflakes are toasted, pull the sheet from the oven and immediately drizzle the melted chocolate over the top. Use a spatula to spread the chocolate in a thin, even layer, letting it cascade into the crevices. The chocolate will harden quickly as it contacts the warm cornflakes, forming that signature “crack” surface. While the chocolate is still glossy, sprinkle a final pinch of flaky sea salt for that extra pop.
Allow the entire sheet to cool completely on a wire rack – this can take about 20‑30 minutes. As it cools, the chocolate sets, and the caramel solidifies, creating a crunchy, glossy slab that you can break into bars or bite‑size shards. Once fully set, use a sharp bench knife to cut into squares or shards, depending on your serving preference.
Transfer the finished pieces to an airtight container. Store at room temperature for up to three days; the crunch will stay intact because the caramel and chocolate act as protective barriers. If you notice any soft spots, a quick 5‑minute stint in a 250°F oven will revive the crispness.
That's it — you did it. But hold on, I've got a few more tricks that'll take this to another level…
Insider Tricks for Flawless Results
The Temperature Rule Nobody Follows
Never let your caramel exceed 350°F (175°C). Going hotter makes the sugar caramelize too quickly, turning it bitter. Use an instant‑read thermometer and pull the pan the moment you see a deep amber hue. A friend once tried to “speed things up” by turning the heat up high – the result was a burnt, acrid mess that no amount of chocolate could rescue.
Why Your Nose Knows Best
Your sense of smell is the best indicator of when the caramel is ready. As soon as you detect a nutty, slightly toasted aroma, you’re at the sweet spot. Relying solely on a timer is a recipe for disappointment because stovetops vary. Trust that nose cue; it’s the secret weapon of seasoned bakers.
The 5‑Minute Rest That Changes Everything
After you drizzle the chocolate, let the slab rest for exactly five minutes before sprinkling the final sea salt. This short pause lets the chocolate set just enough to hold the salt crystals in place without sinking. If you add the salt too early, it dissolves into the chocolate, losing that delightful pop.
Cool‑Down on a Wire Rack
Never let the baked cornflake slab sit directly on a solid surface while cooling. A wire rack allows air to circulate, preventing steam from softening the crust. The result is a crisp, crackly top that stays crunchy for days.
The Double‑Layer Chocolate Trick
For an extra glossy finish, apply a thin first layer of chocolate, let it set for 2 minutes, then drizzle a second layer. This creates a subtle depth of flavor and a more resilient shell that resists breaking during storage.
Creative Twists and Variations
This recipe is a playground. Here are some of my favorite ways to switch things up:
Maple‑Bacon Blitz
Swap half the brown sugar for pure maple syrup and fold in crisp bacon bits after the caramel stage. The smoky‑sweet combo adds a breakfast‑for‑dessert vibe that’s perfect for brunch gatherings.
Spicy Chili Chocolate
Add a pinch of cayenne pepper to the melted chocolate before drizzling. The heat cuts through the sweetness and creates a thrilling tongue‑tingling experience that fans of Mexican chocolate will love.
Nutty Crunch
Stir in toasted chopped almonds or hazelnuts after coating the cornflakes with caramel. The nuts add an extra layer of crunch and a buttery flavor that complements the chocolate beautifully.
White Chocolate & Raspberry
Replace dark chocolate with high‑quality white chocolate and sprinkle freeze‑dried raspberry pieces on top before the final salt. The tart berries contrast the sweet base, creating a sophisticated dessert bite.
Coconut Dream
Add unsweetened shredded coconut to the cornflakes before baking, and finish with a drizzle of dark chocolate infused with toasted coconut oil. This gives a tropical twist that’s perfect for summer picnics.
Storing and Bringing It Back to Life
Fridge Storage
If you live in a humid climate, store the bars in an airtight container inside the refrigerator. They’ll stay crisp for up to a week, and the chocolate will stay firm. Before serving, let them sit at room temperature for 10 minutes to regain that perfect snap.
Freezer Friendly
These treats freeze like a charm. Layer parchment paper between each bar, place them in a zip‑top bag, and freeze for up to three months. When you’re ready to enjoy, thaw them in the fridge for 30 minutes, then let them sit at room temperature for a few minutes before serving.
Best Reheating Method
To revive a slightly softened batch, preheat your oven to 250°F (120°C), place the bars on a baking sheet, and warm for 5‑7 minutes. Add a tiny splash (about a teaspoon) of water to the pan before reheating – the steam helps the chocolate re‑gloss without melting.