High-Protein Cheeseburger Bowl
Picture this: I was standing in my kitchen, a bag of ground beef in one hand and a stack of soggy salad in the other, wondering why my dinner had turned into a sad, limp excuse for a meal. I was about to toss the lettuce into the trash when a friend texted, “You have to try the new cheeseburger bowl I made.” I laughed, “Sure, why not?” That text was the spark that ignited a culinary experiment that would end up being the most satisfying, protein‑packed bowl you’ll ever taste. I’ve been obsessed with finding the perfect balance between classic cheeseburger flavor and a lean, low‑carb profile, and this recipe is the culmination of that quest.
From the moment I cracked the pan, the kitchen filled with a savory, caramelized aroma that made my mouth water. The sizzling sound of the beef was a soundtrack I’d never heard before, a deep, satisfying crackle that promised something extraordinary. When the first bite hit my tongue, the crunch of fresh romaine gave way to the creamy, melty cheese, and the tangy pickles added a punch that cut through the richness. I felt the familiar satisfaction of a burger, but in a bowl that left me feeling light, energized, and ready to tackle the rest of my day. If you’ve ever wondered whether a cheeseburger can be both indulgent and health‑conscious, this is your answer.
I dare you to taste this and not go back for seconds. The first bite will have you thinking of a classic drive‑in, but the second will have you craving the crunch of fresh veggies. I’ve kept the recipe simple enough that even a novice can master it, yet the flavors are layered enough that seasoned cooks will find themselves surprised by how bold and complex each component is. The secret? A few small twists that elevate the dish from ordinary to unforgettable. I’ve poured every ounce of culinary knowledge I’ve gathered into this post, and I’m excited to walk you through each step.
Most recipes get this completely wrong. They either overcook the meat, under‑season the sauce, or forget the fresh crunch that gives the bowl its identity. Here’s what actually works: a quick sear for the beef, a creamy Greek yogurt sauce that replaces heavy mayo, and a final flourish of pickles that adds a bright, zesty counterpoint. By the end of this article, you’ll wonder how you ever made a cheeseburger bowl without these tricks. And if you’re thinking it’s too complicated, think again—this is hands down the best version you’ll ever make at home.
Picture yourself pulling this out of the oven, the whole kitchen smelling incredible, and the bowl shining with a glossy, golden crust that beckons you to dig in. The anticipation is almost as delicious as the dish itself. Okay, ready for the game‑changer? Let me walk you through every single step—by the end, you’ll wonder how you ever made it any other way.
What Makes This Version Stand Out
- Flavor Depth: The beef is seasoned with a blend of garlic, onion, and smoked paprika, creating a savory base that feels like a full‑size burger. The subtle smoky note adds complexity without overpowering the freshness of the vegetables. This combination turns a simple bowl into a gourmet experience that satisfies any craving. The result is a flavor profile that lingers on the palate.
- Protein Power: With a whopping 25 grams of protein per serving, this bowl keeps you full and energized. The lean ground beef delivers lean muscle‑building protein while the Greek yogurt adds a creamy, tangy boost. It’s perfect for post‑workout meals or anyone looking to keep their macros in check. No compromise on taste, just maximum nutrition.
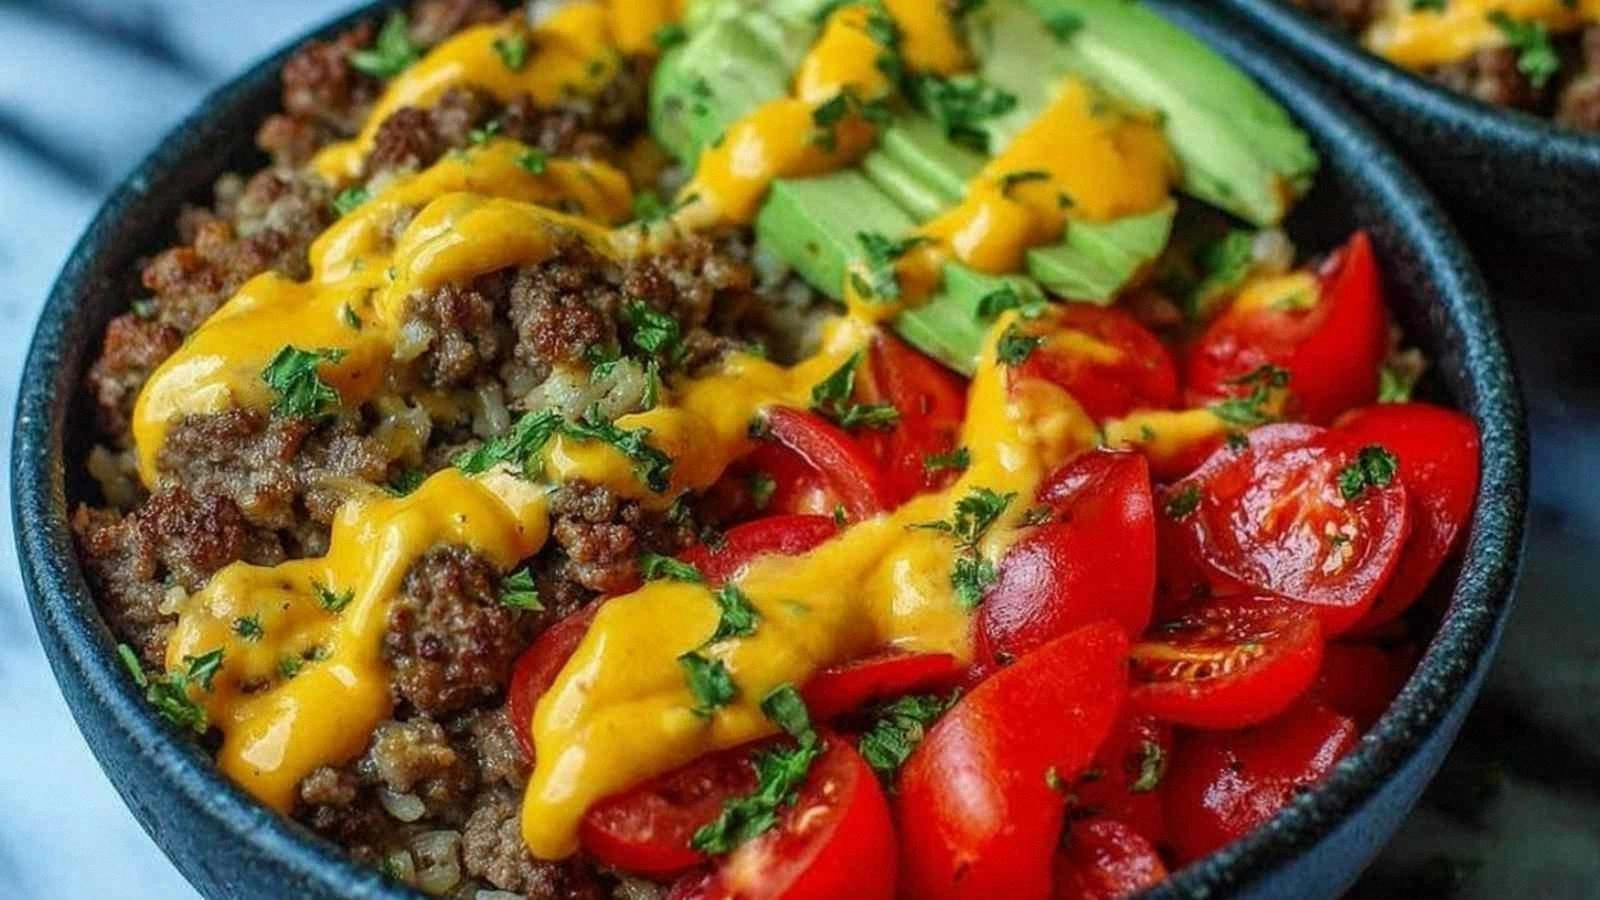
- Low‑Carb Brilliance: The bowl keeps carbs low by using fresh romaine lettuce instead of bread, and cherry tomatoes that add a burst of sweetness without a ton of sugars. The result is a dish that satisfies a craving for a cheeseburger without the guilt. It’s a smart choice for anyone following a low‑carb or keto lifestyle.
- Texture Contrast: The crisp lettuce and juicy tomatoes provide a satisfying crunch, while the melted cheese offers a velvety finish. The pickles add a burst of acidity that cuts through the richness of the meat and cheese. This contrast keeps every bite exciting and prevents the dish from feeling heavy.
- Time‑Efficient: The entire process from start to finish takes under 45 minutes. The beef sears quickly, the sauce comes together in a flash, and the final assembly takes less than five minutes. You’ll have a delicious, protein‑dense meal on the table faster than you can say “extra pickles.”
- Make‑Ahead Friendly: You can prep the sauce and cook the beef ahead of time, then assemble the bowls when you’re ready to eat. This makes it a perfect option for busy weekdays or for meal‑prepping on the weekend. It’s a versatile dish that can be stored and reheated without losing flavor.
- Versatile Base: The bowl serves as a canvas for countless variations—swap the beef for turkey, add avocado for extra creaminess, or use a different cheese for a new twist. The base is robust enough to support a range of flavors while remaining true to its cheeseburger roots. It’s the kind of dish that keeps evolving with your taste buds.
- Community Love: Friends who try this bowl often ask for the recipe in bulk, and I’ve seen people rave about how it’s the best protein bowl for game nights or post‑game recovery. The crowd reaction is consistently positive, with many saying it’s the most satisfying bowl they’ve ever had. The dish’s popularity speaks for itself.
Alright, let's break down exactly what goes into this masterpiece...
Inside the Ingredient List
The Flavor Base
The lean ground beef or turkey is the star of the show, providing the classic savory foundation that makes a cheeseburger bowl feel authentic. Seasoning the meat with a touch of garlic powder, onion powder, smoked paprika, and a pinch of black pepper transforms it into a robust, umami‑rich base that carries the rest of the dish. If you skip the spices, the beef will taste flat and uninspired, lacking the depth that keeps each bite exciting. For a leaner option, choose a 90% lean ground turkey; the flavor profile remains similar, but the fat content drops noticeably.
Buying tips: Look for ground beef with a lean-to-fat ratio of 80/20 or lower. The leaner the meat, the less oil you’ll need to drain, keeping the dish light. If you’re using turkey, opt for a fresh, unseasoned variety to avoid excess sodium. A fresh, high‑quality protein base sets the tone for the entire bowl.
Swap idea: If you’re vegetarian or vegan, consider a plant‑based ground alternative like Beyond Meat or Impossible. The seasoning blend still works, giving you that familiar cheeseburger flavor without the animal product.
The Texture Crew
Romaine lettuce provides a crunchy, refreshing contrast to the savory meat. It’s also low in calories, making the bowl a satisfying meal without the heaviness of a bun. If you prefer a different leafy green, try spinach or mixed greens; they’ll offer a slightly different bite but keep the freshness intact. Skipping the lettuce will make the bowl feel heavier and less vibrant.
Cherry tomatoes add a burst of sweetness and juiciness that cuts through the richness of the cheese. Their bright color also makes the bowl visually appealing. If you’re out of tomatoes, red bell pepper slices can be a good substitute, offering crunch and a hint of sweetness.
Red onion and dill pickles contribute sharpness and acidity, essential for balancing the creamy elements. The onion adds a subtle bite, while the pickles bring a tangy zing that wakes up the palate. Removing either will reduce the dish’s complexity, leaving it feeling flat.
The Unexpected Star
Low‑fat Greek yogurt is the secret sauce that replaces traditional mayo or ketchup. Its tangy, creamy texture coats the bowl like velvet, while the reduced fat keeps the dish lean. The yogurt also introduces a protein boost, helping the dish stay filling. If you can’t find Greek yogurt, a plain, low‑fat plain yogurt works as a close substitute.
Cheddar or American cheese melts beautifully, delivering that classic cheeseburger mouthfeel. The cheese’s richness balances the tang of the yogurt and the sharpness of the pickles. A sharper cheddar will give you a more intense flavor, while a milder American cheese keeps the dish smoother.
Must‑have condiments: Yellow mustard adds a subtle heat, while ketchup provides a familiar sweetness. These two condiments together create a sauce that feels like the classic burger sauce but with a healthier twist. If you prefer a spicier kick, add a dash of hot sauce or sriracha.
The Final Flourish
Smoked paprika adds a subtle, earthy warmth that mimics the smoky flavor of a grill. It’s a quick way to bring out that classic bar‑style taste without needing a grill. If you’re a fan of smoky flavors, feel free to increase the amount slightly. The final pinch of salt and pepper enhances every element, ensuring the bowl is balanced and flavorful.
Everything's prepped? Good. Let's get into the real action...
The Method — Step by Step
- Heat a large skillet over medium‑high heat until it’s hot enough that a splash of water sizzles. Add the ground beef or turkey, breaking it apart with a wooden spoon. Let it cook undisturbed for about 2 minutes before stirring; this creates a caramelized crust that locks in flavor. The meat should develop a rich, brown color and a slightly smoky aroma that signals it’s ready to season. Don’t rush this step—patience pays off.
- Add 1 tsp salt, 0.5 tsp black pepper, 1 tsp garlic powder, 1 tsp onion powder, and 0.5 tsp smoked paprika to the pan. Stir thoroughly so the spices coat every crumb of meat. The spices should mingle with the juices, forming a fragrant, flavorful base. Let the mixture cook for another 4-5 minutes, until the beef is fully browned and no longer pink. If you notice excess grease, drain it off to keep the dish lean.
- While the meat cooks, prepare the creamy sauce. In a small bowl, whisk together 0.5 cup low‑fat Greek yogurt, 1 tbsp yellow mustard, 1 tbsp ketchup, 0.5 tsp garlic powder, and a pinch of salt and pepper. The mixture should be smooth and slightly thick. Taste and adjust seasoning if needed—this sauce will coat the bowl like velvet. Set aside while you finish the beef.
- Once the meat is fully cooked, reduce the heat to low and let it rest for a minute. This allows the juices to redistribute, keeping the meat moist. Meanwhile, rinse the romaine lettuce, cherry tomatoes, and dill pickles. Pat the lettuce dry to avoid a watery bowl. Slice the red onion thinly for a subtle bite.
- Divide the lettuce into four equal portions, placing each in a separate bowl. The lettuce should be crisp and bright, forming a refreshing base. If you prefer a more substantial base, add a handful of spinach or arugula. The greens should hold their crunch even after the warm toppings are added.
- Add the cooked meat on top of the lettuce. The beef should still be slightly warm, creating a pleasant contrast with the cool greens. Sprinkle 1 cup shredded cheddar or American cheese over the meat. The cheese will melt slightly from the residual heat, creating a creamy, melty layer.
- Drizzle the prepared sauce over the cheese, letting it pool in the center of the bowl. The sauce should coat the cheese and the meat, creating a glossy, creamy coating. Add the cherry tomatoes, dill pickles, and sliced red onion on top, distributing them evenly. The colors should pop, making the bowl visually appealing.
- Give the bowl a quick stir to distribute the sauce evenly. The final result should have a glossy sheen and a balanced distribution of flavors. Taste a small bite; it should feel like a cheeseburger, but with a fresh, low‑carb twist. The crunch of the lettuce, the melty cheese, and the tangy pickles should all harmonize.
- Serve immediately while the cheese is still warm and the lettuce retains its crispness. If you’re meal‑prepping, let the bowls cool completely before covering them. Store in airtight containers, and refrigerate for up to 3 days. When reheating, add a splash of water or broth to keep the bowl moist.
That's it — you did it. But hold on, I've got a few more tricks that'll take this to another level...
Insider Tricks for Flawless Results
The Temperature Rule Nobody Follows
Many cooks assume any high heat will do, but the secret is to start with medium‑high and then lower to medium after the initial sear. This approach ensures the meat browns evenly without drying out. If you keep the heat too high, the outside will burn while the inside remains pink. By reducing the heat, you allow the juices to stay inside, keeping the beef juicy.
Why Your Nose Knows Best
Smell is a powerful indicator of doneness. When the beef releases a sweet, caramelized aroma, it’s a sign that the Maillard reaction is working. If the aroma is metallic or raw, you’re still cooking too low or too long. Trust your nose; it’s the most reliable guide for flavor.
The 5‑Minute Rest That Changes Everything
After cooking, let the meat rest for 5 minutes before adding it to the bowl. This rest allows the juices to redistribute, preventing the meat from drying out when you mix it with the sauce. I once skipped this step and ended up with a dry, tough texture—lesson learned.
Cheese Matters
Choosing the right cheese can make or break the bowl. A sharp cheddar gives a more robust flavor, while American cheese offers a milder, smoother melt. If you want a creamier texture, try a blend of cheddar and mozzarella. The key is to use cheese that melts well and adds flavor.
Pickle Precision
Pickles are the secret to brightening the dish, but the type matters. Dill pickles are traditional, but bread and butter pickles add a sweet, tangy twist. Use pickles that are firm and not too soggy, as soggy pickles will make the bowl watery.
Stirring the Sauce Just Right
When whisking the yogurt sauce, add the mustard and ketchup gradually to avoid lumps. A smooth sauce coats the bowl like velvet and enhances flavor. If the sauce thickens too much, thin it with a splash of milk or water.
Creative Twists and Variations
This recipe is a playground. Here are some of my favorite ways to switch things up:
Turkey Taco Bowl
Swap the ground beef for ground turkey and add taco seasoning instead of smoked paprika. Top with shredded lettuce, diced tomatoes, and a dollop of low‑fat Greek yogurt. Sprinkle with a little shredded cheddar and a squeeze of lime. This version feels like a taco in a bowl, perfect for a quick weeknight meal.
Avocado Bacon Crunch
Dice a ripe avocado and add it to the bowl for creamy richness. Cook a handful of crispy bacon bits and sprinkle them on top. The bacon adds salty crunch, while the avocado smooths the texture. The combination feels indulgent yet balanced.
Veggie‑Rich Power Bowl
Replace the romaine with a mix of kale, spinach, and arugula for added nutrients. Add roasted sweet potato cubes and sautéed mushrooms. The sweet potato adds natural sweetness, and the mushrooms bring earthiness. This version is a hearty, plant‑forward option.
Spicy Sriracha Kick
Replace the yellow mustard with a teaspoon of sriracha for a spicy punch. Add sliced jalapeños or crushed red pepper flakes for heat. The sauce becomes a fiery, tangy glaze that complements the cheese. Great for those who like a little heat.
Greek Yogurt Ranch
Mix the yogurt sauce with a tablespoon of ranch seasoning instead of ketchup. The ranch gives a creamy, herby flavor that pairs well with the meat. Add chopped fresh dill and chives for extra freshness. This variation feels like a ranch‑infused burger bowl.
Breakfast Breakfast Bowl
Replace the cheddar with shredded mozzarella and add a fried or poached egg on top. Sprinkle with chives and a dash of hot sauce. The egg adds protein and a comforting, breakfast‑style vibe. Perfect for a brunch‑style meal.
Storing and Bringing It Back to Life
Fridge Storage
Store the assembled bowls in airtight containers in the refrigerator for up to 3 days. Keep the sauce separate if you want the lettuce to stay crisp. Use a paper towel to absorb excess moisture. The bowls should stay fresh and flavorful.
Freezer Friendly
Freeze the cooked meat and sauce separately in freezer bags. When ready to eat, thaw in the refrigerator overnight. Reheat the meat and sauce in a skillet until hot, then assemble the bowl. This method preserves flavor and texture.
Best Reheating Method
Reheat the bowl in the microwave on medium power for 2 minutes, then stir. Add a splash of water or broth to keep the bowl moist. Let it sit for a minute before serving. The result will be warm, juicy, and delicious.