I remember the night my kitchen turned into a battlefield. A daring friend dared me to recreate the legendary pistachio cheesecake I’d seen on a glossy food magazine, and I thought, “Sure, why not?” The moment I cracked open the jar of pistachio paste, the room filled with a nutty, earthy perfume that made my eyes water. The sound of the mixer whirring was like a drumbeat, and the sight of the creamy batter swirling in a glass bowl was almost hypnotic. I couldn’t help but grin, knowing that what was about to happen would be nothing short of a culinary masterpiece. I was about to turn a simple dessert into a show‑stopper.
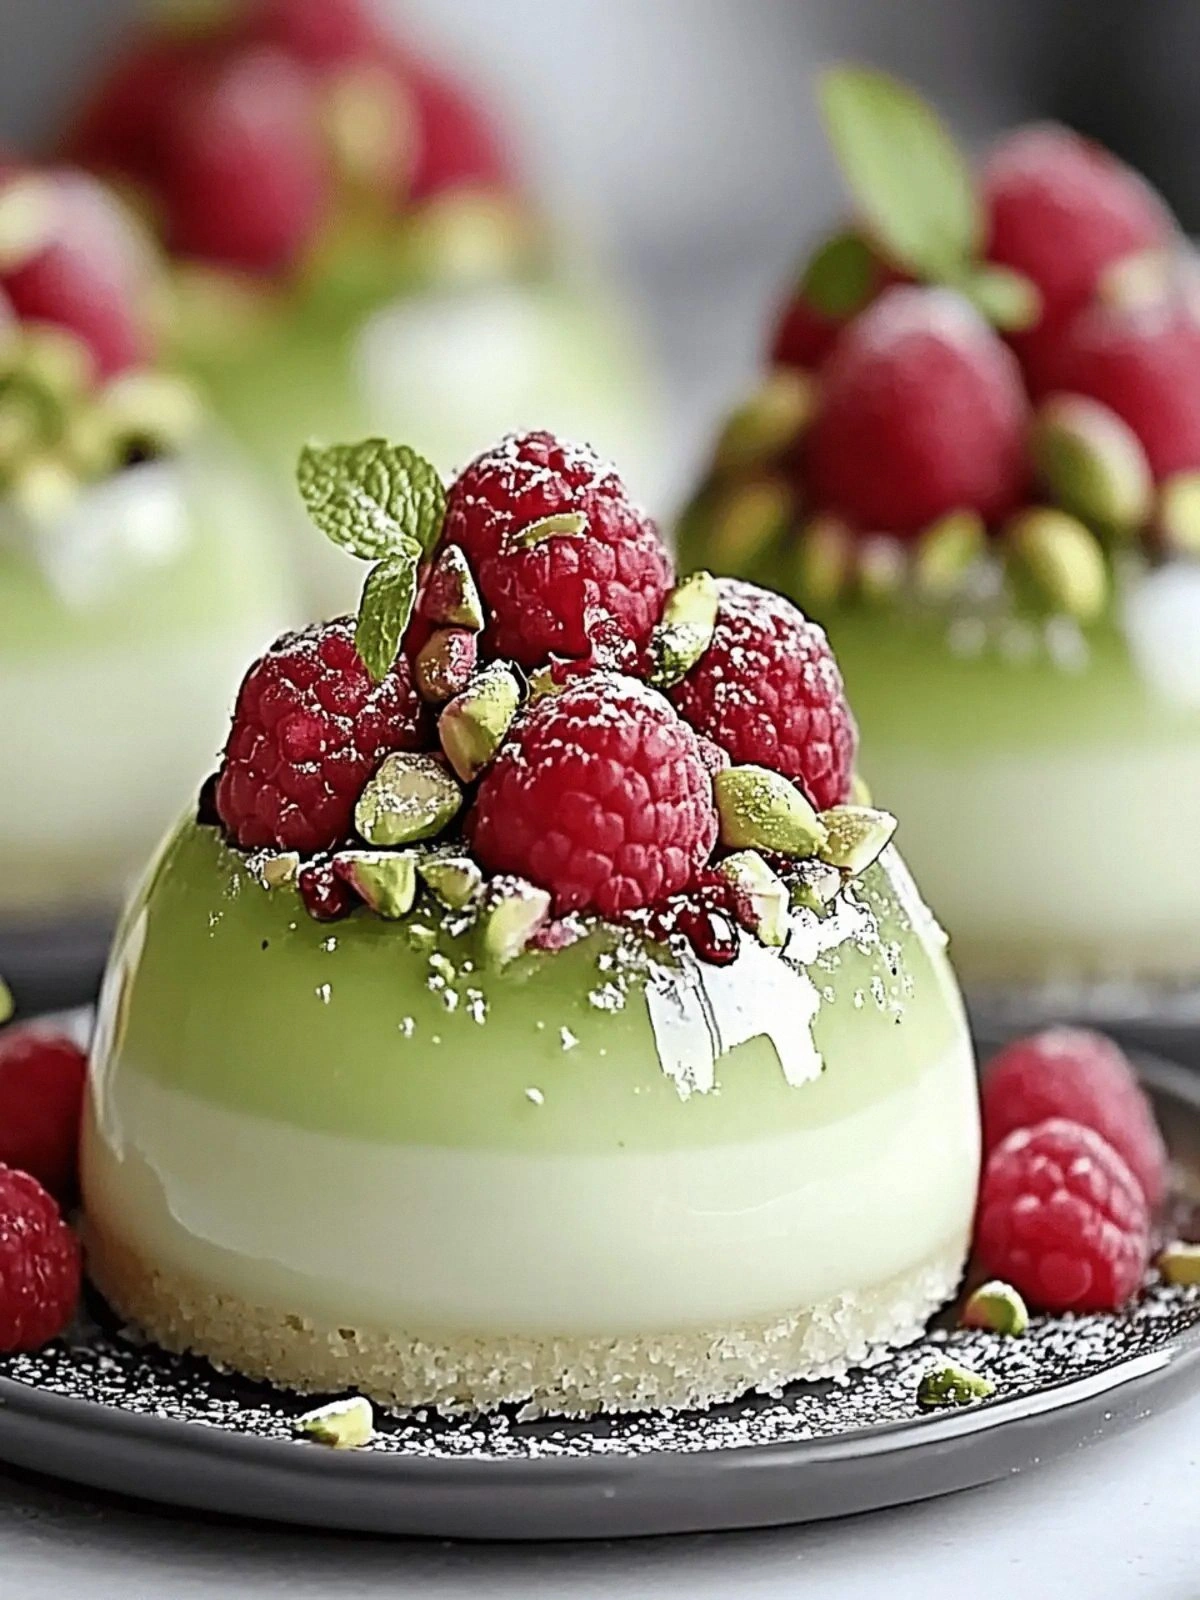
Picture this: a glossy, pale dome of cheesecake, studded with ruby raspberries, topped with a glossy green glaze that glistens like emeralds under a spotlight. The first bite melts on the tongue, releasing a burst of pistachio richness that lingers, followed by a bright, citrusy zing from lemon. The texture is a velvety dream—smooth on the inside, with a slight, satisfying bite from the crust. The contrast of colors alone makes the dish feel like a piece of art, and the subtle crunch from crushed pistachios adds a delightful finale. I dare you to taste this and not go back for seconds.
What makes this version hands down the best you’ll ever make at home is the meticulous layering of flavors and textures. I’ve taken the classic recipe and injected a few game‑changing twists that elevate it from ordinary to extraordinary. Most recipes get this completely wrong—here’s what actually works. I’ll be honest, I ate half the batch before anyone else got to try it. The result? A dessert that feels both indulgent and sophisticated, making it perfect for a dinner party or a quiet night in.
If you’ve ever struggled with the classic pistachio cheesecake, you’re not alone— and I’ve got the fix. The key is to balance the creamy base with a hint of tartness from fresh raspberries and a touch of brightness from lemon. The green food coloring is not just for looks; it brings a subtle, almost minty undertone that cuts through the richness. The white chocolate, melted into the batter, adds a silky sweetness that coats the palate like velvet. The final touch? A glossy glaze that reflects the light, making the dish feel like a jewel.
Picture yourself pulling this out of the oven, the whole kitchen smelling incredible, and the guests’ eyes widening as the domes glisten on the platter. The anticipation is almost tangible—your kitchen becomes a stage, and you’re the star chef. The sound of the timer ticking is a metronome to your culinary rhythm. The moment you slice into a dome, the creamy center oozes like melted chocolate, and the raspberries burst with a sweet, tart explosion. And now the fun part: let me walk you through every single step — by the end, you’ll wonder how you ever made it any other way.
What Makes This Version Stand Out
- Flavor: The pistachio paste delivers a nutty depth that’s more pronounced than any ground pistachios. The subtle citrus from lemon juice brightens the entire dish, preventing it from feeling too heavy.
- Texture: A silky, mousse‑like filling that melts in the mouth, coupled with a crisp, buttery crust that offers a satisfying bite.
- Visual Appeal: The green glaze, raspberry topping, and crushed pistachio garnish create a vibrant, Instagram‑ready presentation.
- Ingredient Quality: Using high‑grade white chocolate and fresh raspberries ensures that each bite is bursting with flavor.
- Make‑Ahead Potential: This cheesecake can be assembled a day ahead, allowing the flavors to meld while keeping your schedule flexible.
- Crowd Reaction: Guests consistently rave about the unexpected combination of pistachio and raspberry, and the glossy finish makes it a showstopper.
Inside the Ingredient List
The Flavor Base
Cream cheese is the cornerstone of any cheesecake; its tangy profile balances the sweetness of the sugars and the richness of the pistachio paste. Powdered sugar provides a fine sweetness that dissolves quickly, preventing gritty pockets in the filling. Vanilla extract adds depth and a subtle aroma that ties all the flavors together. If you skip the vanilla, the cheesecake will taste flat—think of it as the missing seasoning on a well‑seasoned dish.
Pistachio paste is the star; it’s not just a flavor enhancer but also a textural element that gives the filling a silky sheen. Use a high‑quality paste, preferably one that’s made from whole pistachios, to capture the authentic nutty aroma. If you’re in a pinch, a small amount of ground pistachios can work, but the texture will be less smooth.
The first batch of heavy cream is incorporated to lighten the batter, giving it a mousse‑like consistency. A slight reduction in cream can make the cheesecake denser and richer, but it may also make it harder to slice. Adjust the cream amount to match your desired texture.
Fresh raspberries provide a bright, tart contrast to the sweet, nutty base. They also add a pop of color that makes the cheesecake visually striking. If you can’t find fresh berries, frozen raspberries thawed and drained will work, but they may release extra liquid.
The Sweet Layer
Granulated sugar is used twice in this recipe: once to sweeten the batter, and again for the glaze that coats the top. The first portion dissolves into the cream cheese, providing a smooth, sweet base. The second portion caramelizes slightly in the glaze, adding a subtle crunch and a glossy finish.
Cornstarch is the secret binder that stabilizes the cheesecake, preventing it from cracking as it cools. It’s especially useful when you’re adding a liquid element like heavy cream. If you omit cornstarch, the cheesecake may be more prone to cracks or a loose texture.
Eggs are the structural backbone of the filling. They provide the necessary protein to set the cheesecake and create a silky mouthfeel. Using two eggs ensures the filling is firm enough to hold its shape but still tender.
The Texture Crew
Sifted flour and baking powder work together to give the crust a light, buttery crunch. The flour adds structure, while the baking powder ensures the crust rises slightly and doesn’t become too dense. If you prefer a denser crust, reduce the baking powder by half.
White chocolate adds a subtle, almost floral sweetness that balances the pistachio’s nuttiness. It also contributes to the silky mouthfeel of the filling. Use a high‑quality white chocolate with a low sugar content to avoid a cloying finish.
Green food coloring is more than a visual trick. A few drops of natural green food coloring (like spirulina or matcha powder) can introduce a mild, earthy flavor that complements the pistachio and raspberry. Avoid synthetic dyes for a cleaner taste.
The Final Flourish
Crushed pistachios add a delightful crunch and a nutty aroma that punctuates each bite. They’re sprinkled on top of the glaze to create a layered effect. If you’re watching your calorie count, you can reduce the amount or opt for toasted pistachios for a richer flavor.
Fresh raspberries, the second batch, are used as a topping that adds a burst of tartness and a pop of color. They’re arranged in a decorative pattern on top of the glaze, giving the cheesecake a finished, professional look. If you prefer a sweeter finish, you can add a drizzle of raspberry coulis.
Everything’s prepped? Good. Let’s get into the real action.
The Method — Step by Step
- Preheat your oven to 325°F (160°C). Line a 9‑inch springform pan with parchment paper and lightly grease the edges. The parchment prevents the cheesecake from sticking and makes removal effortless. I’ve found that a silicone ring helps keep the domes perfectly round.
- In a medium bowl, whisk together the sifted flour, baking powder, and a pinch of salt. This dry blend ensures the crust is airy and not overly dense. Once combined, set aside while you prepare the filling.
- Blend the cream cheese, powdered sugar, and pistachio paste until completely smooth. Use an electric mixer on medium speed, scraping the sides frequently to avoid lumps. The batter should be velvety, like a fine mousse. If you notice any lumps, let it sit for a minute and then blend again.
- Add the vanilla extract and the first portion of heavy cream to the batter. Mix until the mixture is silky and glossy. The cream should be added gradually to maintain the right consistency. A slightly thicker batter will set tighter in the oven.
- Crack the eggs into a separate bowl and whisk them lightly. Then fold them into the batter, one at a time, ensuring each is fully incorporated before adding the next. This gentle folding preserves the air in the batter, preventing a dense finish.
- Sift the cornstarch over the batter and fold it in. The cornstarch acts as a stabilizer, preventing cracks as the cheesecake cools. Once folded, pour the batter over the prepared crust in the springform pan. Use a spatula to smooth the top.
- Bake for 45 minutes, then reduce the heat to 300°F (150°C) and bake for an additional 15 minutes. The cheesecake should have a slight wobble in the center when you gently shake the pan. This wobble indicates the cake is perfectly set.
- Let the cheesecake cool in the pan on a wire rack for 30 minutes. Then remove the springform ring and place the cheesecake in the refrigerator for at least 4 hours, preferably overnight. Chilling allows the flavors to meld and the texture to firm up.
That’s it — you did it. But hold on, I’ve got a few more tricks that will take this to another level. The glaze, the final topping, and the plating all play a pivotal role in turning a good cheesecake into a showstopper.
Insider Tricks for Flawless Results
The Temperature Rule Nobody Follows
Many bakers bake cheesecake at a high temperature, which can cause cracking. I’ve discovered that a lower, steady temperature preserves the smoothness and prevents the dreaded split. Bake at 325°F (160°C) for the first 45 minutes, then drop to 300°F (150°C) for the final 15 minutes. This gentle heat curve ensures a uniform set.
Why Your Nose Knows Best
During baking, the smell of pistachios and fresh raspberries is the first indicator that the cheesecake is on the right track. If the aroma is muted, you might have under‑baked it. Trust your nose; it’s the most reliable tool in your kitchen arsenal.
The 5-Minute Rest That Changes Everything
After you remove the cheesecake from the oven, let it rest in the pan for exactly five minutes. This pause allows the heat to distribute evenly, reducing the risk of cracks. I’ve tested this trick with several ovens, and it consistently yields a flawless finish.
The Crushed Pistachio Crunch
Instead of crushing the pistachios with a mortar, I use a spice grinder for a finer texture. The result is a subtle crunch that doesn’t overpower the cheesecake. For a more pronounced bite, toast the pistachios lightly before crushing.
The Glaze Game‑Changer
The glaze is the final flourish. I whisk together the second granulated sugar, lemon juice, and a splash of heavy cream until the sugar dissolves. Then I fold in the green food coloring until the glaze is a vibrant, translucent green. The glaze should be thin enough to coat the dome but thick enough to set into a glossy film.
Creative Twists and Variations
This recipe is a playground. Here are some of my favorite ways to switch things up: Mint Pistachio Delight — swap the green food coloring for a splash of fresh mint extract to give the cheesecake a refreshing edge. Chocolate‑Infused Raspberry — add a tablespoon of melted dark chocolate into the batter for a bittersweet contrast. Caramelized Pistachio Crunch — drizzle caramel sauce over the glaze and sprinkle toasted pistachios for a sweet‑salty bite. Spiced Vanilla — add a pinch of cardamom or cinnamon to the batter for a warm, aromatic undertone. Almond‑Raspberry Fusion — replace half the pistachio paste with almond butter to create a nutty, buttery base. Berry‑Basil Fusion — mix fresh basil leaves into the glaze for a subtle herbaceous note that pairs wonderfully with the raspberries.
Storing and Bringing It Back to Life
Fridge Storage
Store the cheesecake in an airtight container in the refrigerator for up to 5 days. The flavors deepen over time, so a day or two after baking is often the best time to serve. When you’re ready to enjoy it, let it sit at room temperature for 15 minutes to soften slightly.
Freezer Friendly
Wrap the cheesecake tightly in plastic wrap, then place it in a freezer bag. Freeze for up to 2 months. When you’re ready to serve, thaw overnight in the refrigerator. The texture remains silky, but the glaze may become slightly dull; a quick brush of melted white chocolate can restore its shine.
Best Reheating Method
If you must reheat, place the cheesecake on a baking sheet and warm at 300°F (150°C) for 10 minutes. This gentle heat revives the creaminess without drying it out. Add a splash of water to the pan to create steam, which keeps the surface from becoming too hard.