I was standing in the kitchen, staring at a half‑cooked pork belly that had been left in the fridge for three days. The smell that rose from the pan when I finally decided to give it a go was like a promise of something epic, a whisper of caramel and smoke that made my mouth water. It was the moment when I realized that what I was about to create was going to be a game‑changer, a dish that would turn ordinary dinner nights into a culinary rave. The sizzling sound, the deep mahogany color, the aroma of sweet and savory mingling together – it was a symphony of senses that I could not ignore. I was about to turn this humble cut of meat into the most unforgettable pork belly burnt ends anyone has ever tasted.
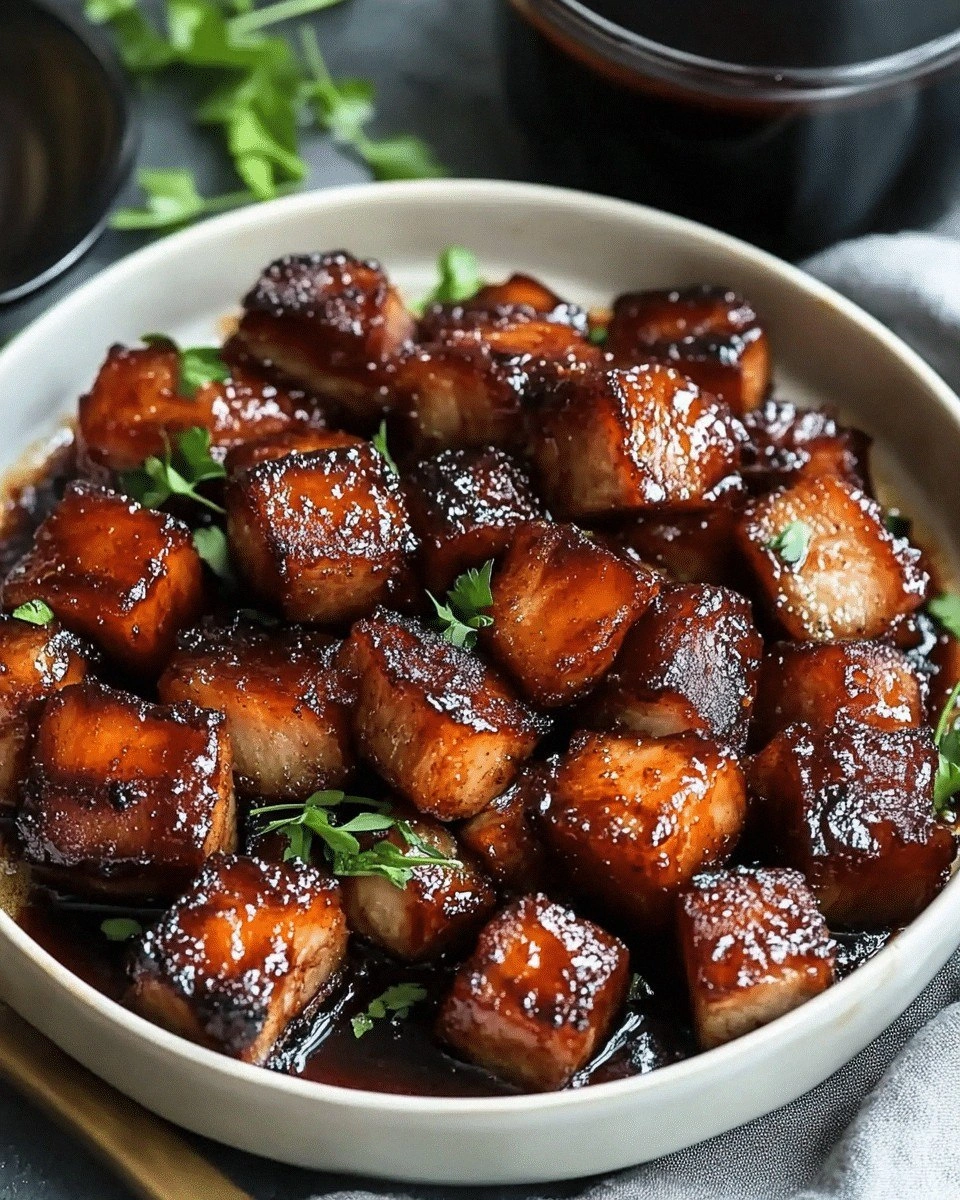
Picture yourself pulling a tray of those glossy, caramelized cubes out of the oven, the kitchen filling with a heady aroma that makes even the most stoic foodie swoon. The edges of each bite are crisp, cracking like thin ice, while the inside remains tender and juicy, a contrast that keeps your palate dancing. I dare you to taste this and not go back for seconds; the first bite will have you shouting, “I’ve never seen anything like this!” and the second will make you wonder why you ever settled for bland barbecue. The secret? It’s a blend of simple ingredients, a precise timing, and a touch of kitchen wizardry that elevates the dish from good to legendary. If you’ve ever struggled to get that perfect balance of sweet and smoky, you’re not alone – and I’ve got the fix.
Most recipes get this completely wrong, focusing on the exterior glaze while neglecting the interior texture. I’ve spent countless evenings experimenting with different rubs, sauces, and cooking times, and this version is hands down the best you’ll ever make at home. The result is a dish that is not only rich and flavorful but also incredibly versatile, perfect for parties, week‑night dinners, or a lazy Sunday lunch. The technique I’ll show you today will give you that glossy, caramelized finish that looks as good as it tastes. Stay with me here – this is worth it, because every step is a step closer to culinary greatness.
Let me walk you through every single step – by the end, you’ll wonder how you ever made it any other way. I’ll share the exact measurements, the timing, and the little hacks that make a huge difference. This isn’t just a recipe; it’s a masterclass in flavor layering, texture control, and kitchen confidence. By the time you finish, you’ll have a new favorite dish that will become a staple in your repertoire. And trust me, the first bite will have you saying, “I’m never cooking pork belly the old way again.”
What Makes This Version Stand Out
- Flavor Depth: The combination of honey, soy sauce, and smoked paprika creates a complex, multi‑layered taste that evolves with each bite. The sweet glaze caramelizes into a glossy finish that coats the meat like velvet, while the smoky undertones linger long after the first mouthful.
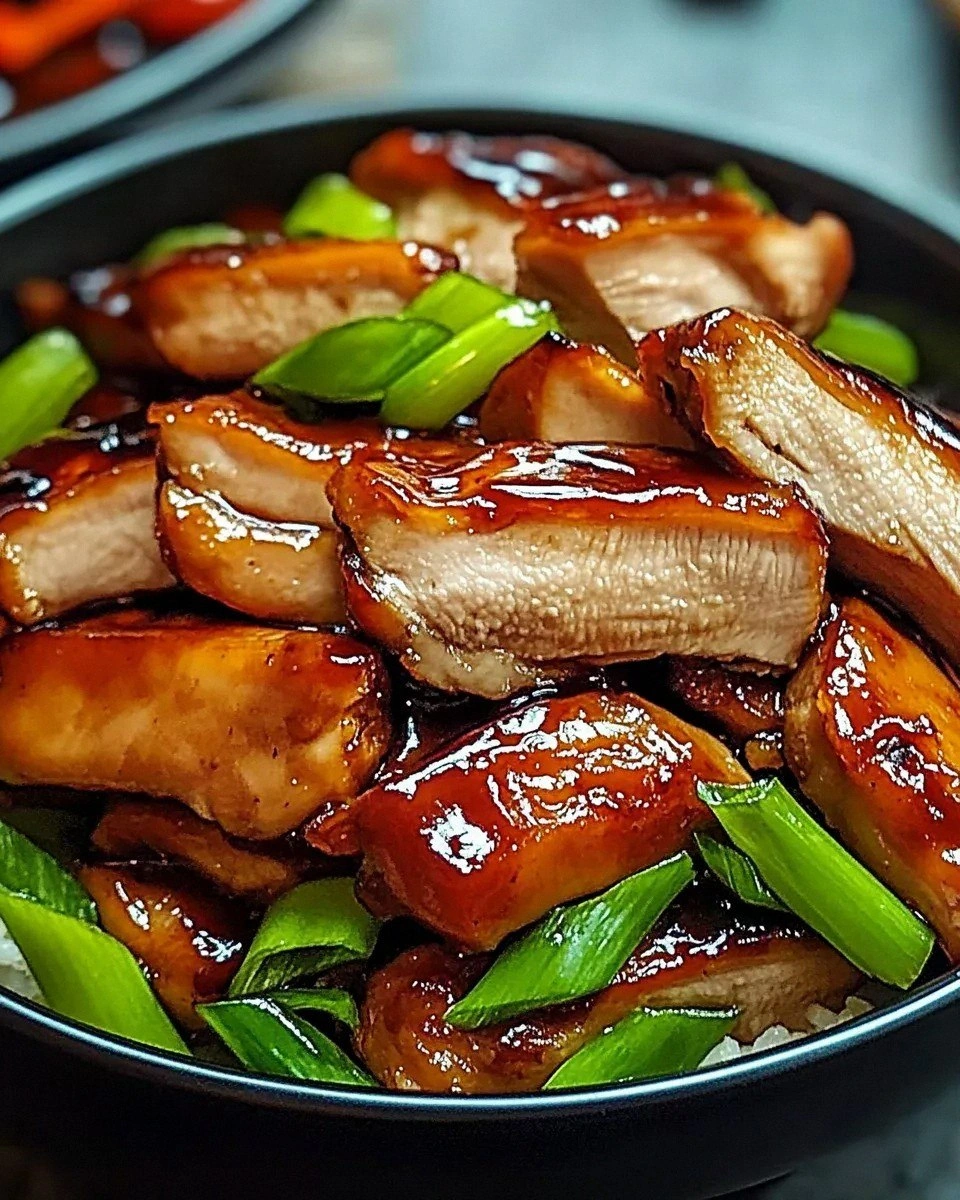
- Texture Mastery: The pork belly is first seared to lock in juices, then slow‑cooked to melt the fat into a buttery sauce. The result is a tender interior that practically falls apart, paired with a crisp, caramelized exterior that snaps pleasantly when you bite.
- Simplicity: Despite its gourmet finish, the recipe requires only a handful of pantry staples. You’ll be surprised how a few common ingredients can transform a simple cut of meat into a showstopper.
- Make‑Ahead Potential: The burnt ends can be prepared ahead of time and reheated without losing flavor or texture. This makes it an ideal dish for busy weeknights or when you have unexpected guests.
- Crowd Reaction: Friends and family will be amazed at the caramelized glaze and the melt‑in‑your‑mouth texture. It’s the kind of dish that turns a casual dinner into a memorable event.
- Ingredient Quality: Using a high‑quality pork belly with a good fat layer ensures the best flavor extraction and texture. The quality of the glaze ingredients also plays a crucial role in achieving the right balance.
Inside the Ingredient List
The Flavor Base
The foundation of these burnt ends is a sweet, umami‑rich glaze that coats each cube like a glossy coat of armor. Honey provides natural sweetness and helps the glaze caramelize, while soy sauce adds depth and a salty punch. Worcestershire sauce brings a tangy complexity that lifts the overall flavor profile.
Skipping any of these will alter the balance; if you omit honey, the glaze will be less sticky and the caramelization will be dull. If you leave out the soy sauce, the dish will lack that essential umami kick. Always use real, high‑quality versions of these sauces – cheap substitutes will leave a flat, uninteresting taste.
The Texture Crew
The pork belly itself is the star of the show. It should have a good layer of fat and a slightly marbled texture; this fat renders during cooking, keeping the meat tender and juicy. Cutting the belly into 1‑inch cubes ensures even cooking and a consistent bite.
Brown sugar is added to the glaze to help create that signature caramelized crust. It also balances the saltiness of the soy sauce and the acidity of the Worcestershire. A pinch of smoked paprika gives a subtle smoky flavor that complements the pork’s natural richness.
The Unexpected Star
Garlic powder, onion powder, and a touch of chili flakes add aromatic depth and a hint of heat that keeps the dish from feeling one‑dimensional. These spices are sprinkled over the pork before the glaze is added, ensuring they infuse into the meat as it cooks.
If you’re looking for a twist, try adding a splash of bourbon or a dash of apple cider vinegar to the glaze. These additions can add complexity and a subtle tang that elevates the flavor profile even further.
The Final Flourish
Butter and Dijon mustard are folded into the glaze in the final stages, creating a silky, glossy finish that clings to every cube. The butter adds richness, while the mustard provides a bright, slightly sharp contrast that cuts through the sweetness.
Molasses is optional but recommended for an extra layer of deep, molasses‑sweetness that pairs beautifully with the smoky paprika. If you’re watching your sugar intake, you can reduce the molasses or replace it with a natural sweetener like maple syrup.
Everything's prepped? Good. Let's get into the real action, where the magic truly happens.
The Method — Step by Step
- First, trim the pork belly of any excess fat and score the surface in a crosshatch pattern. This not only helps the glaze penetrate deeper but also creates a beautiful marbled appearance. Use a sharp knife to make clean cuts, and keep the depth shallow so the meat doesn’t lose too much moisture. Let the meat rest at room temperature for 15 minutes while you prepare the glaze.
- In a small saucepan, combine honey, soy sauce, Worcestershire sauce, brown sugar, smoked paprika, garlic powder, onion powder, and chili flakes. Warm the mixture over medium heat, stirring constantly, until the sugar dissolves and the glaze thickens slightly. This will take about 5 minutes. The glaze should be glossy and pourable but still cling to the back of a spoon.
- Now it’s time to sear. Heat a large cast‑iron skillet over high heat until it’s smoking hot. Add the pork belly cubes in a single layer, searing each side until a golden crust forms, about 2–3 minutes per side. This step locks in juices and creates a caramelized base for the glaze. Don’t crowd the pan; if necessary, do it in batches.
- Transfer the seared cubes to a baking dish and pour the glaze over them, ensuring each piece is coated. Toss gently to distribute the sauce evenly. The glaze should coat every cube like a shiny coat of armor.
- Cover the dish tightly with foil and bake at 300°F (150°C) for 2 hours. The low, slow heat allows the fat to render completely, infusing the meat with flavor while the glaze thickens into a sticky, caramelized coating.
- Halfway through the bake, stir the cubes gently to ensure even cooking and to prevent any glaze from drying out. This also helps the glaze thicken and adhere to the meat, creating that signature glossy finish.
- Remove the foil and increase the oven temperature to 425°F (220°C) for the final 15–20 minutes. This high heat caramelizes the glaze further, giving the burnt ends a slightly charred, crispy edge. Watch the color closely; you want a deep amber, not burnt.
- While the ends are caramelizing, melt butter in a small saucepan and stir in Dijon mustard and molasses. This will be your final glaze that adds a silky finish. The butter keeps the sauce from becoming too thick, while the mustard provides a bright, sharp contrast.
- Once the ends are golden and caramelized, remove them from the oven and toss them in the butter‑mustard glaze. The sauce should coat each cube like a glossy, flavorful coating that clings to the meat. The result is a beautiful, glossy sheen that makes the dish irresistible.
- Let the burnt ends rest for 5 minutes before serving. This allows the juices to redistribute, ensuring each bite is juicy and flavorful. The glaze will thicken slightly as it cools, creating a perfect balance of crisp and tender.
- Serve immediately with your favorite sides, such as roasted vegetables, coleslaw, or a simple green salad. The pork belly’s rich flavor pairs beautifully with both hearty and light accompaniments. And don’t forget to offer extra glaze for those who want a little extra sweetness.
That's it — you did it. But hold on, I've got a few more tricks that'll take this to another level and ensure every bite is flawless.
Insider Tricks for Flawless Results
The Temperature Rule Nobody Follows
Many cooks think that higher temperatures always produce better caramelization, but that’s not the case. The secret is a steady, low heat that allows the fat to render slowly, infusing the meat with flavor. The final high‑heat step is just for that caramelized crust. If you skip it, the ends will be tender but lack that irresistible crunch.
Why Your Nose Knows Best
During the slow bake, trust the scent of the glaze thickening. When the aroma becomes sweet, smoky, and slightly caramelized, it’s a sign that the glaze is ready. I once let my oven run a minute too long, and the ends smelled like burnt sugar. The next time, I checked the scent first and avoided that mishap.
The 5‑Minute Rest That Changes Everything
Resting the burnt ends after baking allows the juices to redistribute, preventing them from spilling onto the plate. It also gives the glaze time to thicken, creating a glossy, flavorful coating. Skipping this step can leave the ends dry or overly greasy.
The Secret to a Perfect Glaze
A glossy glaze requires the right balance of fats and sugars. Adding butter at the end keeps the sauce silky, while the mustard adds a bright note. If the glaze looks too thick, add a splash of water or apple cider vinegar to loosen it.
The Right Pan for the Job
Using a heavy‑bottomed cast‑iron skillet for searing ensures even heat distribution and prevents sticking. If you don’t have a skillet, a stainless steel pan works fine, but watch for flare‑ups. A good pan also helps achieve a beautiful crust without burning.
Creative Twists and Variations
This recipe is a playground. Here are some of my favorite ways to switch things up:
Maple‑Balsamic Fusion
Swap the honey for pure maple syrup and add a splash of balsamic vinegar to the glaze. The result is a sweet‑tart profile that pairs wonderfully with roasted root vegetables.
Spicy Korean Kick
Add gochujang and sesame oil to the glaze for an authentic Korean barbecue flavor. The heat from the gochujang balances the sweetness, creating a complex, addictive taste.
Herb‑Infused Delight
Stir in fresh thyme and rosemary into the glaze before the final caramelization. The herbal notes add depth and pair beautifully with a creamy potato gratin.
Citrus‑Bright Twist
Finish the glaze with a squeeze of fresh orange or lemon juice. The citrus brightens the dish, making it lighter and refreshing, especially during summer gatherings.
Smoky Chipotle Heat
Replace chili flakes with chipotle powder for a smoky heat that complements the caramelized glaze. This variation is perfect for a backyard barbecue with a crowd that loves a bit of spice.
Storing and Bringing It Back to Life
Fridge Storage
Store leftover burnt ends in an airtight container in the refrigerator for up to 4 days. The glaze will thicken slightly, so reheat gently to restore the glossy finish. A quick 2‑minute microwave or a 5‑minute pan‑sauté works best.
Freezer Friendly
For longer storage, wrap the burnt ends tightly in plastic wrap and place them in a freezer bag. They’ll stay fresh for up to 3 months. Thaw overnight in the refrigerator before reheating.
Best Reheating Method
Reheat in a preheated oven at 350°F (175°C) for 10 minutes, or until heated through. Add a splash of water or broth before reheating; this steams the ends back to their original juiciness. Finish with a quick sear in a hot skillet if you want that extra crunch.