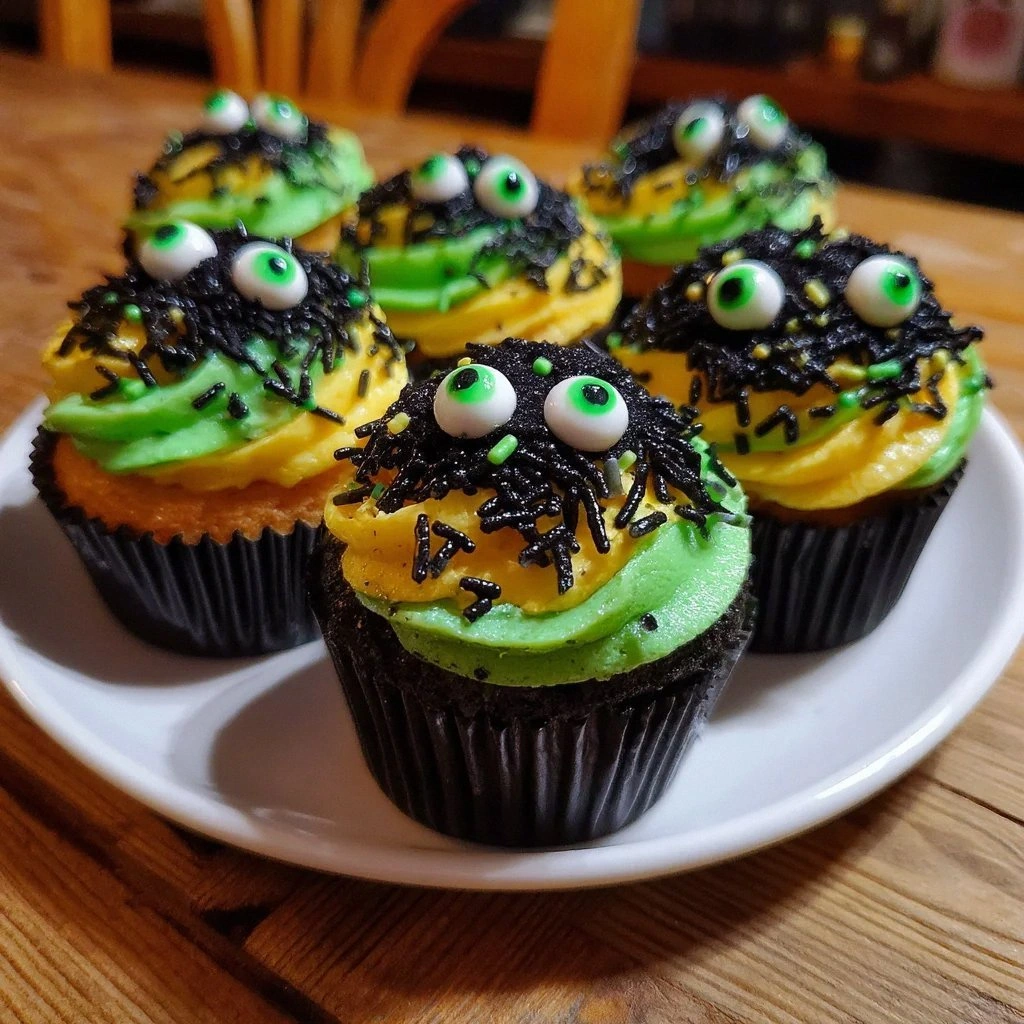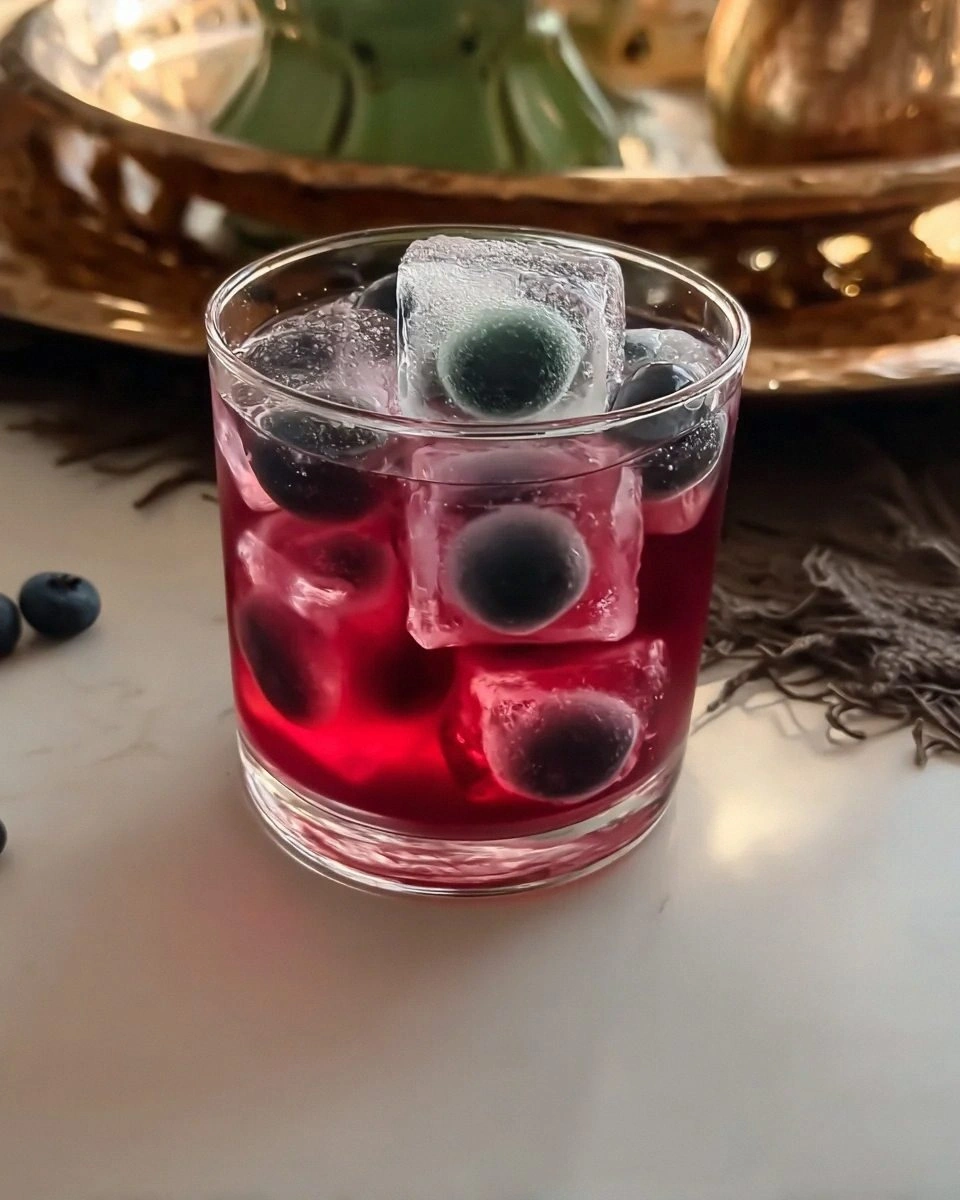
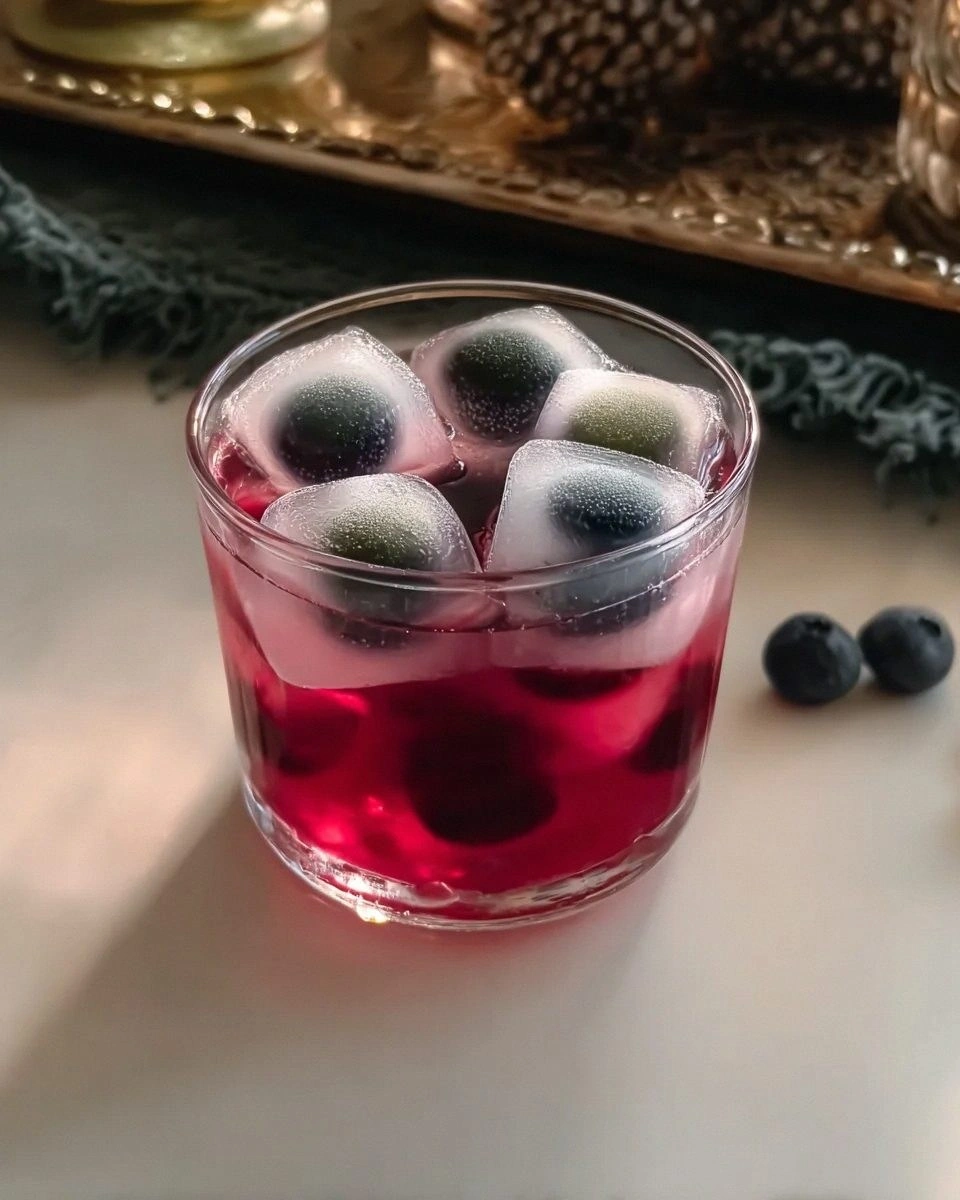
Picture this: it's 2 a.m. on a Saturday in October, your kitchen looks like a crime scene of melted chocolate and food coloring, and you're laughing maniacally at a tray of ice cubes. Not just any ice cubes — gelatinous, bloodshot, unblinking eyeballs staring back at you from the freezer. Your roommate walks in, screams, drops their phone, and you realize you've accidentally created the most gloriously creepy party trick of the decade. Welcome to the beautiful chaos of spooooky eyeball ice cubes, the Halloween hack that turns every drink into a scene from a B-movie.
I've been the unofficial "creepy cocktail aunt" of my friend group for years, and let me tell you, nothing — absolutely nothing — gets a party buzzing faster than dropping a frozen eyeball into someone's pumpkin spice latte and watching them shriek with delight. The first time I made these, I used those cheap plastic eyeball candies from the dollar store, and they dissolved into sad little blobs that looked more like pink boogers than terrifying ocular orbs. Fast forward through three failed attempts, a melted silicone mold disaster, and one very unfortunate incident involving red food coloring and my favorite white jeans, and I've finally cracked the code to ice cubes that look like they were harvested from a zombie ophthalmologist's office.
This isn't your basic "freeze some grapes with food coloring" situation. We're talking crystal-clear spheres with realistic iris patterns, delicate veining that looks disturbingly lifelike, and a texture that makes people do a double-take when their teeth hit something unexpectedly chewy in their drink. The secret lies in a combination of agar agar (for that unsettling wobble), lychee juice (for subtle sweetness and cloudiness), and a technique I learned from a Japanese bartender who specializes in anatomically correct garnishes. Trust me, once you serve these at your Halloween bash, you'll become the stuff of legend — the friend who made people genuinely uncomfortable in the best possible way.
Let me walk you through every single step — by the end, you'll wonder how you ever made it any other way.
What Makes This Version Stand Out
- Terrifyingly Realistic: Most recipes look like sad ping pong balls floating in your drink. These have actual depth, with a pupil that seems to follow you around the room and sclera that's convincingly bloodshot rather than just pink.
- Texture That Freaks People Out: The agar creates a firm outside with a slightly gelatinous center — when someone bites down, they get this incredible "pop" followed by a wobble that makes even brave adults shudder.
- Zero Food Coloring Stains: I learned the hard way that liquid food coloring turns everything it touches into a crime scene. This version uses natural alternatives that won't destroy your countertops or your guests' teeth.
- Actually Tastes Good: Unlike those plastic-tasting candy eyes, these have a subtle lychee-rose flavor that complements cocktails and mocktails without overwhelming them.
- Make-Ahead Magic: You can prep these up to a month in advance. They actually get better after a few days as the flavors meld and the textures develop.
- Endless Variations: Once you master the base technique, you can create everything from zombie eyes (green and yellow) to vampire eyes (red with gold flecks) to alien eyes (purple with silver shimmer).
Alright, let's break down exactly what goes into this masterpiece...
Inside the Ingredient List
The Base That Binds
Agar agar powder is your best friend here — it's a vegetarian gelatin derived from seaweed that sets at room temperature and creates that perfect slightly-resistant bite. Don't you dare substitute with regular gelatin; it melts too quickly in drinks and doesn't have that unsettling firmness that makes people question what they're putting in their mouths. You'll need about two teaspoons per cup of liquid, and trust me, it's worth ordering the good stuff online rather than using those sad packets from the grocery store that have been sitting there since 2003.
Lychee juice forms the backbone of our eyeball flavor — it's subtly sweet, slightly floral, and has just enough natural cloudiness to look like actual eye tissue. If you can't find lychee juice, white grape juice with a drop of rose water works, but you'll lose that slightly tropical note that makes people go "wait, what am I tasting?" The key is using 100% juice, not cocktail mix, because we're already adding enough sugar with our other components.
The Color Crew
For the iris, we're using butterfly pea flower tea for natural blue, then adjusting with tiny amounts of other natural colors. The butterfly pea flower is magical — it starts blue, turns purple with acid, and gives you that realistic iris depth that food coloring just can't match. You'll need about a teaspoon of dried flowers steeped in a quarter cup of hot water, strained through coffee filters to remove any specks that would ruin the illusion.
The sclera (the white part) gets its realistic tint from a combination of coconut milk and a touch of titanium dioxide, which sounds scary but is literally just mineral-based white coloring used in organic candies. Without it, your eyeballs look grey and dead rather than that creepy alive-but-not-alive white. Just a pinch — too much and you'll get chalky ice cubes that crack when they freeze.
The Vein Network
Here's where it gets fun: we're creating delicate red veins using a mixture of hibiscus tea and agar, piped into the molds with a tiny syringe. The hibiscus gives us that perfect blood-red color without the artificial taste of food coloring, and when it sets against the white sclera, it creates that "I should probably see a doctor about this" level of realism. You'll need about a tablespoon of strong hibiscus tea mixed with a pinch of agar, kept warm so it doesn't set while you work.
For the pupil, we're using a mixture of activated charcoal and agar — it creates that deep, light-absorbing black that makes the eye seem to stare into your soul. Don't use black food coloring; it always has a purple undertone that ruins the effect. Activated charcoal is cheap, natural, and gives you that perfect void-black that makes people's skin crawl in the best way.
The Special Effects
To create that wet, glossy look, we're adding a thin layer of clear agar over the finished eyeballs — it creates a membrane that catches the light like real eye tissue. This is what separates amateur eyeball ice cubes from the ones that make people genuinely uncomfortable. The clear layer needs to be applied warm but not hot, using a small spoon to gently coat the surface without disturbing your carefully crafted iris patterns.
Finally, a touch of edible glitter in the iris creates that subtle shimmer that living eyes have when they catch the light. Use ultra-fine white or silver glitter — anything colored will look fake, and chunky glitter looks like craft project gone wrong. Just a few specks per eyeball, applied with a damp toothpick while the surface is still tacky.
Everything's prepped? Good. Let's get into the real action...
The Method — Step by Step
- Prepare your workspace like you're performing surgery. Lay down parchment paper, set up your silicone sphere molds (1.75-inch diameter works best), and arrange all your components within arm's reach. Once you start, you can't stop to hunt for the hibiscus tea because your agar will set faster than your enthusiasm. I learned this the hard way when I had to explain to my neighbor why there were half-set red blobs all over my kitchen floor at 3 a.m.
- Create the sclera base by blooming the agar. Sprinkle 2 teaspoons of agar powder over 1 cup of cold lychee juice and let it sit for 5 minutes — this prevents lumps that will ruin the smooth, creepy texture. Heat gently while whisking constantly until it just starts to simmer; you'll see it thicken slightly and become glossy like unsettling liquid porcelain. Remove from heat immediately — overcooked agar loses its setting power and you'll end up with eyeball soup instead of solid spheres.
- Add the white coloring and coconut milk. Whisk in 2 tablespoons of full-fat coconut milk and a pinch of titanium dioxide until you get that disturbing medical-exam-room white. The mixture should coat the back of a spoon but still pour easily — too thick and you'll get air bubbles that look like cataracts. Strain through a fine-mesh sieve to remove any coconut lumps that would ruin the smooth surface.
- Fill the molds three-quarters full and create the vein effect. Pour the white mixture into your sphere molds, then immediately use a syringe to inject thin lines of warm hibiscus-agar mixture. The key is temperature — the hibiscus needs to be warm enough to stay liquid but cool enough to set quickly when it hits the white base. Draw delicate branching patterns that look like real blood vessels, not random squiggles. This is where your inner artist gets to play mad scientist.
- Partially freeze to create the iris cavity. Place the molds in the freezer for 45 minutes — just long enough for the outside to set while the center remains liquid. Use a small spoon to carefully scoop out a shallow well in each sphere, creating space for the iris and pupil. Don't go all the way through or your eyeballs will leak their contents into someone's drink, which is creepy but not in the way you want.
- Craft the iris layer with butterfly pea flower magic. Mix 1 teaspoon of agar with half a cup of butterfly pea flower tea, heat until just dissolved, then add a teaspoon of honey for shine. Pour a thin layer into each cavity — just enough to create a realistic iris depth. While it's still tacky, add tiny amounts of other natural colors using toothpicks: a touch of turmeric for green eyes, beet juice for brown, or keep it blue for that supernatural stare.
- Create the void-black pupil. Mix activated charcoal with agar (1/4 teaspoon agar to 2 tablespoons water) and heat until dissolved. Using a syringe, place a tiny drop in the exact center of each iris — it should spread slightly to create a perfect circle. The contrast between the deep black pupil and the colored iris is what makes these look disturbingly alive.
- Apply the glossy membrane. Mix clear agar (1 teaspoon agar to 1 cup water) and heat until just dissolved. Let it cool until warm but not hot, then gently spoon a thin layer over each eyeball. This creates that wet, living tissue look that makes people instinctively uncomfortable. Work quickly — agar sets at room temperature, and you want a smooth, glass-like surface.
- Final freeze and unmold with surgical precision. Freeze the completed eyeballs for at least 4 hours, preferably overnight. To unmold, briefly dip the bottom of each mold in warm water for 3-4 seconds — any longer and you'll start melting the details. Invert onto parchment paper and immediately transfer to a sealed container. These are surprisingly delicate until fully frozen, and nothing ruins the mood like a squished eyeball.
- Store properly for maximum creep factor. Keep frozen in an airtight container with parchment paper between layers. They'll last up to a month, though I guarantee they won't survive past your next party. For serving, drop directly into drinks — they'll slowly release a subtle lychee-rose flavor as they melt, turning every sip into a scene from a horror movie.
That's it — you did it. But hold on, I've got a few more tricks that'll take this to another level...
Insider Tricks for Flawless Results
The Temperature Rule Nobody Follows
Here's the thing about agar that nobody tells you: it's got memory. If you heat it too high or cool it too fast, it sets with a rubbery texture that bounces like a superball instead of that subtle resistance that makes people uncomfortable. The sweet spot is 85-90°C — just hot enough to dissolve completely but not so hot that it loses its setting power. I use a candy thermometer like a paranoid chemist, and my eyeballs have perfect texture every single time. Don't walk away during this step; agar goes from perfect to ruined faster than your ex's new relationship.
Why Your Nose Knows Best
Your sense of smell is your secret weapon here. When the agar-lychee mixture is ready, it should smell like a haunted tropical garden — floral but with an underlying mineral note that reminds you this isn't just another pretty garnish. If it smells like coconut candy, you've added too much milk. If it smells like nothing, your lychee juice is old and you need fresh bottles. And if it smells like seaweed, you've overheated your agar and need to start over. Trust your nose — it's never steered me wrong, except for that time I tried to make durian eyeballs. We don't talk about that.
The 5-Minute Rest That Changes Everything
After you unmold your eyeballs, resist the urge to immediately throw them into drinks and impress your friends. Let them sit at room temperature for exactly 5 minutes. This allows the surface to develop a slight tackiness that catches the light like real eye tissue, and it prevents that awful cracking that happens when frozen eyeballs hit warm liquid. It's the difference between amateur hour and professional-level creepiness. I set a timer because I'm impatient, and every time I've skipped this step, I've regretted it when my perfect eyeballs split like overripe tomatoes.
The Lighting Trick That Makes Them Come Alive
Here's a photographer's secret that works terrifyingly well: place a small LED tea light under the glass or bowl where you're serving these. The light shining up through the eyeballs creates shadows and highlights that make the irises seem to dilate and contract. It's subtle enough that people can't quite figure out why they're so unsettled, but dramatic enough to create that "did that eye just blink?" reaction. I discovered this by accident during a power outage, and now it's my secret weapon for the ultimate creepy cocktail experience.
The Storage Secret That Preserves Perfection
Most people throw their eyeball ice cubes in a plastic bag and wonder why they're frost-bitten and cracked a week later. Instead, store them in a container with a damp paper towel on top, sealed tight. The humidity prevents sublimation (that awful freezer burn that makes them look like mummy eyes), and they stay glossy and disturbing for weeks. Change the paper towel every few days, and never — I repeat never — store them near anything with strong odors. Nobody wants eyeballs that taste like last week's leftover pizza.
Creative Twists and Variations
This recipe is a playground. Here are some of my favorite ways to switch things up:
Zombie Virus Eyes
Swap the butterfly pea flower tea for matcha powder to create sickly green irises, add a touch of turmeric for that jaundiced yellow sclera, and create veins using spirulina mixed with hibiscus for a truly disgusting grey-green blood effect. These look like they came from a walking corpse and taste like a grassy smoothie that went wrong in all the right ways. Perfect for zombie-themed parties or when you want to make your guests genuinely queasy.
Vampire Glamour Eyes
Use beet juice for deep red irises, add edible gold leaf flecks for that immortal sparkle, and create the sclera using coconut milk tinted with the tiniest touch of red to suggest centuries of bloodthirsty nights. These look luxurious and deadly, like something you'd find in a vampire's wine cellar. They taste like expensive roses and look like they belong in a Gothic romance novel.
Alien Abduction Eyes
Purple sweet potato juice creates otherworldly violet irises, add a touch of baking soda to turn the butterfly pea flower mixture green in spots for a diseased alien effect, and use black sesame paste for pupils that seem to absorb light. These look like they belong on a creature that probes memories and drinks fear. The flavor is oddly nutty and sweet, which makes the visual horror even more disturbing.
Mermaid Curse Eyes
Spirulina creates ocean-green irises, add edible pearl dust for that wet fish-eye look, and use blue spirulina for the sclera to create an all-over aquatic effect. These look like they came from a creature that lives in the deepest trenches and hasn't seen sunlight in millennia. They taste like the ocean breeze and look like they might drag you underwater.
Demon Possession Eyes
Mix activated charcoal with a touch of red to create black irises with evil undertones, use the hibiscus mixture to create burst blood vessels that look like possession, and add a drop of chili oil to the clear coating for a subtle heat that makes people wonder if they're actually cursed. These are not for the faint of heart — they look genuinely evil and taste like danger.
Frankenstein's Monster Eyes
Create heterochromia (two different colored eyes) for that reanimated corpse look, add visible stitch marks using thin lines of darker agar, and make the pupils slightly off-center for that "not quite right" feeling. These look like they were assembled from multiple donors and brought to life with lightning. The flavor is a chaotic mix of whatever you have left in your kitchen, which somehow works perfectly.
Storing and Bringing It Back to Life
Fridge Storage
If you need to store eyeballs in the refrigerator rather than the freezer (maybe you're prepping for a party tomorrow), they'll last about 3 days before they start to weep and lose their shape. Keep them in a container with a tight-fitting lid, layered with damp paper towels, and add a tiny pinch of citric acid to the storage liquid to prevent bacterial growth. They'll develop a slightly firmer texture that's actually great for warm drinks, but they'll lose that glossy wet look. Brush with a glycerin-water mixture before serving to restore the creepy factor.
Freezer Friendly
These freeze beautifully for up to a month if you store them properly. Use a hard-sided container rather than a bag (they're delicate until frozen solid), separate layers with parchment paper, and squeeze out as much air as possible. The enemy here is freezer burn and odor absorption — nobody wants eyeballs that taste like frozen fish sticks. If they develop a slight white film, it's just surface dehydration. A quick brush with warm water restores their disturbing shine.
Best Reheating Method
You don't reheat eyeballs — you serve them frozen and let the drink do the work. But if you need to refresh them after storage, let them sit at room temperature for 2-3 minutes until they develop that slight surface tackiness. Don't microwave them (trust me, I tried once and created eyeball soup), and don't run them under warm water or you'll lose all your beautiful detail work. For drinks, drop them in at the last second — they take about 5 minutes to start melting in room-temperature liquid, giving you just enough time to enjoy the horrified reactions.