I was halfway through a marathon of protein pancakes that tasted like a soggy blanket, when my roommate burst in with a grin that could only mean she had a new secret weapon. She’d just discovered a recipe that promised to turn the humble protein pancake into a baked, fluffy, protein‑packed bowl that could double as a breakfast, a snack, or a post‑workout reward. The aroma hit me first: a sweet, nutty perfume that danced with a hint of vanilla and a whisper of cinnamon, and I knew I was about to witness a culinary revolution.
Picture this: a golden, airy crust that crackles when you lift it from the pan, a center that’s moist enough to cradle berries and yogurt like a gentle hug, and a flavor profile that balances the savory bite of protein powder with the comforting sweetness of honey. The first bite is a symphony—crisp edges, tender middle, and a subtle, almost buttery aftertaste that lingers like a promise. I dare you to taste this and not go back for seconds, because once you’ve experienced the way these pancakes melt in your mouth, the idea of a plain, greasy pancake will seem like a distant memory.
What sets this version apart is not just the flawless texture but the strategic use of ingredients that work in harmony. We’re talking about a blend of oats, whey, and a dash of baking soda that lifts the batter without compromising the protein content. The batter’s consistency is fine-tuned to ensure it spreads evenly in the pan, creating that coveted uniform rise. It’s the kind of recipe that feels like a well‑orchestrated symphony, where every note—protein, flour, egg—plays in perfect pitch.
I’m not just here to give you a recipe; I’m here to give you a game plan that eliminates the usual pitfalls of baked pancakes. Most recipes get this completely wrong, either by overbaking, underbaking, or using the wrong ratio of dry to wet. The secret? A precise balance of leavening agents that gives you that airy rise, and a temperature that locks in moisture without scorching the edges. By the end of this post, you’ll wonder how you ever made protein pancakes any other way.
I’ve spent countless evenings tweaking the batter, testing different flours, and measuring temperatures. The result is a recipe that delivers the best version of protein pancakes you’ll ever make at home, with a finish that’s both satisfying and indulgent. It’s a dish that looks as good as it tastes, and it’s ready in under an hour. The best part? It’s so simple that even a novice can master it, while a seasoned chef can tweak it to perfection.
If you’ve ever struggled with protein pancakes that are dense, rubbery, or simply flavorless, you’re not alone. The frustration of a batter that spreads too thin, or a pan that leaves you with a burnt edge, is all too common. This recipe flips that narrative on its head. By using a blend of oat flour and whey, we create a batter that’s thick enough to hold its shape but light enough to rise beautifully. The result is a bowl that feels like a warm hug in every bite.
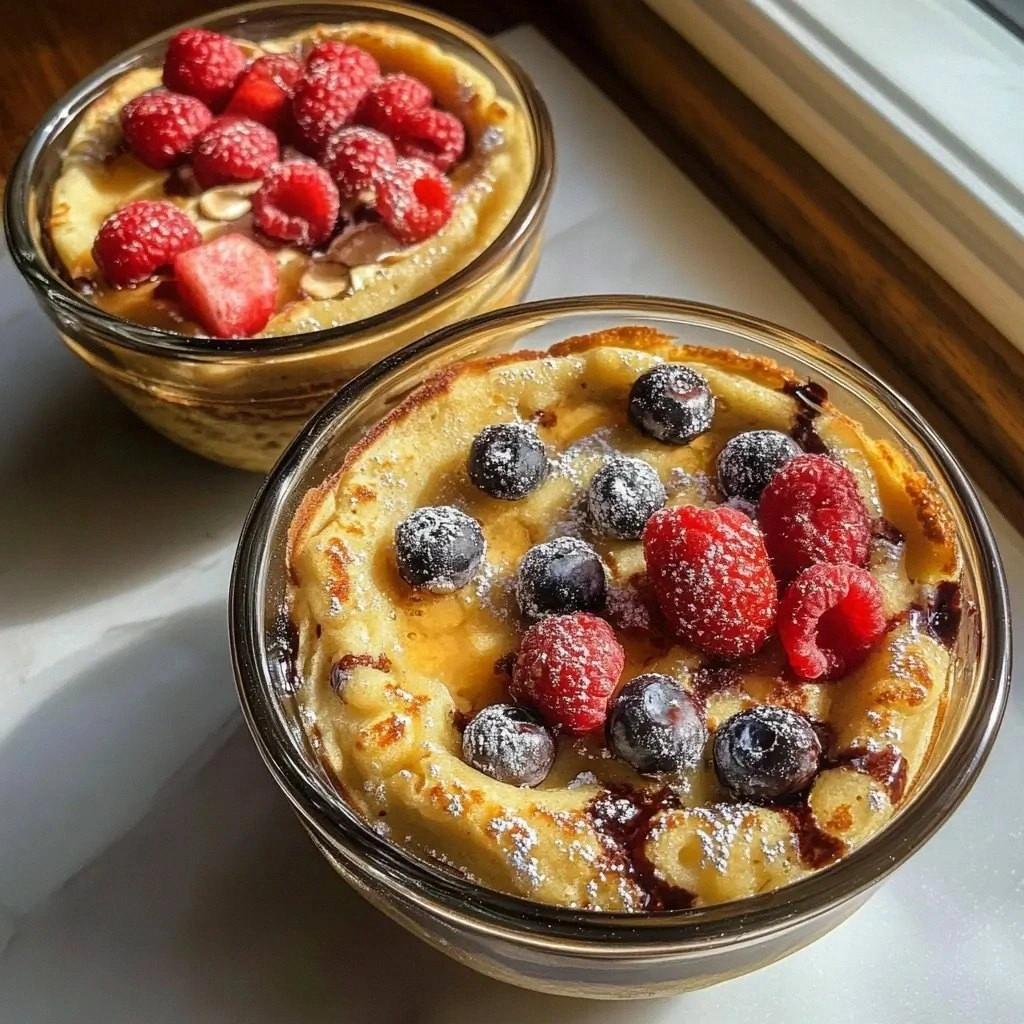
Picture yourself pulling this out of the oven, the whole kitchen smelling incredible, and a stack of golden pancakes waiting to be topped with fresh berries, a dollop of Greek yogurt, and a drizzle of honey. The anticipation is almost tangible, and when you cut into one, you’re greeted by a moist, fluffy interior that’s a delight to the senses. Let me walk you through every single step—by the end, you’ll wonder how you ever made it any other way.
What Makes This Version Stand Out
- Texture: The batter is engineered for a perfect rise, resulting in pancakes that are airy on the inside and crisp on the outside, with a melt-in-your-mouth center that doesn’t dry out.
- Flavor: A subtle sweetness from honey and vanilla is balanced by the natural nuttiness of oat flour and the mild, savory undertone of whey protein, creating a harmonious taste profile.
- Ease: The recipe requires no special equipment—just a standard non‑stick skillet and an oven—making it accessible for cooks of all skill levels.
- Versatility: It can be served for breakfast, a midday snack, or a post‑workout meal, and can be customized with a variety of toppings to suit any palate.
- Health: With 25 grams of protein per serving and minimal added sugars, it’s a balanced choice for anyone looking to fuel their body without compromising flavor.
- Make‑ahead: The batter can be prepared up to 24 hours in advance, refrigerated, and baked when ready, which is perfect for busy mornings or meal prep sessions.
- Crowd‑pleaser: The visual appeal of a golden, perfectly risen pancake bowl, topped with fresh fruit and a drizzle of honey, is guaranteed to impress friends and family alike.
- Ingredient Quality: Each component is chosen for its functional contribution—oat flour for structure, whey for protein, and eggs for binding—ensuring a reliable outcome.
Alright, let's break down exactly what goes into this masterpiece...
Inside the Ingredient List
The Flavor Base
At the heart of this recipe lies a blend of oat flour and whey protein powder. Oat flour provides a subtle, earthy sweetness that complements the neutral taste of whey, which delivers a clean protein punch without overwhelming the palate. If you skip the whey, you’ll lose that essential protein boost, and the pancakes will become more like regular oat pancakes. For a vegan version, replace whey with pea or soy protein, but be prepared for a slightly different texture.
The Texture Crew
Eggs, milk, and a touch of baking soda create the structural backbone of our batter. Eggs act as a binder, ensuring the pancakes hold together, while milk adds moisture and helps achieve that tender crumb. Baking soda works in tandem with the acidic whey to lift the batter, producing that coveted airy rise. If you’re lactose intolerant, swap regular milk for oat or almond milk; the batter will still rise beautifully, though the flavor will shift slightly.
The Unexpected Star
Honey is the secret sweetener that brings everything together. It not only sweetens the batter but also adds a subtle floral note that elevates the overall flavor profile. If you’re watching sugar intake, a drizzle of maple syrup or agave nectar can replace honey, though the taste will differ. The honey also helps create a caramelized crust when baked, giving the pancakes a delightful crunch.
The Final Flourish
Fresh berries, Greek yogurt, and a sprinkle of chopped nuts are the finishing touches that turn a simple pancake into a complete meal. Berries add a burst of acidity that balances the sweetness, while Greek yogurt contributes creaminess and an extra protein hit. Nuts, whether walnuts or almonds, provide a satisfying crunch and a dose of healthy fats. If you’re aiming for a dairy-free version, use coconut yogurt and omit the nuts if you have allergies.
Everything's prepped? Good. Let's get into the real action...
The Method — Step by Step
- Step 1: Prepare the Dry Mix. In a large bowl, whisk together 2 cups oat flour, 1 cup whey protein powder, 1 tsp baking soda, and 1/2 tsp salt. The dry mix should be free of lumps; use a whisk to ensure even distribution. This step is critical—any clumps will translate into uneven texture in the final pancakes.
- Step 2: Whisk the Wet Ingredients. In a separate bowl, beat 2 eggs, 1 cup milk, 1 tsp vanilla extract, and 1 tbsp honey until fully combined. The mixture should be smooth and slightly frothy, indicating that the eggs have been properly incorporated. This frothiness helps the pancakes rise during baking.
- Step 3: Combine Wet and Dry. Pour the wet mixture into the dry mix, stirring gently with a spatula. Aim for a batter that’s thick but pourable—think of the consistency of pancake batter that can be swirled but still holds its shape. Overmixing can develop gluten and make the pancakes tough.
- Step 4: Preheat the Skillet. Heat a 12‑inch non‑stick skillet over medium heat and lightly coat it with cooking spray or a small amount of oil. The skillet should be hot enough that a drop of water sizzles upon contact but not so hot that the batter burns instantly. This temperature ensures a golden crust without scorching.
- Step 5: Pour the Batter. Spoon about 1 cup of batter into the skillet, leaving space for expansion. The batter should spread evenly, forming a circular shape. The edges should begin to set within 2 minutes, indicating the right heat level.
- Step 6: Seal the Edges. Once the edges lift from the skillet and the top begins to bubble, flip the pancake. This is the moment of truth—if the pancake is flipping easily, the batter is perfectly balanced. Flip carefully to avoid tearing.
- Step 7: Bake to Perfection. Reduce heat to medium‑low and cover the skillet with a lid. Bake for 6–8 minutes, or until the pancake is golden and a toothpick inserted in the center comes out clean. The lid traps steam, ensuring a moist interior.
- Step 8: Serve and Top. Transfer the pancake to a plate and top with fresh berries, a spoonful of Greek yogurt, and a sprinkle of chopped nuts. Drizzle with a little honey or maple syrup for added sweetness. Plate immediately for maximum freshness.
That's it—you did it. But hold on, I've got a few more tricks that'll take this to another level...
Insider Tricks for Flawless Results
The Temperature Rule Nobody Follows
Many cooks assume that higher heat always means a better crust, but with protein pancakes, the secret lies in medium heat. A scorching pan will burn the outside before the inside cooks, leading to a rubbery center. Keep the skillet at medium, and use a thermometer if you’re precise—ideally 350°F. This ensures a steady rise without compromising the batter’s integrity.
Why Your Nose Knows Best
When the batter hits the skillet, a distinct aroma of toasted oats and vanilla will begin to rise. This scent is your cue that the batter is setting. If the smell is weak, the heat is too low; if it’s too strong, you’re close to burning. Trust your senses—your nose is the ultimate judge of doneness.
The 5‑Minute Rest That Changes Everything
After baking, let the pancake rest for five minutes on a cooling rack. This brief pause allows the steam to redistribute, preventing a soggy bottom. Many chefs skip this step, resulting in a denser texture. Resting also makes the pancakes easier to top without the batter collapsing.
The Secret to a Crispy Edge
If you crave a crispier edge, lightly brush the top of the batter with a thin layer of melted butter before baking. The butter melts into the surface, creating a golden, crunchy border that contrasts beautifully with the soft interior. Be careful not to overdo it, or the edges may become too hard.
The Final Flourish of Flavor
Just before serving, add a pinch of sea salt to the top of the pancake. The salt accentuates the natural sweetness and balances the flavors. It’s a simple trick that elevates the dish from good to unforgettable.
Creative Twists and Variations
This recipe is a playground. Here are some of my favorite ways to switch things up:
Citrus Burst
Add the zest of one lemon or orange to the batter. The citrus will brighten the flavor and pair wonderfully with berries. A squeeze of fresh lemon juice on top before serving adds a refreshing tang.
Chocolate Lover’s Edition
Stir in 2 tablespoons of unsweetened cocoa powder and replace honey with a small amount of dark chocolate syrup. Top with sliced bananas and a sprinkle of cacao nibs for an indulgent treat that still packs protein.
Savory Spin
Omit the honey and vanilla, and add 1/4 cup of shredded cheese, a handful of chopped spinach, and a pinch of smoked paprika. Serve with a side of avocado slices and a dollop of Greek yogurt for a savory protein bowl.
Tropical Twist
Replace berries with diced mango and pineapple. Add a splash of coconut milk to the wet mix for a subtle coconut flavor. Finish with a drizzle of toasted coconut flakes.
Nutty Power Boost
Incorporate 1/4 cup of almond butter into the batter for extra richness and a nutty undertone. Top with sliced almonds and a drizzle of maple syrup for a balanced, protein‑rich breakfast.
Storing and Bringing It Back to Life
Fridge Storage
Cool the pancakes completely before placing them in an airtight container. Store in the refrigerator for up to three days. The pancakes will remain moist, and the toppings can be added fresh when you’re ready to eat.
Freezer Friendly
Wrap each pancake individually in parchment paper, then place them in a freezer bag. They can be frozen for up to two months. When reheating, remove the parchment and warm in the oven at 350°F for 10 minutes.
Best Reheating Method
To bring the pancakes back to life, add a splash of milk or water to the pan before reheating. This steams the batter, restoring the soft, fluffy texture. Finish with a quick drizzle of honey or maple syrup to revive the flavor.