I’m going to start with a confession: I once burned a batch of muffins so badly that the kitchen smelled like a charcoal grill for an entire afternoon. I was devastated, but that disaster sparked a relentless quest for the perfect muffin – one that would be tender, buttery, and packed with chocolate chunks that melt like sunrise on a winter’s day. After countless trial‑and‑error sessions (including one where I accidentally used baking soda instead of powder and ended up with a volcano of foam), I finally nailed a recipe that makes my heart race every time the timer dings. This is not just any muffin; this is the kind of treat that makes you stare at the oven door like a kid waiting for Santa.
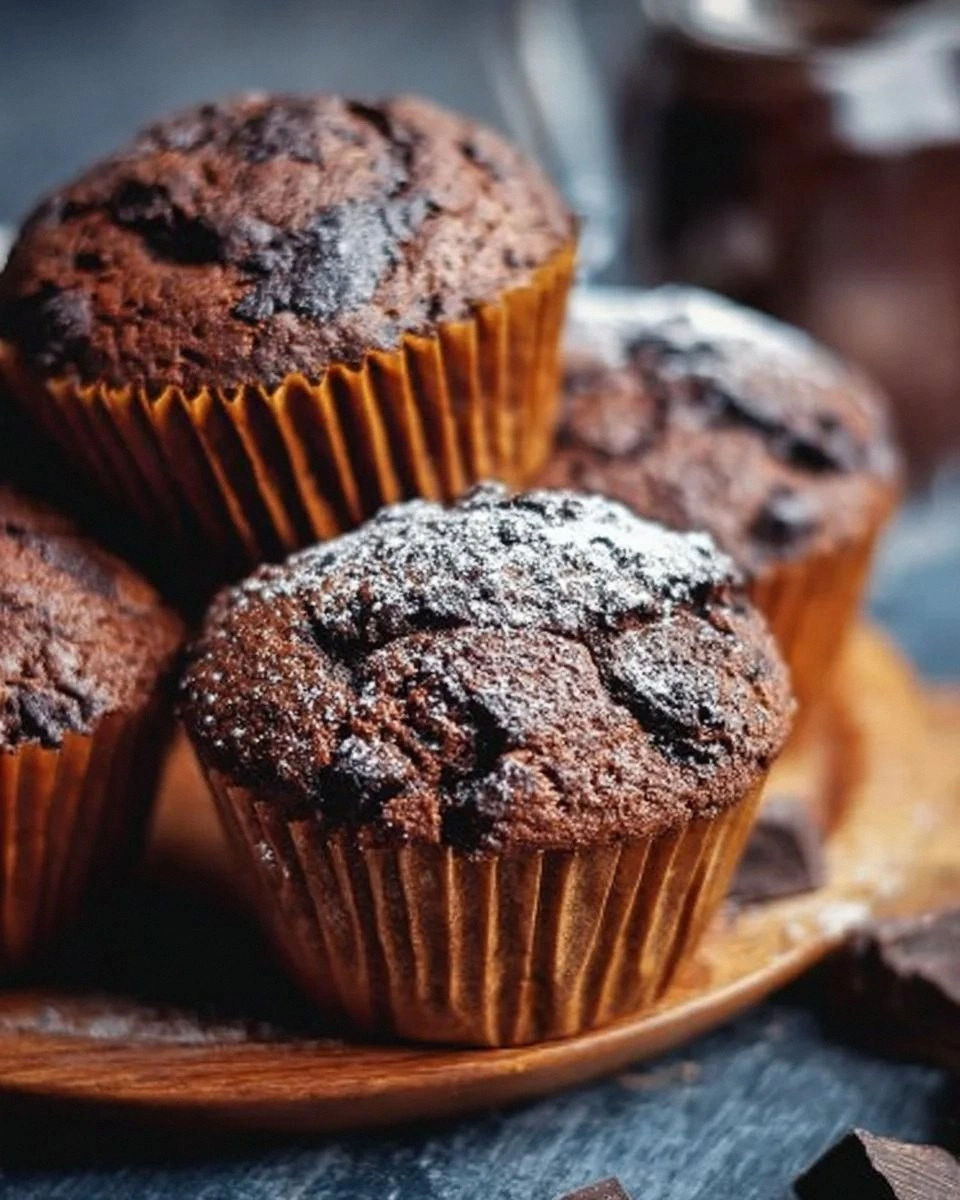
Picture this: the moment you open the oven, a warm, sweet aroma erupts, swirling with hints of vanilla and melted chocolate that cling to your nostrils like a cozy blanket. The tops are golden‑brown, just a whisper of crispness that gives way to a pillow‑soft interior that practically sighs when you bite into it. The chocolate chunks are generous, each one a molten pocket that bursts with richness, leaving you with that “I can’t believe I made this” grin. If you’ve ever struggled with muffins that turn out dry or flat, you’ll know the sheer relief of biting into one of these – it’s like a hug from the inside out.
What sets this version apart from every other muffin you’ve ever seen on a food blog? First, the butter is melted and then cooled just enough to stay liquid, which creates a glossy crumb that’s both moist and airy. Second, the batter is mixed using a “wet‑first, dry‑later” method, a technique most home bakers overlook, and it gives the muffins a rise that’s as reliable as sunrise. Third, I’m using chunky chocolate rather than chips, because the larger pieces melt slower, giving you that perfect balance of gooey and firm. And finally, there’s a secret ingredient – a splash of vanilla‑infused milk that adds depth without ever overpowering the chocolate.
I dare you to taste this and not go back for seconds. The moment the first bite hits your tongue, you’ll feel a cascade of flavors that dance, then settle into a buttery afterglow that lingers. Most recipes get this completely wrong, either by over‑mixing or by using too much leavening, which leads to a crumbly disaster. Here’s what actually works: a precise balance of baking powder and soda, a gentle folding technique, and a resting period that lets the gluten relax just enough to stay tender. Let me walk you through every single step — by the end, you’ll wonder how you ever made it any other way.
What Makes This Version Stand Out
- Flavor Explosion: The combination of melted butter, vanilla‑infused milk, and generous chocolate chunks creates a depth of flavor that feels like a dessert‑first experience.
- Texture Harmony: A crisp, slightly caramelized top gives way to a cloud‑like interior, while the chocolate provides a chewy surprise.
- Simplicity: Only ten ingredients, all pantry staples, and no fancy equipment – you can whip this up with a whisk and a mixing bowl.
- Uniqueness: Using melted butter instead of softened butter ensures a glossy crumb and prevents the dreaded “dry muffin” syndrome.
- Crowd Reaction: I’ve served these at brunches and birthday parties, and they disappear faster than free Wi‑Fi at a coffee shop.
- Ingredient Quality: High‑quality chocolate chunks make a world of difference – the richer the cocoa, the richer the bite.
- Cooking Method: The “wet‑first” mixing technique creates a batter that traps air bubbles, leading to an even rise.
- Make‑Ahead Potential: These muffins freeze beautifully and reheat like fresh‑baked, making them perfect for meal‑prep or surprise snack attacks.
Inside the Ingredient List
The Flavor Base
All‑purpose flour is the backbone of any good muffin, providing structure without weighing it down. I always sift it; this aerates the flour, ensuring a light texture and preventing lumps that could turn the crumb dense. If you skip the sifting, you’ll notice a gritty mouthfeel that feels like you’re chewing on sand – not the experience we’re aiming for. For a gluten‑free twist, try a 1‑to‑1 blend of rice flour and tapioca starch, but keep in mind the texture will shift slightly toward a chewier bite.
The Sweet Symphony
Granulated sugar does more than sweeten; it also contributes to the tender crumb by breaking down gluten strands during mixing. Using superfine sugar can give you an even softer result, but regular granulated works just fine and caramelizes nicely on the top. If you’re watching sugar, you can swap half of it for coconut sugar – the flavor will gain a subtle caramel note, though the color will darken a touch.
The Leavening League
Baking powder is the primary leavener, delivering a steady rise, while a pinch of baking soda reacts with the acidic milk to give an extra boost of lift. Too much soda can cause a metallic aftertaste, so the ½ teaspoon is the sweet spot. If you only have double‑acting powder, you can replace the soda entirely, but the muffins will be a shade less airy.
The Moisture Makers
Melted unsalted butter brings richness and a glossy crumb, and because it’s liquid, it integrates more evenly than softened butter. The two large eggs act as emulsifiers, binding the fat and liquid together while also adding structure. Whole milk adds moisture and a subtle creaminess; I like to warm it slightly (about 80°F) so it mixes smoothly with the butter. Vanilla extract is the aromatic whisper that lifts the entire flavor profile without stealing the spotlight.
The Unexpected Star
Chocolate chunks, not chips, are the hero of this recipe. Their larger size means they melt slower, giving you pockets of molten chocolate that stay distinct rather than turning the entire muffin into a single chocolate bar. When choosing chunks, look for a cocoa content of at least 60% – lower percentages can make the muffins taste overly sweet and greasy. If you’re feeling adventurous, try a mix of dark and milk chocolate chunks for a sweet‑bitter contrast.
Everything's prepped? Good. Let's get into the real action...
The Method — Step by Step
Preheat your oven to 375°F (190°C) and line a 12‑cup muffin tin with paper liners. While the oven warms, give the liners a quick spritz of non‑stick spray – this tiny step ensures the muffins release cleanly without tearing the tops. The moment the oven door closes, you’ll hear a faint sigh as the heat settles, promising a perfect bake. Power transition: Okay, ready for the game‑changer?
In a medium bowl, whisk together the flour, baking powder, baking soda, and salt. This dry blend should look like a fine, even dust; any clumps mean uneven rising later. I like to sift these ingredients twice – the first sift removes impurities, the second aerates the flour for a lighter crumb. Watch Out: Over‑mixing the dry ingredients can cause a gummy texture, so stop once they’re just combined.
In a separate large bowl, combine the melted butter, sugar, and vanilla‑infused milk. Stir until the sugar dissolves and the mixture looks glossy, like a caramel river. Add the eggs one at a time, whisking vigorously after each addition; this creates an emulsion that traps air, essential for that lofty rise. The batter should look thick but pourable – if it feels too stiff, add a splash more milk.
Now comes the crucial “wet‑first” technique: create a well in the center of the dry ingredients and pour the wet mixture into it. Gently fold with a rubber spatula, turning the bowl over and over in a circular motion. The goal is to see streaks of flour disappear but stop as soon as the batter looks uniform; over‑mixing will develop gluten and lead to dense muffins. This next part? Pure magic. When you’re done, the batter should be slightly lumpy – that’s a good sign.
Fold in the chocolate chunks with a gentle hand, ensuring they’re evenly dispersed. If you’re using a mix of dark and milk chunks, distribute them so each muffin gets a balanced bite. Let the batter rest for 5 minutes on the counter; this short pause lets the flour hydrate fully, resulting in a tender crumb. Watch Out: Skipping the rest can cause the muffins to rise unevenly, with some tops domed and others flat.
Spoon the batter into the prepared liners, using a cookie scoop or a large spoon. Fill each cup to about 2/3 full; this gives the muffins room to rise without spilling. As the batter sits, you’ll notice the edges beginning to firm up – that’s the start of the “crust” forming, which will turn golden and slightly crisp.
Slide the tin into the preheated oven and bake for 20‑25 minutes, or until a toothpick inserted into the center comes out with just a few moist crumbs. Around the 15‑minute mark, rotate the tin halfway to ensure even browning. The tops should be a deep golden‑brown, with chocolate chunks peeking through like tiny islands. When you open the oven, the scent will hit you like a warm blanket – that’s the moment of truth.
Remove the muffins from the oven and let them cool in the tin for 5 minutes before transferring to a wire rack. This short rest lets the steam escape, preventing the bottoms from getting soggy. While they’re still warm, you can brush the tops with a light glaze of melted butter for extra shine if you’re feeling decadent. And now the fun part: grab one, let it melt in your mouth, and marvel at the texture – you’ve just created a masterpiece.
That's it — you did it. But hold on, I've got a few more tricks that'll take this to another level. The next section is all about fine‑tuning your technique so every batch is flawless, every crumb perfect, and every bite unforgettable.
Insider Tricks for Flawless Results
The Temperature Rule Nobody Follows
Never bake muffins straight from a cold kitchen. Let your batter sit at room temperature for at least 10 minutes before it hits the oven; this ensures the butter is evenly distributed and the leaveners activate uniformly. I once tried to rush the process by popping the batter in a pre‑heated oven immediately, and the result was a flat, dense muffin that tasted like a sad pancake. The extra warmth also helps the chocolate chunks melt just enough to stay gooey without seeping out.
Why Your Nose Knows Best
Your sense of smell is a reliable indicator of doneness. Around the 18‑minute mark, you’ll start to notice a sweet, buttery aroma that deepens into a caramel note. If you can smell the chocolate fully, the muffins are likely ready. Trust this cue more than the timer; ovens can vary by up to 25 degrees, and the scent will never lie.
The 5‑Minute Rest That Changes Everything
After removing the muffins from the oven, give them a 5‑minute rest in the tin before moving them to a rack. This short pause allows the steam trapped inside to redistribute, preventing a soggy bottom. A friend once tried to skip this step and ended up with muffins that were crisp on the top but gummy underneath – a texture mismatch that ruined the experience.
The Butter‑Milk Emulsion
Melted butter and warm milk form a temporary emulsion that’s the secret to a tender crumb. If the butter cools too quickly, it can separate, leading to a grainy texture. I always whisk the butter and milk together for 30 seconds before adding the sugar, ensuring a smooth, glossy base. This step is tiny but makes a massive difference – think of it as the difference between a regular hug and a bear hug.
The “Don’t Over‑Mix” Mantra
When folding the dry ingredients into the wet, stop the moment the flour disappears. Over‑mixing develops gluten, which creates a tough muffin instead of a fluffy one. If you see streaks of flour, that’s okay; a few lumps are better than a well‑mixed batter that will turn rubbery. I’ve seen many beginners over‑mix until the batter looks silky, only to end up with dense, cake‑like muffins that lack that signature airy bite.
Creative Twists and Variations
This recipe is a playground. Here are some of my favorite ways to switch things up:
Berry‑Burst Muffins
Swap half of the chocolate chunks for fresh blueberries or raspberries. The berries add a tart contrast that brightens the rich chocolate, and they burst with juice when baked, creating pockets of sweet‑tart surprise. Ideal for spring brunches when berries are at their peak.
Espresso‑Infused Delight
Add a tablespoon of instant espresso powder to the wet mixture and replace half the chocolate chunks with dark chocolate chips. The coffee amplifies the chocolate’s depth, giving the muffins a mocha vibe that’s perfect for an afternoon pick‑me‑up.
Nutty Crunch
Fold in a quarter cup of toasted chopped pecans or walnuts along with the chocolate. The nuts provide a satisfying crunch and a buttery flavor that complements the chocolate beautifully. Just be sure to toast them lightly first – raw nuts can taste bitter.
Spiced Autumn
Add a teaspoon of pumpkin spice or cinnamon to the dry ingredients and swap half the chocolate for chopped dried apricots. This variation feels cozy and is perfect for cooler evenings when you want a muffin that tastes like a warm hug.
Gluten‑Free Glory
Replace the all‑purpose flour with a 1‑to‑1 gluten‑free flour blend that includes rice flour, potato starch, and xanthan gum. The texture will be slightly denser, but the flavor remains unchanged. Just be careful not to over‑mix, as gluten‑free batters can become gummy if handled too much.
Storing and Bringing It Back to Life
Fridge Storage
Place cooled muffins in an airtight container and store them in the refrigerator for up to 5 days. The butter content keeps them moist, but the cold can firm up the crumb slightly. To revive, microwave for 15‑20 seconds or let them sit at room temperature for 10 minutes.
Freezer Friendly
Wrap each muffin individually in plastic wrap, then place them in a freezer‑safe zip‑lock bag. They’ll keep for up to 3 months. When you’re ready to eat, pop a muffin into the microwave for 30 seconds, then finish in a pre‑heated oven at 350°F for 5 minutes to restore that fresh‑baked crust.
Best Reheating Method
For the ultimate reheating, preheat your oven to 325°F, place the muffins on a parchment‑lined sheet, and add a tiny splash of water (about a teaspoon) to each muffin before covering loosely with foil. The steam generated revives the interior moisture while the foil prevents the tops from over‑browning. After 8‑10 minutes, remove the foil and let the muffins finish crisping for another 2 minutes. The result? As if they just came out of the oven.