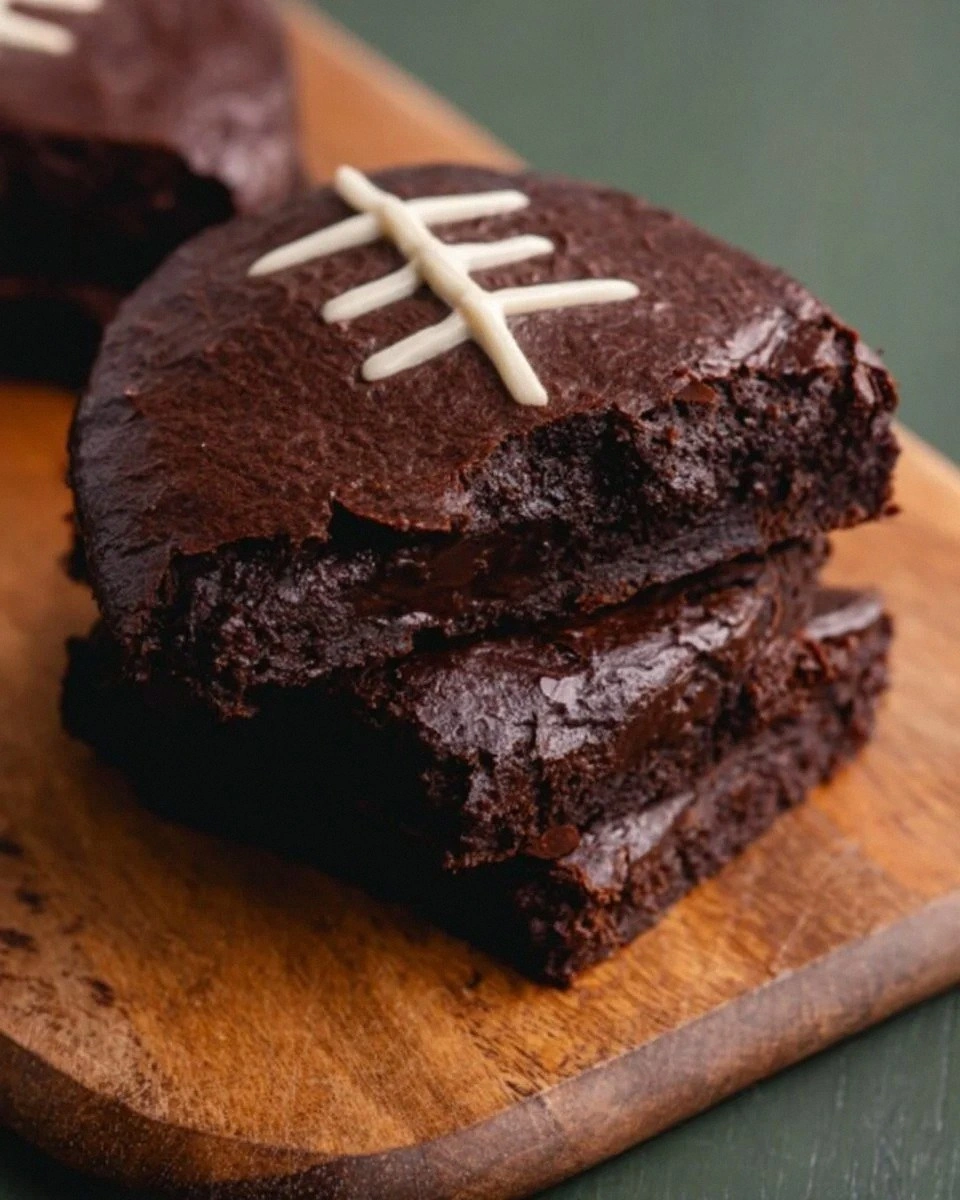
The kitchen was a battlefield that night, the oven door open, a pot of cocoa on the stove, and my friend’s challenge echoing in my ears: “Make the most unforgettable chocolate treat you’ve ever tasted.” I was half‑sitting on the counter, half‑dreaming of a glossy, gooey brownie that would melt like a snowflake on a warm tongue. I had no idea that the answer would come from a humble can of sweetened condensed milk and a handful of sprinkles, but the aroma that began to rise was already promising a holiday miracle. That single moment of culinary inspiration turned into a recipe that I now swear is hands down the best version you’ll ever make at home, and it’s about to become your new favorite holiday staple.
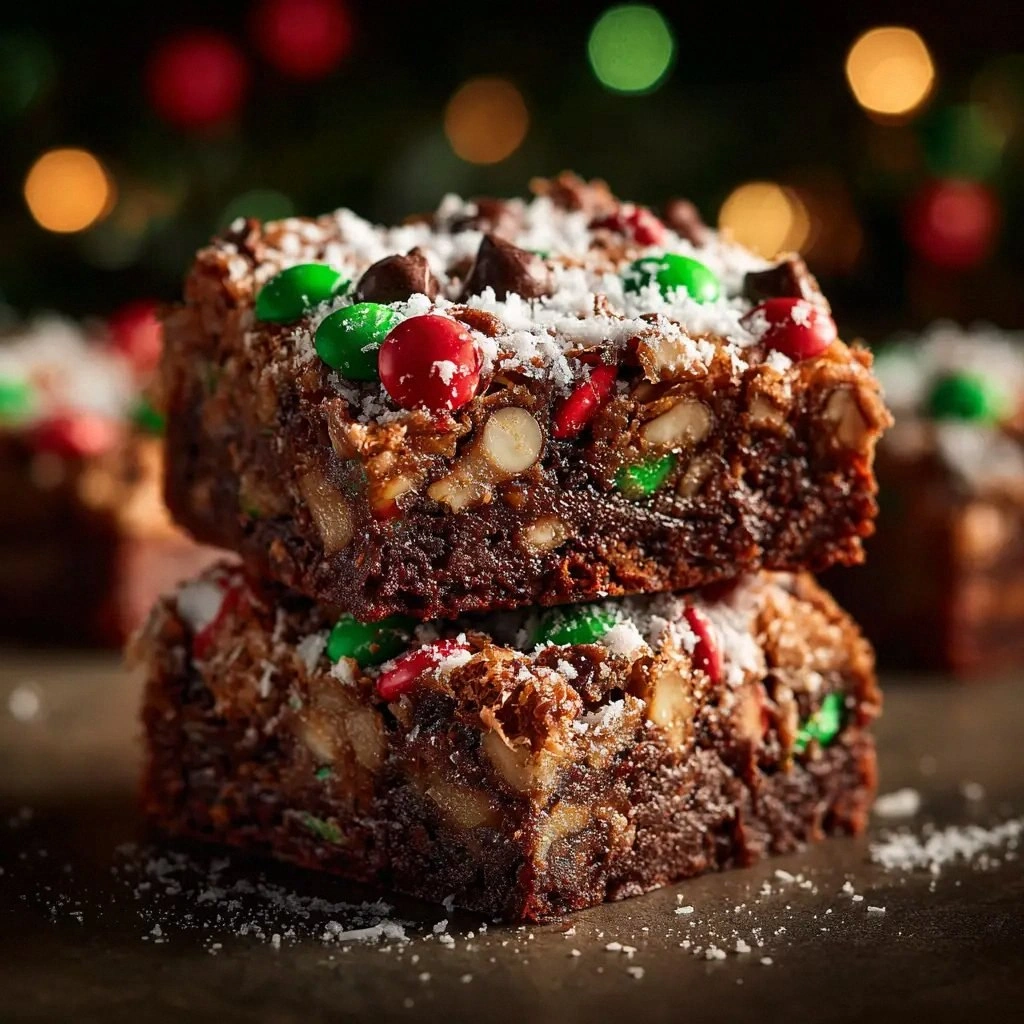
Picture yourself pulling a tray of golden bars from the oven, the scent of chocolate and toasted coconut drifting through the kitchen like a winter snowfall. The edges crackle just enough to give way to a soft, almost molten center that glistens under the holiday lights. I dare you to taste this and not go back for seconds—because the texture is a paradox of crunch and silk, and the flavors burst like a fireworks display of cocoa and sweet coconut. My friends swear they can’t stop reaching for the next bite, and I’ve been secretly eating half the batch before anyone else even got a taste. That is the power of this recipe: it’s a holiday treat that feels like a secret, yet is so simple it could be made in a pinch.
What makes this version stand out is not just the ingredients, but how each element is layered to create a symphony of flavors. The sweetened condensed milk base keeps the brownies moist and silky, while the toasted coconut adds a subtle crunch that contrasts with the buttery pecans. I’ve tweaked the ratio of chocolate chips to cocoa powder until the chocolate flavor was rich enough to stand on its own, yet balanced by the subtle sweetness of the condensed milk. The festive sprinkles are more than just decoration—they add a pop of color and a slight crunch that feels like holiday confetti. All of this is wrapped in a graham cracker crust that gives the bars a satisfying bite and a hint of vanilla sweetness.
Most recipes get this completely wrong, either by overbaking the brownies or under seasoning the crust. The secret to this recipe is the precise timing and the layering technique that keeps each component distinct yet harmonious. I’ll be honest—my first attempt was a disaster, but after a few adjustments it became a masterpiece that I can’t wait to share. If you’ve ever struggled with brownies that turn out too dry or too gooey, you’re not alone, and I’ve got the fix. Let me walk you through every single step—by the end, you’ll wonder how you ever made it any other way.
What Makes This Version Stand Out
- Texture: The combination of a buttery graham cracker base with a silky condensed milk center creates a multi‑layered mouthfeel that feels both crunchy and molten.
- Flavor: The semi‑sweet chocolate chips and unsweetened cocoa powder provide a deep cocoa profile, while the toasted coconut adds a tropical twist.
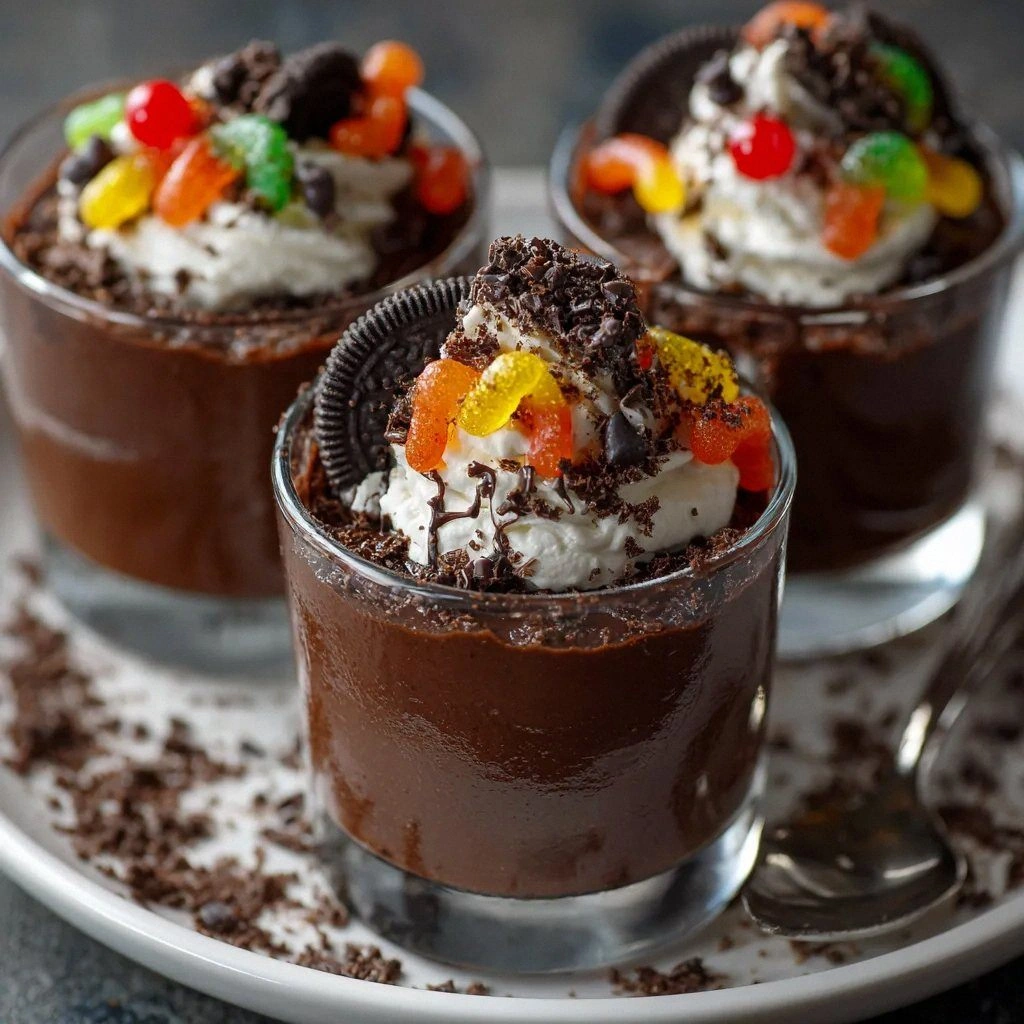
- Visual Appeal: The festive sprinkles sit atop the bars like sparkling snow, giving each bite a playful look that’s perfect for holiday gatherings.
- Ease: No complex measurements or advanced techniques—just a few simple steps that even novice bakers can master.
- Make‑Ahead: These bars hold up wonderfully; you can bake them a day ahead and keep them in the fridge for up to a week.
- Ingredient Quality: Using a can of sweetened condensed milk instead of heavy cream adds a unique sweetness that elevates the overall flavor profile.
- Crowd Reaction: Friends who try these bars often ask for the recipe immediately, claiming it’s the best chocolate treat they’ve ever had.
- Versatility: The layers can be swapped or customized—think almond butter, dark chocolate, or even a splash of espresso for a mocha twist.
Alright, let's break down exactly what goes into this masterpiece…
Inside the Ingredient List
The Flavor Base
Sweetened Condensed Milk: This is the heart of the bars. Its creamy sweetness balances the bitterness of the cocoa and the crunch of the coconut. If you skip it, the brownies will be dry and lack the silky texture that makes them unforgettable. For a slightly healthier option, you can use a 70% dark chocolate alternative, but the classic flavor will change.
The Texture Crew
Graham Cracker Crumbs: They form the crunchy base that holds the layers together. Choose a dark or honey‑flavored variety for an extra depth of flavor. If you prefer a gluten‑free version, look for certified gluten‑free graham crackers or use crushed rice crackers. Skipping the crumbs will result in a flat, unstructured brownie that doesn’t hold its shape.
Unsalted Butter (2 types): The 6 tablespoons melt into the base, while the ½ cup is folded into the batter for richness. Butter adds a buttery sheen and helps the chocolate melt evenly. If you use salted butter, you’ll need to reduce the added salt to avoid an overly salty finish.
The Unexpected Star
Festive Sprinkles: More than decoration, they add a subtle crunch and a burst of color that makes the bars visually festive. Use a mix of red, green, and white for a classic Christmas palette. If you’re avoiding sugar, opt for sugar‑free sprinkles or a dusting of cocoa powder.
The Final Flourish
Chocolate Chips & Cocoa Powder: The semi‑sweet chips give a chocolatey bite, while the unsweetened cocoa powder deepens the flavor without adding sweetness. This combination ensures the bars have a balanced cocoa intensity. If you prefer a darker chocolate, swap the chips for dark chocolate chunks.
Granulated Sugar: Provides the necessary sweetness to complement the condensed milk. A pinch of brown sugar can add a caramel undertone. Avoid using powdered sugar as it may alter the texture.
Pecan Halves: They add a nutty crunch and a buttery flavor that pairs well with the coconut. If you’re allergic or simply don’t like nuts, substitute with chopped walnuts or omit entirely.
Everything's prepped? Good. Let's get into the real action…

The Method — Step by Step
- Preheat your oven to 350°F (175°C). Line a 9x13 inch baking pan with parchment paper, leaving an inch of overhang on each side for easy removal. Melt the 6 tablespoons of butter in a saucepan over low heat, then stir in the graham cracker crumbs until the mixture resembles wet sand. Press this crumb mixture firmly into the bottom of the pan, creating a uniform crust that will hold the layers together. Let the crust cool slightly while you prepare the filling.
- In a medium bowl, whisk together the 1 cup of granulated sugar, the 1/3 cup unsweetened cocoa powder, and the 1/4 teaspoon salt. Add the 2 large eggs, one at a time, beating well after each addition so the mixture becomes smooth and glossy. Stir in the 1 teaspoon vanilla extract, which will enhance the chocolate flavor without overpowering it. This batter will be poured over the crust to create the first chocolate layer.
- Pour half of the batter over the crust, spreading it evenly with a spatula. The batter should be thick enough to hold its shape but not so thick that it becomes a cake. At this point, you can add a few pecan halves on top for a crunchy surprise. Gently press them into the batter so they’re partially embedded. This step is crucial for the layered effect, and the pecans will add a buttery crunch when you bite into the bars.
- In a small saucepan, combine the 1 can of sweetened condensed milk with the 1 cup of semi‑sweet chocolate chips. Heat over low heat, stirring constantly until the chocolate chips melt completely and the mixture becomes glossy and smooth. This chocolate‑condensed milk blend will be poured over the first batter layer to create a decadent, gooey middle layer. The key is to keep the heat low to avoid scorching the milk.
- Pour the chocolate‑condensed milk mixture over the first batter layer, spreading it evenly. This creates a luscious, glossy middle that will melt into the top layer when baked. Next, sprinkle the 1 cup of shredded coconut over the chocolate layer, pressing it lightly so it adheres. The coconut adds a tropical crunch that contrasts beautifully with the chocolate’s smoothness.
- Fold the remaining ½ cup of butter into the 1 cup of granulated sugar, then add the 2 tablespoons of chocolate chips, 1 cup of pecan halves, and 1 cup of coconut. Mix until everything is evenly distributed. This mixture will form the final chocolate layer that covers the bars. Pour it over the coconut, then gently swirl it through to create a marbled effect. The swirling creates a visual delight that’s as pleasing to the eyes as it is to the palate.
- Finally, sprinkle the 2 tablespoons of festive sprinkles over the top layer, pressing them gently into the batter so they stay in place. The sprinkles add a playful sparkle and a hint of crunch that feels like holiday confetti. Bake the bars in the preheated oven for 30 minutes, or until a toothpick inserted near the center comes out with a few moist crumbs. The aroma during the last 10 minutes is an irresistible invitation to taste.
- Remove the pan from the oven and let the bars cool in the pan for 15 minutes before lifting them onto a wire rack. The bars will be fragile at first, but they’ll firm up as they cool completely. Once cooled, cut them into bars along the parchment overhang. Serve immediately, or store in an airtight container in the fridge for up to a week. If you’re feeling adventurous, drizzle melted white chocolate on top for an extra indulgent touch.
That's it — you did it. But hold on, I've got a few more tricks that'll take this to another level...
Insider Tricks for Flawless Results
The Temperature Rule Nobody Follows
Many bakers bake brownies at 375°F, but that high heat can dry out the layers. Keep the oven at 350°F to allow the chocolate to melt evenly without burning the crust. If your oven runs hot, use an oven thermometer to verify the temperature. This small adjustment can mean the difference between a soggy center and a silky, melt‑in‑your‑mouth experience.
Why Your Nose Knows Best
When the chocolate‑condensed milk mixture is poured, the scent will start to rise almost immediately. That scent is a sign that the mixture is at the right temperature. If you notice a slight steam, the mixture is ready to pour. Trust your nose; it’s the best judge of doneness.
The 5‑Minute Rest That Changes Everything
After you remove the bars from the oven, let them rest for exactly 5 minutes before cutting. This short rest allows the layers to set, making the bars easier to slice without tearing. If you cut them too early, the chocolate will run and the bars will become a sticky mess.
Use a Silicone Mat for Easy Release
If you’re using parchment paper, the bars might stick to the paper. A silicone baking mat gives you the best of both worlds: it’s non‑stick and easy to clean. You’ll also notice that the bars lift out of the pan cleanly, preserving the perfect shape.
Keep the Layers Cool Until Baking
If your batter or chocolate mixture is too warm when you pour it over the previous layer, the layers will fuse together, losing the distinct texture. Keep each component at room temperature or slightly chilled before pouring. This will maintain the separation and give you that coveted layered bite.
The Secret to a Perfect Finish
Just before baking, lightly mist the top layer with a fine spray of water. This creates a subtle steam that helps the chocolate set with a glossy finish. It also reduces the likelihood of a cracked top surface, ensuring your bars look as good as they taste.
Creative Twists and Variations
This recipe is a playground. Here are some of my favorite ways to switch things up:
Mocha Madness
Add 1 teaspoon of instant espresso powder to the batter and replace the semi‑sweet chocolate chips with dark chocolate chips. The coffee undertone pairs beautifully with the sweetened condensed milk, creating a sophisticated flavor profile that’s perfect for coffee lovers.
Almond Joy
Swap the pecans for chopped almonds and add ½ cup of shredded coconut to the top layer. The almond butter from the almond pieces will give a nutty richness that complements the coconut’s tropical sweetness.
Coconut Lime Surprise
Add a tablespoon of freshly grated lime zest to the batter and replace the standard sprinkles with lime‑colored sugar crystals. The citrus zing cuts through the sweetness, creating a refreshing contrast.
Nutty Caramel Drizzle
After baking, drizzle warm caramel sauce over the bars. The caramel pairs wonderfully with the pecans and adds a buttery sweetness that elevates the entire treat.
Vegan Version
Use a plant‑based condensed milk and replace the butter with coconut oil. Swap the eggs for flaxseed meal mixed with water. This vegan version maintains the same texture and flavor profile while being cruelty‑free.
Salted Caramel Crunch
Add a teaspoon of sea salt to the batter and top the bars with a sprinkle of caramelized sugar crystals. The salty caramel will give a decadent, indulgent finish that’s hard to resist.
Storing and Bringing It Back to Life
Fridge Storage
Store the bars in an airtight container at room temperature for up to 4 days. If you want them to stay extra moist, place a slice of apple or a piece of parchment paper soaked in water inside the container. The moisture will keep the bars from drying out.
Freezer Friendly
Wrap each bar individually in parchment paper, then place them in a freezer bag. They will keep for up to 3 months. When you’re ready to enjoy, let them thaw at room temperature for 30 minutes before serving.
Best Reheating Method
Reheat the bars in a preheated 300°F oven for 5–7 minutes, or until warm. Add a tiny splash of water to the top before reheating; the steam will steam back to perfection, restoring that silky texture.