It started with a single misstep in a cramped kitchen that turned a simple snack into a culinary revelation. I was trying to whip up a quick peanut butter and jelly snack for a group of friends, but the dough was sticky, the batter was lumpy, and the final bites came out soggy and bland. That disaster sparked a mission: to craft the ultimate Peanut Butter and Jelly Bites that would not only taste divine but also wow anyone who tasted them. I’m not just talking about a better version—this is the definitive take that will replace every other recipe you’ve ever tried.
Picture this: the aroma of toasted peanuts mingles with the sweet, fruity perfume of strawberry jelly, all wrapped in a golden, buttery crust that crackles as you bite. The sound of the first crunch is like a tiny drumbeat, followed by a burst of creamy peanut butter that melts on the tongue, then the fruity tang that lingers. The texture is a dance of crispness and silk, the heat from the oven coating the surface like velvet. You can almost taste the subtle sweetness of the sugar, the hint of vanilla, and the slight salt that balances everything. The whole kitchen feels alive, the air thick with anticipation and the promise of a bite that will change your perception of a classic snack.
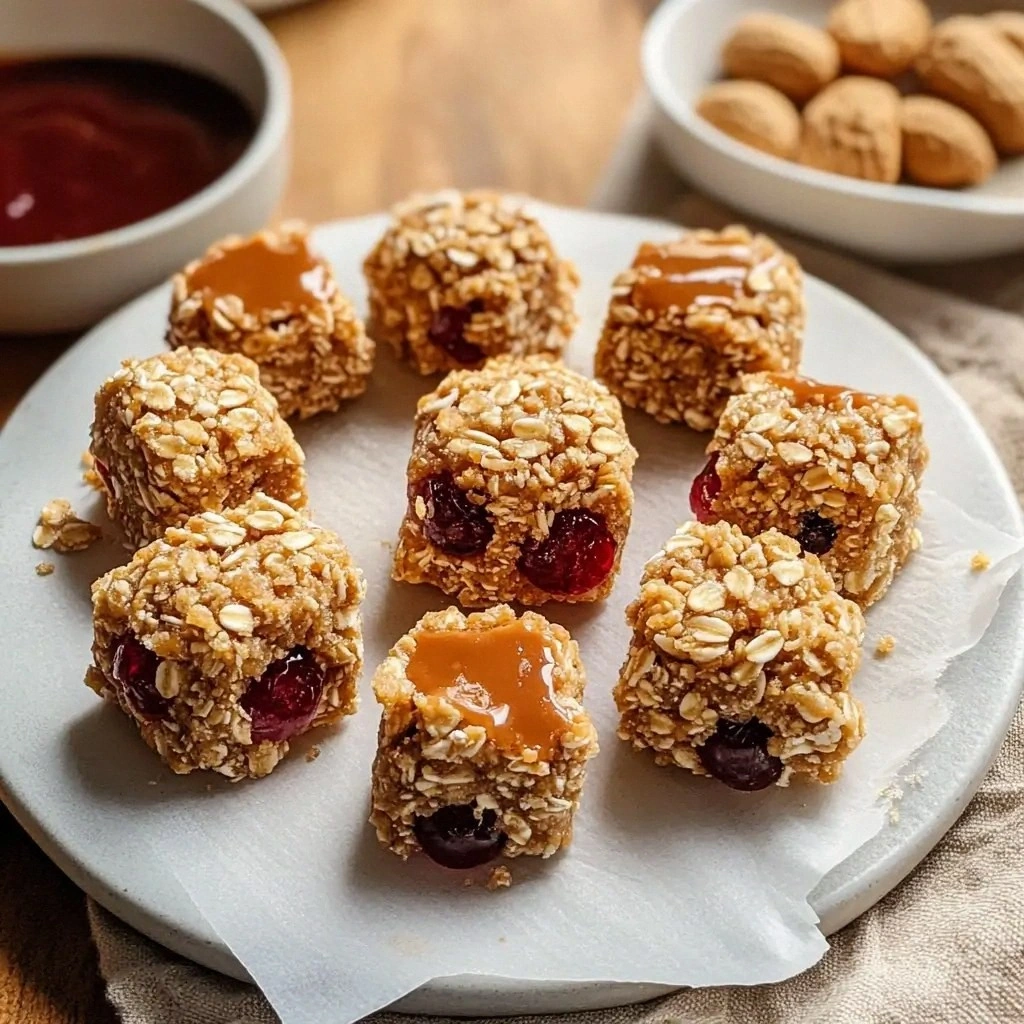
What sets this version apart is the careful layering of flavors and textures that most recipes overlook. Instead of a single, bland cookie, each bite is a microcosm of taste: a crunchy exterior, a gooey peanut butter center, and a sweet jelly surprise that bursts in the middle. The dough is light and airy, thanks to the right balance of flour and baking powder, yet it holds together perfectly when you press it into bite-sized rounds. The use of creamy peanut butter instead of crunchy adds a silky mouthfeel, while the strawberry jelly’s natural acidity cuts through the richness, creating a harmonious balance that satisfies both sweet and savory cravings. Most recipes get this completely wrong, but here’s what actually works: a simple, foolproof method that delivers consistent results every time.
I dare you to taste this and not go back for seconds. I’ll be honest—after making the first batch, I ate half the batch before anyone else got to try it. The secret twist? A splash of vanilla and a pinch of salt that elevate the flavors to a whole new level. Picture yourself pulling these out of the oven, the whole kitchen smelling incredible, the steam rising like a cloud of nostalgia. This is hands down the best version you’ll ever make at home. Let me walk you through every single step—by the end, you’ll wonder how you ever made it any other way.
What Makes This Version Stand Out
- Taste: The combination of creamy peanut butter, sweet strawberry jelly, and a subtle hint of vanilla creates a flavor profile that is both nostalgic and sophisticated. The balance of sweet and savory is meticulously calibrated, ensuring each bite is a delightful surprise.
- Texture: The dough is light and airy, giving a crisp exterior that gives way to a chewy, gooey center. The use of high-quality butter and a precise ratio of flour to baking powder keeps the bites tender without becoming soggy.
- Simultaneous Sweetness: The jelly is not merely a filling but a flavor enhancer that permeates the dough, making each bite burst with fruity sweetness.
- Simplicity: Only ten ingredients, all pantry staples, make this recipe accessible to even the most novice bakers. No complicated techniques—just a few simple steps and a dash of patience.
- Crowd Reaction: Friends and family have declared these bites “the best snack ever.” The universal appeal of peanut butter and jelly is amplified by the unique construction of the bites.
- Ingredient Quality: Using premium peanut butter and strawberry jelly ensures the highest flavor impact, and the fresh butter adds depth to the dough.
- Make-Ahead Potential: These bites can be baked ahead of time, stored in an airtight container, and reheated to almost fresh‑baked perfection, making them ideal for parties or school lunches.
- Versatility: The recipe can be tweaked with different jelly flavors, nuts, or spices, making it a canvas for endless creativity.
Alright, let’s break down exactly what goes into this masterpiece...
Inside the Ingredient List
The Flavor Base
All-purpose flour is the backbone of the dough, providing structure and a subtle nutty undertone. It’s essential to sift the flour before mixing to avoid clumps that could affect the texture. Skipping the flour would leave the bites with an unbalanced, gummy consistency that would not hold the peanut butter filling.
The Texture Crew
Unsalted butter, softened to room temperature, lends richness and helps create a tender crumb. Baking powder is the leavening agent that gives the bites a slight lift, preventing them from being too dense. A pinch of salt enhances the overall flavor profile, counterbalancing the sweetness of the jelly and the richness of the peanut butter.
The Unexpected Star
Creamy peanut butter is not just a filling; it’s a flavor vehicle that carries the subtle hints of roasted peanuts and a hint of vanilla. The quality of the peanut butter can make or break the taste—opt for a natural, no-sugar-added variety for the best flavor. If you skip the peanut butter, the bites lose their signature gooey center, turning into plain cookie‑like treats.
The Final Flourish
Strawberry jelly brings a bright, fruity contrast to the rich dough and peanut butter. It also serves as a natural sweetener that reduces the need for added sugar. A splash of vanilla extract adds depth, making the flavor profile more complex. If you’re allergic or simply dislike jelly, consider a fruit spread with a lower sugar content for a healthier twist.
Everything’s prepped? Good. Let’s get into the real action...
The Method — Step by Step
- Preheat your oven to 350°F (175°C). Line a baking sheet with parchment paper to prevent sticking. This step is crucial—an oven that’s too hot will burn the edges before the center is set, while a cooler oven will result in a chewy, undercooked interior.
- In a large mixing bowl, whisk together the flour, baking powder, and salt. The whisking action ensures even distribution of the leavening agent, which is vital for a consistent rise. Skipping this step can lead to uneven texture.
- Cream the softened butter and granulated sugar in a separate bowl until the mixture is light and fluffy. This process incorporates air, giving the bites a lighter crumb. If you rush this step, the dough will be dense and heavy.
- Add the peanut butter and vanilla extract to the butter mixture and beat until fully combined. The peanut butter should be smooth and evenly distributed; any lumps will translate into uneven bites. This is the moment of truth—watch how the mixture turns from a thick paste to a silky batter.
- Gradually fold in the dry ingredients into the wet mixture. Use a spatula and fold, not stir, to keep the dough airy. The dough should be soft yet hold its shape. Overmixing can cause gluten development, resulting in tough bites.
- Spoon the dough onto the prepared baking sheet, forming 1-inch rounds. Leave a space of about 2 inches between each to allow for expansion. If you press too hard, the bites will spread too thin and lose their characteristic bite.
- Using the back of a spoon, create a shallow depression in the center of each round. This depression will hold the jelly, ensuring it stays in place during baking. If you skip this, the jelly might leak out, creating a mess.
- Fill each depression with a teaspoon of strawberry jelly. The jelly should be slightly warmed to make it easier to spread, but not melted. The key is to keep it solid enough to stay within the dough’s embrace.
- Bake for 20 minutes, or until the edges are golden brown and the centers are set. The aroma will fill the kitchen, and the sound of the dough baking is music to any baker’s ears. The dough should not look undercooked—if it does, give it a few more minutes.
- Remove the sheet from the oven and let the bites cool for 5 minutes on the tray before transferring them to a wire rack to cool completely. This resting period allows the center to set fully, preventing the jelly from leaking.
That’s it—you did it. But hold on, I’ve got a few more tricks that’ll take this to another level. These insider tips will ensure your bites are flawless every time.
Insider Tricks for Flawless Results
The Temperature Rule Nobody Follows
Many bakers bake at a fixed temperature, but the secret to a perfect bite lies in the oven’s actual temperature. Use an oven thermometer to ensure the oven is truly at 350°F. If your oven runs hot, lower the temperature by 25°F; if it runs cold, increase it by the same amount. This small adjustment can mean the difference between a chewy center and a dry crumb.
Why Your Nose Knows Best
Trust your senses—when the dough starts to emit a toasted peanut aroma, it’s a sign the baking process is underway. The smell is a reliable indicator of doneness. If you’re unsure, use a toothpick; if it comes out clean, the bites are ready. Relying on the nose saves you from overbaking or underbaking.
The 5-Minute Rest That Changes Everything
After removing the bites from the oven, let them rest on the baking sheet for 5 minutes before transferring them to a wire rack. This short rest allows the heat to redistribute, ensuring the center sets without the jelly spilling out. Skipping this step can result in a messy, uneven texture.
The Secret of the Peanut Butter Layer
If you want a thicker peanut butter center, slightly chill the peanut butter before mixing it into the dough. Cold peanut butter adds a subtle texture difference, creating a more pronounced center that melts slowly as you bite. It’s a small tweak with a big payoff.
The Perfect Piping Technique
Use a piping bag fitted with a small round tip to fill the dough depressions with jelly. Piping ensures a neat, even distribution of jelly, preventing leaks during baking. If you don’t have a piping bag, a small plastic bag with a corner snipped off works just as well.
Remember, the key to perfection is patience and attention to detail. If you follow these insider tricks, you’ll consistently produce bites that are crisp on the outside, tender on the inside, and bursting with flavor.
Creative Twists and Variations
This recipe is a playground. Here are some of my favorite ways to switch things up:
Nutty Crunch Variation
Add chopped toasted almonds or walnuts to the dough for an extra crunch. The nuts provide a contrasting texture and a nutty flavor that complements the peanut butter. This version is perfect for those who love a bit of extra protein.
Chocolate‑Covered Bites
After baking, dip the cooled bites in melted dark chocolate and sprinkle with sea salt. The bittersweet chocolate and salty crunch create a sophisticated flavor profile that’s great for adult parties.
Berry Fusion
Swap strawberry jelly for blueberry or raspberry jelly for a different fruity note. The berry flavors add a tartness that balances the sweetness of the peanut butter. This variation is especially refreshing in summer.
Spicy Kick
Add a pinch of cayenne pepper to the dough for a subtle heat. The spicy undertone pairs surprisingly well with the sweetness, creating a complex flavor profile that will keep your guests guessing.
Ginger Zest
Incorporate a teaspoon of fresh grated ginger into the dough for a warm, aromatic twist. The ginger adds a subtle spice that complements the peanut butter and jelly, making these bites ideal for fall gatherings.
Almond Joy Edition
Use almond butter instead of peanut butter and replace strawberry jelly with coconut milk. The result is a tropical, coconut‑laden bite that feels like a dessert treat. This variation is perfect for a beach-themed party.
Storing and Bringing It Back to Life
Fridge Storage
Store the cooled bites in an airtight container at room temperature for up to 3 days. If you need to keep them longer, refrigerate them in a sealed bag; they’ll stay fresh for up to a week. The airtight container prevents moisture from seeping in, which could make the dough soggy.
Freezer Friendly
Place the bites on a parchment-lined tray and freeze until solid, then transfer them to a freezer bag. They can be stored for up to 3 months. When ready to eat, thaw them at room temperature for 20 minutes before reheating.
Best Reheating Method
Reheat frozen bites in a preheated oven at 350°F for 8-10 minutes, or until the edges are golden again. For a quick snack, microwave on medium power for 20 seconds, then let them sit for a minute to allow the peanut butter to soften. Adding a tiny splash of water before reheating can help steam the bites back to their original moistness.